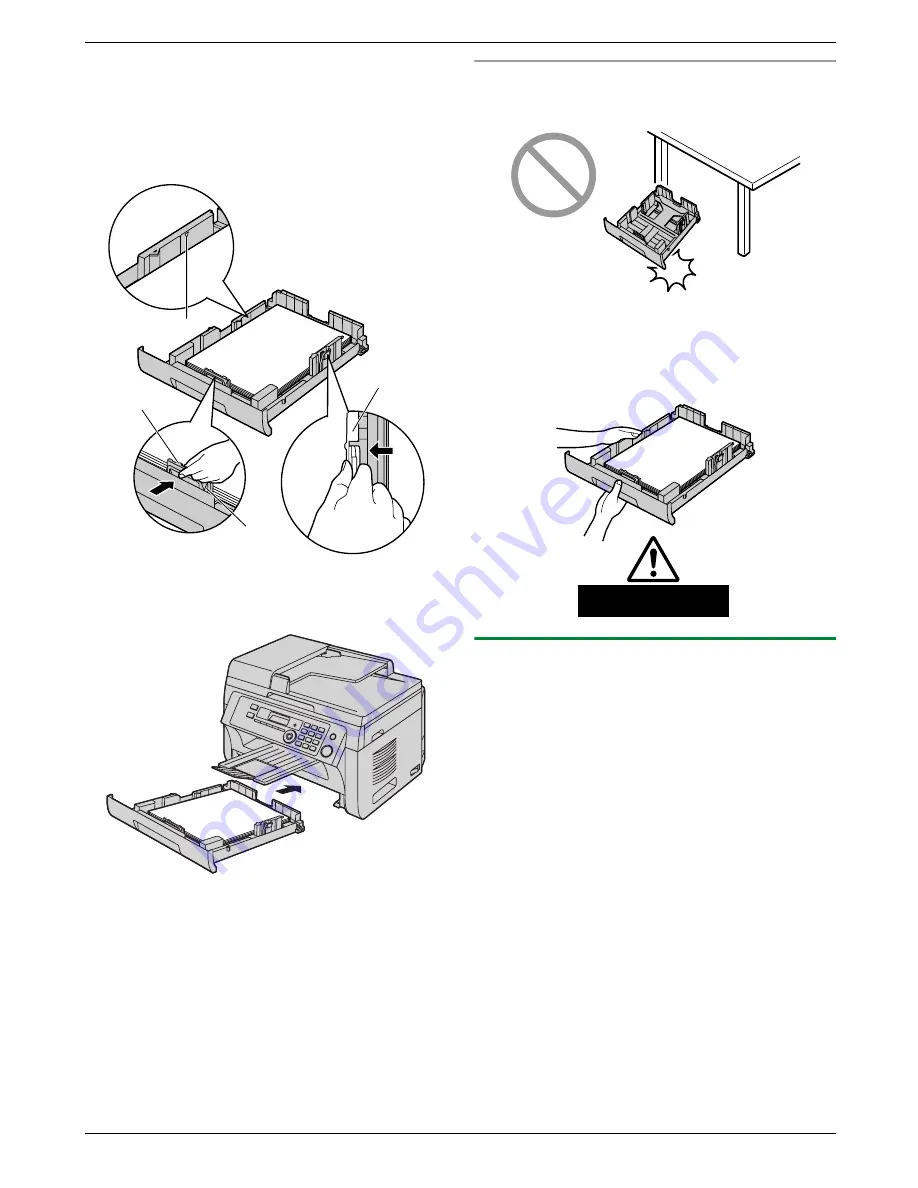
match the paper size mark. Pinch the right side of the
recording paper guide (
E
), then slide it to adjust the
width to the size of the recording paper.
R
Make sure that the recording paper is under the
paper limit mark (
F
), and the paper should not
be loaded over the snubbers (
G
).
G
D
E
F
5
Insert the paper input tray into the unit, lifting the front
part of the tray. Then push it completely into the unit.
Note:
R
If the paper is not loaded correctly, re-adjust the
paper guides, or the paper may jam.
R
If the paper input tray does not close, the plate in the
paper input tray may not be in the locked position.
Push the paper down and make sure that the paper
is laying flat in the paper input tray.
Caution for the paper input tray
R
Do not drop the paper input tray.
R
Hold the paper input tray with both hands when
removing or installing. The paper input tray
weighs approximately 2 kg when fully loaded with
recording paper.
Approx. 2 kg
1.7.1 Manual input tray
You can use the manual input tray for printing with the
computer and for copying. It can hold one page at a time.
When printing or copying multiple pages, add a next
page after the first page has been fed into the unit.
R
Please refer to page 104 for information on recording
paper.
R
The unit is set for printing A4-size plain paper by
default.
–
To use other paper sizes, change the
recording paper size setting (feature #381 on
page 63).
–
To use thin paper, change the recording paper
type setting (feature #384 on page 63).
1
Adjust the width of the guides (
A
) to the size of the
recording paper.
15
1. Introduction and Installation
Содержание KX-MB2000FR
Страница 58: ...R Station 1 and 2 can be used alternatively as broadcast keys page 46 58 7 Caller ID KX MB2025 KX MB2030 only ...
Страница 121: ...121 Notes ...
Страница 122: ...122 Notes ...
Страница 123: ...123 Notes ...
Страница 124: ... MB2000GX MB2000GX PNQX2655ZA CM1109DW0 CD ...


