TEST AND MEASUREMENT
MCUK000601C8
Section 6
Issue 1
Service Manual
– 53 –
Revision 0
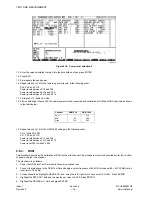
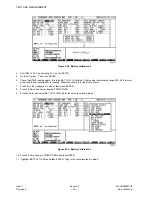
Figure 6.34: Charging Calibration 2
5.
Disconnect VBAT by setting the BCVCU Voltage switch to OFF.
6.
Measure the voltage across the Test Battery terminals. If the voltage is within the range 4.2 V ±5 mV, proceed to step 11.
Otherwise, calculate the difference (DAC STEP) as follows:
difference = (measured voltage - 4.2 V) / 7.4 mV
7.
Press Shift + F4.
8.
Scroll down and select PROG CHARG-DAC DATA and enter the value calculated by subtracting the value recorded in
step 6 from the initial CHARG-DAC DATA value (439).
9.
Repeat steps 6 to 8 until the measured voltage is 4.2 V ±5 mV.
10. If the final value is outside the range 342 - 542, then there is a fault and further investigation is required. Otherwise, record
the value for use later.
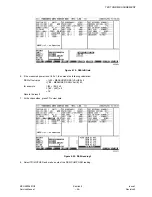
11. Press F6. Highlight TRIM OTHER and press ENTER. Highlight DAC REFERENCE and press ENTER.
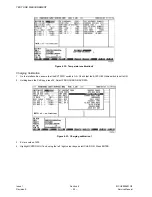
Figure 6.35: Charging calibration 3
12. Enter the value recorded in step 10.
Содержание EB-GD52
Страница 4: ...Issue 1 iv MCUK000601C8 Revision 0 Service Manual This page is left intentionally blank ...
Страница 81: ... 5 8 7 5 06 0 8 6HFWLRQ VVXH 6HUYLFH 0DQXDO 5HYLVLRQ 5 8 7 5 06 0DLQ 3 RJLF LJXUH 0DLQ 3 5 FLUFXLW GLDJUDP ...
Страница 82: ... 5 8 7 5 06 VVXH 6HFWLRQ 0 8 5HYLVLRQ 6HUYLFH 0DQXDO 0DLQ 3 5 LJXUH 0DLQ 3 RJLF FLUFXLW GLDJUDP ...
Страница 83: ... 5 8 7 5 06 0 8 6HFWLRQ VVXH 6HUYLFH 0DQXDO 5HYLVLRQ H SDG 3 ...
Страница 84: ... 5 8 7 5 06 VVXH 6HFWLRQ 0 8 5HYLVLRQ 6HUYLFH 0DQXDO 7KLV SDJH LV LQWHQWLRQDOO EODQN ...
Страница 85: ... 5 8 7 5 06 0 8 6HFWLRQ VVXH 6HUYLFH 0DQXDO 5HYLVLRQ 0DLQ 3 RJLF LJXUH 0DLQ 3 5 FLUFXLW GLDJUDP ...
Страница 86: ... 5 8 7 5 06 VVXH 6HFWLRQ 0 8 5HYLVLRQ 6HUYLFH 0DQXDO 0DLQ 3 5 LJXUH 0DLQ 3 RJLF FLUFXLW GLDJUDP ...
Страница 87: ... 5 8 7 5 06 0 8 6HFWLRQ VVXH 6HUYLFH 0DQXDO 5HYLVLRQ H SDG 3 ...
Страница 88: ... 5 8 7 5 06 VVXH 6HFWLRQ 0 8 5HYLVLRQ 6HUYLFH 0DQXDO 7KLV SDJH LV LQWHQWLRQDOO EODQN ...

