background image

VQT2S42

172

Connecting to other equipment

Connecting to a PC

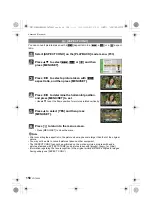
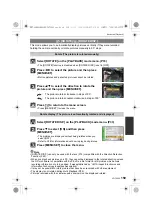
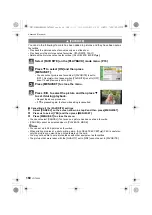
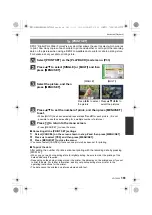
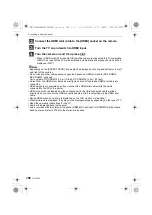
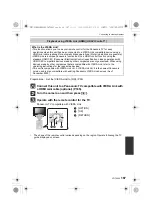
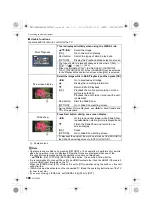
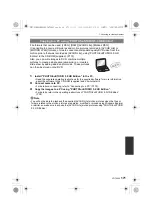
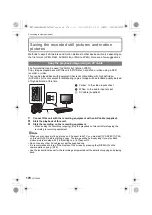
You can acquire recorded pictures to a PC by connecting the camera and the PC.

• Some PCs can read directly from the card removed from the camera. For details, refer to the 

operating instructions of your PC.

• If the computer being used does not support SDXC Memory Cards, a message 

prompting you to format may appear. (Doing so will cause recorded images to be erased 

so do not choose to format.)

If the card is not recognised, please refer to the below support site.

http://panasonic.net/avc/sdcard/information/SDXC.html

• You can easily print out or mail the pictures you have imported. Use of the “PHOTOfunSTUDIO 

5.0 HD Edition” bundled software on the CD-ROM (supplied) is a convenient way of doing this.

• Read the separate operating instructions for the supplied software for more information about 

the software in the CD-ROM (supplied) and how to install it.

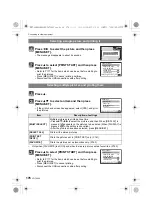
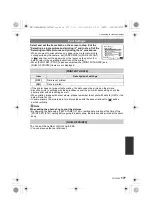
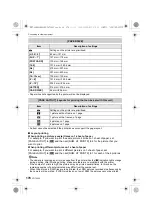
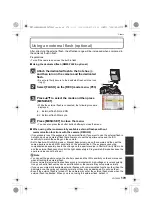
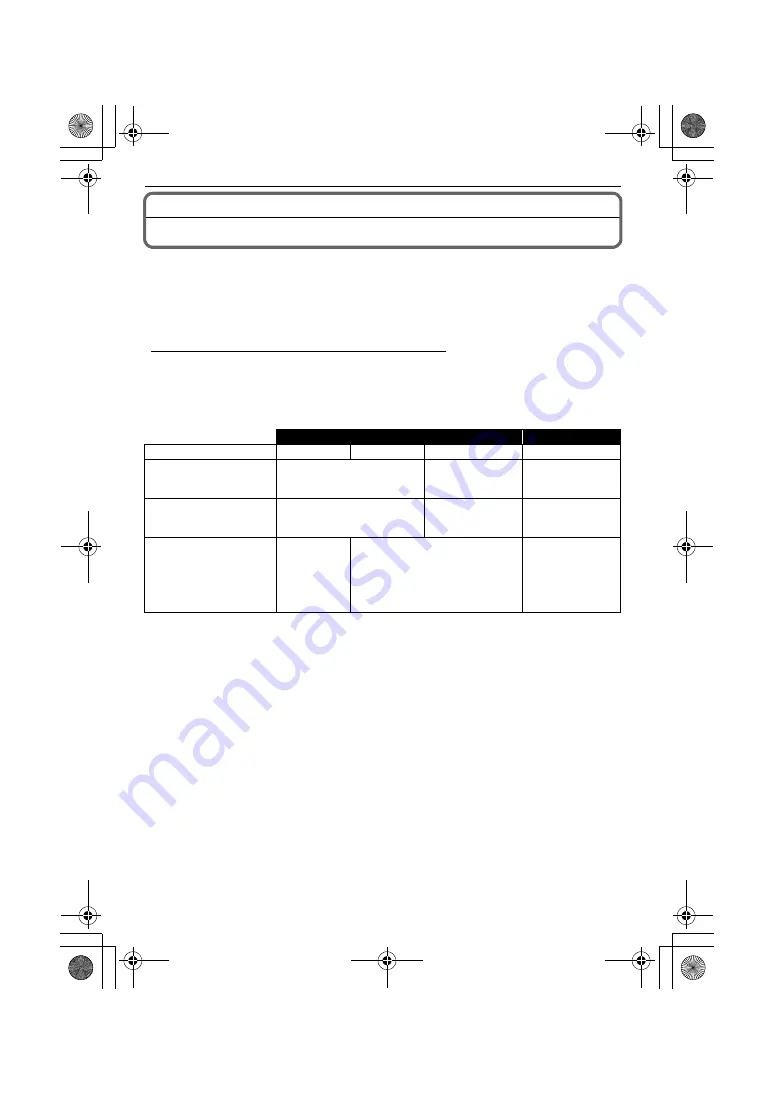
PC that can be used

• PC with Windows 98/98SE or older, or Mac OS 8.x or older cannot be connected via USB, but 

it can acquire the pictures if an SD memory card reader/writer can be used.

¢

1 It is necessary for Internet Explorer 6.0 or newer to be installed. PC with higher processing 

performance is required depending on the function to be used. It may not play back correctly 
or operate correctly depending on the environment of the PC used.

¢

2 Always acquire the [AVCHD Lite] motion pictures using the “PHOTOfunSTUDIO 5.0 

HD Edition”.

Windows

Macintosh

98/98SE

Me/2000

XP/Vista/7

OS 9/OS X

Can the 

PHOTOfunSTUDIO be 

used?

¢

1

Can the [AVCHD Lite] 

motion picture be 

acquired to the PC?

¢

2

Can the still pictures and 

[MOTION JPEG] motion 

pictures in the digital 

camera be acquired to 

the PC using a USB 

connection cable?

(OS 9.2.2/OS X 

[10.1~10.6])

DMC-G2K&G2W&G2EB-VQT2S42_eng.book  172 ページ  2010年4月13日 火曜日 午後7時40分

Содержание DMC-G2EB

Страница 1: ...B Operating Instructions Digital Camera Lens Kit Double Zoom Lens Kit Body Model No DMC G2K DMC G2W DMC G2 Web Site http www panasonic europe com until 2010 4 23 Model number suffix EB denotes UK model DMC G2K G2W G2EB VQT2S42_eng book 1 ページ 2010年4月13日 火曜日 午後7時40分 ...
Страница 2: ...utomobile exposed to direct sunlight for a long period of time with doors and windows closed WARNING TO REDUCE THE RISK OF FIRE ELECTRIC SHOCK OR PRODUCT DAMAGE DO NOT EXPOSE THIS APPARATUS TO RAIN MOISTURE DRIPPING OR SPLASHING AND THAT NO OBJECTS FILLED WITH LIQUIDS SUCH AS VASES SHALL BE PLACED ON THE APPARATUS USE ONLY THE RECOMMENDED ACCESSORIES DO NOT REMOVE THE COVER OR BACK THERE ARE NO US...

Страница 3: ...tated below If in any doubt please consult a qualified electrician IMPORTANT The wires in this mains lead are coloured in accordance with the following code Blue Neutral Brown Live As these colours may not correspond with the coloured markings identifying the terminals in your plug proceed as follows The wire which is coloured Blue must be connected to the terminal which is marked with the letter ...

Страница 4: ...here you purchased the camera or the repair service centre Do not place your hands inside the mount of the digital camera body Since the sensor unit is a precision apparatus it may cause a malfunction or damage About Condensation When the lens the Viewfinder or LCD Monitor is fogged up Condensation occurs when the ambient temperature or humidity changes Be careful of condensation since it causes l...

Страница 5: ...llection and recycling of old products and batteries please contact your local municipality your waste disposal service or the point of sale where you purchased the items Penalties may be applicable for incorrect disposal of this waste in accordance with national legislation For business users in the European Union If you wish to discard electrical and electronic equipment please contact your deal...

Страница 6: ...g the Touch Shutter function 55 Programme Shift 55 Taking Pictures with the Zoom 56 Using the Optical Zoom Using the Extra Optical zoom EZ Using the Digital Zoom 56 Playing back Pictures 58 Changing the Information Displayed on the playback screen 59 Displaying Multiple Screens Multi Playback 59 Displaying Pictures by Recording Date Calendar Playback 60 Using the Playback Zoom 61 Deleting Pictures...

Страница 7: ...Recognition function 120 Face Settings 121 Setting Auto Registration Sensitivity 124 Auto Registration 125 Useful Functions at Travel Destinations 126 Recording which Day of the Vacation You Take the Picture 126 Recording Dates Times at Overseas Travel Destinations World Time 128 Using the REC Mode Menu 129 ASPECT RATIO 129 PICTURE SIZE 129 A QUALITY 130 FACE RECOG 131 C METERING MODE 131 STABILIZ...

Страница 8: ...r of Recordable Pictures and Available Recording Time 203 Specifications 208 Sales and Support Information Customer Care Centre For customers within the UK 0844 844 3852 For customers within the Republic of Ireland 01 289 8333 Visit our website for product information www panasonic co uk E mail customer care panasonic co uk Technical Support for AV Software For customers within the UK 0844 844 386...

Страница 9: ...ase 10 Lens Rear Cap This is attached to the interchangeable lens at the time of purchase 11 Lens Storage Bag 12 Battery Pack Indicated as battery pack or battery in the text Charge the battery before use 13 Battery Charger AC Adaptor Indicated as battery charger or charger in the text 14 AC Mains Lead 15 AV Cable 16 USB Connection Cable 17 Body Cap This is attached to the camera body at the time ...

Страница 10: ...E A49C K2CT39A00002 K1HA08CD0020 K1HA08AD0003 VKF4385 VFC4538 VGQ0C14 2 3 4 5 6 1 7 8 9 10 11 H FS045200 VYC0986 VYF3201 VFC4315 VFC4430 H FS014042 VYC1009 VYF3201 VFC4315 VFC4456 DMC G2K 1 DMC G2W 2 DMC G2K G2W G2EB VQT2S42_eng book 10 ページ 2010年4月13日 火曜日 午後7時40分 ...
Страница 11: ...ipod Adaptor DMW TA1 4 SDXC Memory Card 64 GB RP SDW64GE1K 48 GB RP SDW48GE1K SDHC Memory Card 32 GB RP SDW32GE1K RP SDP32GE1K 24 GB RP SDP24GE1K 16 GB RP SDW16GE1K RP SDP16GE1K 8 GB RP SDW08GE1K RP SDP08GE1K RP SDR08GE1A 4 GB RP SDW04GE1K RP SDP04GE1K RP SDR04GE1A SD Memory Card 2 GB RP SDP02GE1K RP SDR02GE1A Some optional accessories may not be available in some countries 1 We recommend to use t...

Страница 12: ...n P86 14 Camera ON OFF switch P31 15 Rear dial P55 59 60 73 97 98 118 149 157 16 DISPLAY button P59 64 100 17 Eye Cup P188 18 Touch panel LCD monitor P16 41 59 64 184 19 Q MENU button P34 49 79 84 20 Delete button P62 Preview button P100 Flicker reduction function P119 21 MENU SET button P31 22 Cursor buttons 3 ISO P92 2 Film mode P94 4 Function button P139 Rear dial is described as follows in the...

Страница 13: ... 47 28 Focus distance reference mark P85 29 Flash open lever P67 30 Hot shoe P179 182 31 Mode dial P44 32 Status indicator P47 33 Motion picture button P46 113 34 Intelligent auto button P47 35 MIC REMOTE socket P181 182 36 Shoulder strap eyelet P25 Be sure to attach the shoulder strap when using the camera to ensure that you will not drop it 37 HDMI socket P165 167 38 AV OUT DIGITAL socket P164 1...

Страница 14: ...6 Wide 47 Zoom ring P56 48 Contact point 49 Lens fitting mark P21 H FS045200 LUMIX G VARIO 45 200 mm F4 0 5 6 MEGA O I S 50 Tele 51 Lens surface 52 Focus ring P84 53 O I S switch P22 54 Wide 55 Zoom ring P56 56 Contact point 57 Lens fitting mark P21 Battery charger AC adaptor P26 183 58 Power input socket AC IN 59 CHARGE indicator 60 Power output socket DC OUT 61 Battery holder 39 42 41 40 43 44 4...

Страница 15: ...90o It can only be rotated 90o towards you Note Only rotate the LCD monitor after opening it wide enough and be careful not to use excessive force as it may be damaged When holding the edge of the LCD monitor there may be some distortion however this is not a malfunction Moreover this has no effect on the taken pictures or playback When not using the LCD monitor it is recommended that you close it...

Страница 16: ...ns Do not operate with your fingernails Wipe the LCD monitor with dry soft cloth when it gets dirty with finger prints and others Do not scratch or press the LCD monitor too hard It is easier to use the stylus pen supplied for detailed operation or if it is hard to operate with your fingers Only use the supplied stylus pen Do not place it where small children can reach Touch To touch and release t...

Страница 17: ...m cannot be set with touch operation Set with the cursor button or rear dial P33 Touch operation is not possible while using the viewfinder Perform the setting using the cursor button or rear dial P18 What can be done by touch operation When recording Touch Tracking P49 82 Touch 1 area AF P83 Face Recognition Touch 1 area AF P80 Touch Multi AF Area Selection P83 Touch MF Assist Enlarge P84 Touch S...

Страница 18: ...rious settings A Rear dial 1 Recording 2 Playback Note The sound of the rear dial operation may be recorded when operated during motion picture recording Example of operation during recording playback screen 1 Rotating 2 Pressing 1 Adjustments of Programme Shift P55 Aperture P97 Shutter Speed P97 etc Switching to compensating the exposure P73 etc 2 Multi calendar Playback P60 Playback Zoom P61 Swi...

Страница 19: ...e value of the lens you are using Take some test pictures with the lens you are using Lens with the Four Thirds mount specification can be used by using the mount adaptor DMW MA1 optional Because of its structure Micro Four Thirds mount specification lenses cannot be used on the Four Thirds mount specification cameras It can only be used on the Micro Four Thirds mount specification cameras When yo...

Страница 20: ...ime 7 The sound of aperture operation may be recorded 8 AF performance may differ depending on the lens used Refer to the website for details Lens type when recording still pictures while recording motion pictures Auto focus Auto aperture setting Auto focus Auto aperture setting Micro Four Thirds mount specification lens The Lenses included in DMC G2K and DMC G2W H FS014042 H FS045200 AFS AFC 4 5 ...

Страница 21: ...s on the camera body and the lens and then rotate the lens in the direction of the arrow until it clicks Do not press the lens release button D when you attach a lens Do not try to attach the lens when holding it at an angle to the camera body as the lens mount may get scratched Check that the lens is attached correctly Detach the lens cap Detach the lens cap before taking pictures Attaching a len...

Страница 22: ...atched Note Change lenses where there is not a lot of dirt or dust Refer to P188 when dirt or dust gets on the lens When you turn the camera off or carry the camera attach the lens cap to protect the surface of the lens Be careful not to lose the lens cap the lens rear cap and the body cap When using a lens with an O I S switch it is possible to set to enable the Optical Image Stabilizer by switch...

Страница 23: ...ape that came with the 14 42 mm F3 5 5 6 lens included in DMC G2K DMC G2W Insert the lens hood into the lens with the short sides at the top and bottom and turn in the direction of the arrow until it stops A Fitting to the mark To attach the lens hood that came with the 45 200 mm F4 0 5 6 lens included in DMC G2W Insert the lens hood into the lens and turn in the direction of the arrow until it st...

Страница 24: ...oes not appear in the picture Note Hold the short sides of the flower shaped lens hood when attaching or detaching it When taking pictures with flash with the lens hood attached the lower portion of the photo may turn dark vignetting effect and the control of the flash may be disabled because the photo flash may be obscured by the lens hood We recommend detaching the lens hood When using the AF as...

Страница 25: ...trap through the hole on the other side of the stopper Pull the other side of the shoulder strap and then check that it will not come out Perform steps 1 to 4 and then attach the other side of the shoulder strap Note Attach the shoulder strap so that the LUMIX LOGO is on the outside Use the shoulder strap around your shoulder Do not wrap the strap around your neck It may result in injury or accide...

Страница 26: ...he battery in a temperature between 10 oC to 30 oC 50 oF to 86 oF The battery temperature should also be the same It has been found that counterfeit battery packs which look very similar to the genuine product are made available to purchase in some markets Some of these battery packs are not adequately protected with internal protection to meet the requirements of appropriate safety standards Ther...

Страница 27: ... turns red and blinks if the remaining battery power is exhausted The status indicator also blinks Recharge the battery or replace it with a fully charged battery Note Do not use any other AC mains leads except the supplied one The battery becomes warm after using it and during and after charging The camera also becomes warm during use This is not a malfunction The battery can be recharged even wh...

Страница 28: ...perating times and number of recordable pictures will differ according to the environment and the operating conditions For example in the following cases the operating times shorten and the number of recordable pictures is reduced In low temperature environments such as on ski slopes When using AUTO POWER LCD or POWER LCD P37 When flash is used repeatedly When the operating time of the camera beco...

Страница 29: ...touch the connection terminals of the card The card may be damaged if it is not fully inserted 1 Close the card battery door 2 Slide the release lever in the direction of the arrow If the card battery door cannot be completely closed remove the card check its direction and then insert it again Note Remove the battery after use Do not remove the battery while the power is on as the settings on the ...

Страница 30: ...tion shock or static electricity to the unit The card or the data on the card may be damaged and this unit may no longer operate normally If operation fails due to vibration impact or static electricity perform the operation again Write Protect switch A provided When this switch is set to the LOCK position no further data writing deletion or formatting is possible The ability to write delete and f...

Страница 31: ...play format is common in the US and elsewhere Press MENU SET to set Press MENU SET Press to return to the settings screen Turn the camera off after finishing setting the clock Then turn it on and check that the clock setting is correct When MENU SET has been pressed to complete the settings without the clock having been set set the clock correctly by following the Changing the clock setting proced...

Страница 32: ...modes or menu settings being used on the camera due to the specifications REC mode menu P129 to 137 SETUP menu P36 to 40 This menu lets you set the aspect ratio number of pixels and other aspects of the pictures you are recording This menu lets you perform the clock settings select the operating beep tone settings and set other settings which make it easier for you to operate the camera MOTION PIC...

Страница 33: ...item cannot be set with touch operation Set with the cursor buttons or the rear dial Example Setting I EXPOSURE from OFF to HIGH in the Programme AE mode Setting menu items Turn the camera on A MENU SET button B Mode dial Set the mode dial to Press MENU SET to display the menu C Menu toggle icon D Menu item E Settings Switching to other menus e g Switching to the SETUP menu 1 Press 2 2 Press 4 or ...

Страница 34: ...anel Setting of the Quick Menu can be set using the touch panel Touch to display the Quick Menu in recording status Press 3 4 or rotate the rear dial to select I EXPOSURE Select the item at the very bottom and press 4 or rotate the rear dial right to move to the next screen Press 1 or the rear dial Depending on the item its setting may not appear or it may be displayed in a different way Press 3 4...

Страница 35: ...th 3 4 Set by pressing MENU SET You can also use the rear dial to set LCD recording information display in LCD monitor style Select the item with 3 4 2 1 press MENU SET and then select the setting contents with 3 4 2 1 Set by pressing MENU SET You can also use the rear dial to set You can change the settings by directly touching the items without displaying the Quick Menu Finder style Select the i...

Страница 36: ...justment screen Adjust between red and green with 3 4 or between orange and blue with 2 1 or the rear dial Press MENU SET to return to the LCD adjustment screen It will adjust the LCD monitor when the LCD monitor is in use and the viewfinder when the viewfinder is in use U CLOCK SET Setting Date Time WORLD TIME Set the time in your home area and travel destination DESTINATION Travel destination ar...

Страница 37: ...d to 2MIN when AUTO LCD OFF is set to 15SEC or 30SEC Press any button to turn on the LCD monitor again It is recommended to use this mode with LVF LCD AUTO P144 in the CUSTOM menu is set to OFF SLEEP MODE does not work in the following cases When using the AC adaptor When connecting to a PC or a printer When recording or playing back motion pictures During a slide show LCD MODE These menu settings...

Страница 38: ...ted via the PTP Picture Transfer Protocol communication system This will operate when the AV cable or HDMI mini cable optional is connected This will work when the AV cable is connected o AUTO REVIEW Set the length of time that the picture is displayed after taking it OFF 1SEC 3SEC 5SEC HOLD The pictures are displayed until shutter button is pressed halfway x USB MODE Select the USB communication ...

Страница 39: ... playing back on the HDMI compatible high definition TV connected with this unit using the HDMI mini cable optional AUTO The output resolution is automatically set based on the information from the connected TV 1080i The interlace method with 1080 available scan lines is used for output 720p The progressive method with 720 available scan lines is used for output 576p 1 480p 2 The progressive metho...

Страница 40: ...te return date location The WORLD TIME P128 setting The folder number and the clock setting are not changed Use a battery with sufficient battery power or the AC adaptor P183 when formatting Do not turn the camera off during formatting If the card has been formatted on a PC or other equipment format it on the camera again If the card cannot be formatted please try another card before contacting yo...

Страница 41: ...ns P189 When taking pictures make sure your footing is stable and there is no danger of colliding with another person an object etc This is convenient as it allows you to take pictures from various angles by adjusting the LCD monitor P15 Taking pictures at a normal angle Tips for taking good pictures LCD Monitor Taking pictures at a high angle Open the LCD monitor 180o toward you and adjust the an...

Страница 42: ...otated Only when ROTATE DISP P159 is set to ON The Direction Detection Function may not operate correctly if recording is performed with the camera aimed up or down Motion pictures taken with the camera held vertically are not displayed vertically You can only use the Direction Detection Function when using a compatible lens Refer to the catalogue website etc for compatible lenses Taking pictures ...

Страница 43: ...hat come closer to it therefore it is recommended that LVF LCD AUTO be set to OFF in ECONOMY P37 The eye sensor is disabled during motion picture playback slide show and output to TV Press LVF LCD to switch the monitor screen A Viewfinder B Eye sensor C LCD monitor D LVF LCD button E Eye cup It is possible to switch between the LCD LCD monitor and LVF viewfinder display manually Diopter adjustment...

Страница 44: ...with the mode dial Switching the mode by rotating the mode dial Align a desired mode with part B Rotate the mode dial slowly and surely to adjust to each mode The mode dial rotates 360 o The recording mode selected by the mode dial is disabled while the button is lit Intelligent Auto Mode P47 The subjects are recorded using settings automatically selected by the camera DMC G2K G2W G2EB VQT2S42_eng...

Страница 45: ... Motion Picture P mode P118 Use this mode to record motion pictures with the desired settings Scene mode P106 This allows you to take pictures that match the scene being recorded My Colour mode P109 Use this mode to check colouring effects select a colour mode from among eight colour modes and then take pictures Portrait mode P102 Use this mode to take pictures of people Scenery mode P103 Use this...

Страница 46: ...n of each recording mode 1 Press the motion picture button to start the recording 2 Press the motion picture button again to stop the recording Sound will be heard when pressing the motion picture button indicating start stop of motion picture recording Sound volume can be set in BEEP P36 Recording of motion picture appropriate for each mode is possible For more details refer to Recording Motion P...

Страница 47: ...he mode dial is set to motion pictures will reflect the setting of Intelligent Auto Mode P115 AF mode will be set to š regardless of the setting of the auto focus mode dial Set the focus mode lever to AFS or AFC Refer to P53 for AFS and AFC The status indicator 3 lights when you turn this unit on 2 1 Shutter button Press the shutter button halfway to focus The focus indication 1 green lights when ...

Страница 48: ... tripod is used for instance and the camera has judged that camera shake is minimal when the scene mode has been identified as the shutter speed will be slower than normal Take care not to move the camera while taking pictures An optimum scene for the specified subject will be chosen when set to AF tracking P49 Depending on the scene detected camera will automatically adjust the setting of the I R...

Страница 49: ... subject automatically even if it moves When operating the touch panel 1 Touch the subject is displayed in the lower left of the screen AF Tracking frame will be displayed in yellow and it will determine the most appropriate scene for the locked subject AF Tracking is cancelled when CANCEL is touched 2 Press the shutter button halfway to focus and then press it fully to take the picture When opera...

Страница 50: ...ill be fixed to MODE1 when recording a motion picture even if it is set to MODE2 MOTION PICTURE mode menu REC MODE P116 REC QUALITY 2 P116 CONTINUOUS AF P138 WIND CUT P138 2 for MOTION JPEG cannot be set CUSTOM menu GUIDE LINE P139 LCD INFO DISP P143 REMAINING DISP P144 SETUP menu CLOCK SET WORLD TIME BEEP LCD MODE LANGUAGE Only STANDARD and STANDARD in Film Mode P94 can be selected Use the Quick ...

Страница 51: ...T FOCUS AREA SHOOT W O LENS The other items on the SETUP menu and CUSTOM menu can be set in a mode such as the Programme AE mode What is set will be reflected in the Intelligent Auto Mode Item Settings ECONOMY SLEEP MODE P37 5MIN Flash P67 Œ FLASH SYNCHRO P72 1ST BURST RATE P74 H High speed AUTO BRACKET P76 STEP 3 1 3 SEQUENCE 0 _ AF mode P79 š Set to 4 when a face cannot be detected WHITE BALANCE...

Страница 52: ... Press the shutter button halfway to focus on the subject again The focus range is different depending on the lens used When the 14 42 mm F3 5 5 6 lens included in DMC G2K DMC G2W is used 0 3 m 0 99 feet to When the 45 200 mm F4 0 5 6 lens included in DMC G2W is used 1 0 m 3 28 feet to If the SENSITIVITY is set to ISO100 and the aperture value is set to F3 5 when the 14 42 mm F3 5 5 6 lens include...

Страница 53: ...rotate the zoom ring from Wide to Tele or suddenly change the subject from a distant one to a nearby one Focusing will continue even after the shutter button is pressed during the burst Refer to P74 for details Set the PRE AF of CUSTOM menu item P140 when you would like to set focus before pressing the shutter button halfway Focus sound will not be heard in AFC even if the subject comes into focus...

Страница 54: ... Fast moving subjects extremely bright subjects or subjects without contrast When recording subjects through windows or near shiny objects When it is dark or when jitter occurs When the camera is too close to the subject or when taking a picture of both distant and near subjects When the jitter alert appears use STABILIZER P132 a tripod the self timer P78 or the remote shutter DMW RSL1 optional P1...

Страница 55: ...ton even during the Burst Auto Bracket or self timer modes Measurement of brightness is performed on the spot touched when the METERING MODE is set to Ù P131 The Touch Shutter function will not work in the following cases During motion picture P mode In the LCD recording information display P35 In Programme AE mode you can change the preset aperture value and shutter speed without changing the exp...

Страница 56: ...ke people and objects appear closer or zoom out to record landscapes in wide angle To make subjects appear closer use Tele Rotate the zoom ring towards Tele P14 To make subjects appear further away use Wide Rotate the zoom ring towards Wide P14 To enlarge further set the EX OPT ZOOM to ON or the DIGITAL ZOOM to 2k or 4k in the REC mode menu or the MOTION PICTURE mode menu Then you can take larger ...

Страница 57: ...ecording motion pictures 9 4k 2k including Extra Optical Zoom when taking still pictures 12k 1 when recording motion pictures 18 7k 2 4k including Extra Optical Zoom when taking still pictures 24k 1 when recording motion pictures 37 5k 2 When the 45 200 mm F4 0 5 6 lens included in DMC G2W is used 4 4k 2k 1 when taking still pictures 8 9k 3 1k 2 when recording motion pictures 13 9k 2k including Ex...

Страница 58: ...igent Auto Mode In advanced scene mode In Scene mode When QUALITY is set to or Playing back Pictures Forward or rewind the image by dragging P16 the screen horizontally Forward drag from right to left Rewind drag from left to right It is also possible to forward or rewind the image by pressing 2 1 of the cursor button Speed of picture forwarding rewinding changes depending on the playback status Y...

Страница 59: ...es B Slide bar Rotate the rear dial right to return to the previous screen Screen can be switched by dragging the slide bar up or down P16 The screen can be switched gradually by dragging the screen up or down P16 Pictures are not rotated for display Pictures displayed using cannot be played back To return to normal playback Touch the picture to select You can also return to the one screen display...

Страница 60: ... travel destination in WORLD TIME the pictures are displayed by the dates at the travel destination in Calendar Playback Displaying Pictures by Recording Date Calendar Playback Rotate the rear dial left to display the calendar screen Press 3 4 2 1 to select the date to be played back If there were no pictures recorded during a month the month is not displayed Press MENU SET or the rear dial to dis...

Страница 61: ...centre in the following images Images with different aspect ratios Images with different numbers of recorded pixels Images with a different rotation direction when ROTATE DISP is set to ON Playback Zoom cannot be used during motion picture playback or pictures with audio playback Using the Playback Zoom Touch the part to enlarge 1k 2k 4k 8k 16k Portion that is touched will be enlarged Picture can ...

Страница 62: ...ete multiple pictures up to 50 or all the pictures Press Press 3 4 to select DELETE MULTI or DELETE ALL and then press MENU SET DELETE ALL step 5 Press 3 4 2 1 to select the picture and then press DISPLAY to set Repeat this step appears on the selected pictures If DISPLAY is pressed again the setting is cancelled Press MENU SET Press 3 to select YES and then press MENU SET to set DMC G2K G2W G2EB ...

Страница 63: ...hile deleting while is displayed Use a battery with a sufficient power or the AC adaptor P183 If you press MENU SET while deleting pictures using DELETE MULTI DELETE ALL or ALL DELETE EXCEPT Ü the deleting will stop halfway Depending on the number of pictures to be deleted it may take some time to delete them If pictures do not conform to the DCF standard or are protected P162 they will not be del...

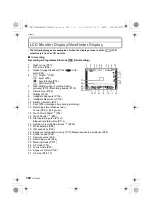
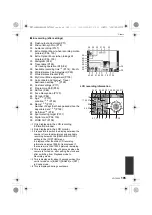
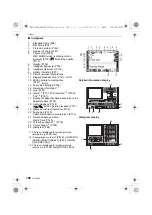
Страница 64: ...mal display 1 2 C No display 1 D LCD INFO DISP 3 E Turned off When is set F Normal displayidetailed information 1 2 G Normal display 1 H LCD INFO DISP 3 I Turned off Switching the Information Displayed on the recording screen LCD monitor display P AWB WB AF AUTO ISO STD 9 0 0 3 2 1 1 2 3 9 9 P P AWB AWB AWB STD STD STD AUTO AUTO AUTO 3 3 0 3 3 0 AFS AFS AFS P AWB WB AF AUTO ISO STD 9 0 0 3 2 1 1 2...

Страница 65: ...the histogram using the touch panel P67 It is also possible to display the Exposure meter by setting the EXPO METER of the CUSTOM menu to ON P142 3 It is displayed when the LCD INFO DISP of the CUSTOM menu is set to anything except OFF Colour of the screen can be selected from 3 colours of blue red or black P143 Note In NIGHT PORTRAIT P105 the guide line is grey Viewfinder display A Normal display...

Страница 66: ...t displays brightness along the horizontal axis black to white and the number of pixels at each brightness level on the vertical axis It allows you to easily check a picture s exposure Examples of histogram A This is used when dividing the entire screen into 3k3 for taking pictures with a well balanced composition B This is used when you want to position the subject at the exact centre of the scre...

Страница 67: ...correctly displayed in dark places When the exposure is not adequately adjusted The histogram is an approximation in recording mode The histogram displayed in this camera does not match histograms displayed by picture editing software used in PCs etc Histogram is displayed in R red G green B blue and Y luminance during the playback REC mode Taking Pictures using the Built in Flash A To open the fl...

Страница 68: ...ess of the recording conditions Use this when your subject is back lit or under fluorescent light Forced ON Red eye reduction The flash is activated every time regardless of the recording conditions Simultaneously it reduces the red eye phenomenon Use this when your subject is back lit or under fluorescent light Slow sync When taking pictures against a dark background landscape this feature will s...

Страница 69: ...F When the AF mode is set to anything except š Available flash settings by recording mode The available flash settings depend on the recording mode Available Not available Initial setting of advanced scene mode and scene mode is displayed or is set depending on the type of subject and brightness The flash setting may change if the recording mode is changed Set the flash setting again if necessary ...

Страница 70: ...to 3 9 m 12 8 feet 1 0 m 3 28 feet to 5 5 m 18 0 feet 1 0 m 3 28 feet to 3 9 m 12 8 feet ISO100 45 cm 1 48 feet to 3 1 m 10 2 feet 30 cm 0 99 feet to 1 9 m 6 23 feet 1 0 m 3 28 feet to 2 7 m 8 85 feet 1 0 m 3 28 feet to 1 9 m 6 23 feet ISO200 45 cm 1 48 feet to 4 4 m 14 4 feet 30 cm 0 99 feet to 2 7 m 8 85 feet 1 0 m 3 28 feet to 3 8 m 12 5 feet 1 0 m 3 28 feet to 2 7 m 8 85 feet ISO400 45 cm 1 48...

Страница 71: ... of view causing dark areas to appear in the resulting pictures When taking a picture with the flash we recommend removing the lens hood In some cases it may not allow the scene to be illuminated properly It may take time to charge the flash if you repeat taking a picture Take a picture after the access indication disappears The Red Eye Reduction effect differs between people Also if the subject w...

Страница 72: ...ly 2nd is displayed in the flash icon on the screen if you set FLASH SYNCHRO to 2ND The flash sync settings are also effective when using an external flash P179 When a fast shutter speed is set the effect of FLASH SYNCHRO may deteriorate You cannot set or when FLASH SYNCHRO is set to 2ND It can only be set with PERIPHERAL DEFOCUS in Scene Mode Setting to the 2nd Curtain Synchro Item Effect 1st cur...

Страница 73: ...he rear dial is pressed In the Aperture Priority AE mode Aperture Setting Operation P97 and Exposure Compensation operation is switched every time the rear dial is pressed In the Shutter Priority AE mode Shutter Speed Setting Operation P97 and Exposure Compensation operation is switched every time the rear dial is pressed Operation method can be changed with EXPO SETTINGS in the CUSTOM menu P143 E...

Страница 74: ... and take a picture A When Burst Mode is set to high speed H Hold down the shutter button fully to activate the burst mode Changing the burst speed 1 Select BURST RATE in the REC mode menu P33 2 Press 3 4 to select the burst speed and then press MENU SET 3 Press MENU SET to close the menu You can also press the shutter button halfway to close the menu 1 Number of recordable pictures 2 Pictures can...

Страница 75: ... picture for the subsequent pictures as well When the burst speed is set to M or L they are adjusted each time you take a picture If you are following a moving subject while taking pictures in a place landscape indoors outdoors etc where there is a large difference between the light and shade it may take time until the exposure is stable If burst is used at this time the exposure may not become op...

Страница 76: ... 0 s r Set the drive mode lever to Focus on the subject and take a picture If you press and hold the shutter button the number of pictures that you set is taken The Auto Bracket indication A blinks until the number of pictures that you set is taken The picture count is reset to 0 if you change the Auto Bracket setting change the setting on the drive mode lever or turn the camera off before all the...

Страница 77: ...ted with Auto Bracket depending on the brightness of the subject The Auto Review function is activated regardless of the Auto Review setting Will not hold You cannot set the Auto Review function in the SETUP menu When the flash is activated you can take only 1 picture Set number of pictures cannot be recorded if the recordable number of pictures is less than set number of pictures Settings for Mul...

Страница 78: ... blinks again after the first and the second pictures are taken and the shutter is activated 2 seconds after it blinks Changing the time setting for the self timer 1 Select SELF TIMER in the REC mode menu P33 2 Press 3 4 to select the mode and then press MENU SET If you set after 10 seconds the camera takes 3 pictures at about 2 second intervals 3 Press MENU SET to close the menu You can also pres...

Страница 79: ...us mode lever to AFS or AFC Switching the auto focus mode dial Auto focus mode dial Item Effect š Face detection The camera automatically detects the person s face The focus and exposure can then be adjusted to fit that face no matter what portion of the picture it is in max 15 areas AF Tracking Focus and exposure can be adjusted to a specified subject Focus and exposure will keep on following the...

Страница 80: ... NIGHT SCENERY and ILLUMINATIONS in NIGHT PORTRAIT The AF mode is fixed to Ø when using the digital zoom AF area will be fixed to a small point in PERIPHERAL DEFOCUS in Scene Mode It will be set to Ø when a recording is performed with the Touch Shutter function P55 When the camera detects a person s face the following colour AF area is displayed Yellow When the shutter button is pressed halfway th...

Страница 81: ...US AREA SET is set to Fn BUTTON SET P139 AF area setting screen can also be displayed by pressing 4 2 Touch the slide bar to change the size of AF area frame It can be changed to 4 different sizes of spot A normal B large C and extra large D It is also possible to rotate the rear dial to the right to make it larger Rotate it to the left to make it smaller 3 Touch SET AF area with same function as ...

Страница 82: ...racking function may not work in the following cases When the subject is too small When the recording location is too dark or bright When the subject is moving too fast When the background has the same or similar colour to the subject When jitter is occurring When zoom is operated Setting up AF Tracking 1 Bring the subject to the AF tracking frame and press the shutter button halfway to lock the s...

Страница 83: ...area setting screen is displayed AF area can then also be moved by pressing the cursor button toward 3 4 2 1 You can set to arbitrary position of the screen It cannot be set to edge of the screen The AF area returns to the centre when is pressed When the FOCUS AREA SET is set to Fn BUTTON SET P139 AF area setting screen can also be displayed by pressing 4 2 Touch the slide bar to change the size o...

Страница 84: ...F assist or MF guide will disappear about 10 seconds after you stop operating the focus ring touch panel or 3 4 2 1 Take the picture MF ASSIST Even without rotating the focus ring the MF assist can be displayed with the following operations When operating the touch panel 1 Touch the place to enlarge and display the MF assist For the operations while displaying the MF assist refer to step 2 of the ...

Страница 85: ... focus on the subject 2 Rotate it a little more 3 Finely focus on the subject by rotating the focus ring slowly in reverse About the focus distance reference mark The focus distance reference mark is a mark used to measure the focus distance Use this when taking pictures with Manual Focus or taking close up pictures A Focus distance reference mark B Focus distance reference line C 0 3 m 0 99 feet ...

Страница 86: ...may not display depending on the lens used REC mode Fixing the Focus and the Exposure AF AE Lock This is useful when you want to take a picture of a subject outside the AF area or the contrast is too strong and you cannot achieve appropriate exposure Fixing the exposure only Align the screen with the subject Press and hold AF AE LOCK to fix the exposure A AF AE LOCK button The aperture value and t...

Страница 87: ...omposition you would like to take and then press the shutter button fully Note If you set AF AE LOCK HOLD in the CUSTOM menu to ON you can fix the focus and the exposure even if you release AF AE LOCK after pressing it P140 The brightness of the image displayed on the LCD monitor viewfinder Live View will be also locked when the AE lock is performed AF Lock only is effective when taking pictures i...

Страница 88: ...ight sources are being used or there is nothing with a colour close to white Auto White Balance may not function properly In a case like this set the white balance to a mode other than AWB 1 Auto white balance will work within this range 2 Blue sky 3 Cloudy sky Rain 4 Shade 5 Sunlight 6 White fluorescent light 7 Incandescent light bulb 8 Sunrise and sunset 9 Candlelight KlKelvin colour Temperature...

Страница 89: ...TS In FOOD in CLOSE UP In NIGHT PORTRAIT In SUNSET or PARTY in scene mode My colour mode The camera will not be able to operate with 3 4 2 1 if the DIRECT FOCUS AREA P141 is set to ON Set using the Quick Menu P34 Set the white balance value Use to match the condition when taking photographs Select or and then touch WHITE SET The white balance setting screen can also be displayed by pressing the cu...

Страница 90: ...ursor button toward 4 Touch within the frame to finely adjust You can finely adjust also by touching G_ M A B or pressing 3 4 2 1 of the cursor button Touch SET Note If you finely adjust the white balance to A amber the white balance icon on the screen will change to orange If you finely adjust the white balance to B blue the white balance icon on the screen will change to blue If you finely adjus...

Страница 91: ... Bracket settings can also be made by rotating the rear dial or rear dial right Horizontal A to B or rear dial left Vertical Gi to Mj Touch SET Note is displayed in white balance icon in the screen when the White Balance Bracket is set The White Balance Bracket setting is released when the power has been turned off including Sleep Mode Pictures can be taken with White Balance Bracket regardless of...

Страница 92: ...T SET will not operate About Intelligent ISO sensitivity control The camera automatically sets the optimum ISO sensitivity and shutter speed to suit the movement of the subject and brightness of the scene to minimise the jitter of the subject The shutter speed is not fixed when the shutter button is pressed halfway It is continuously changing to match the movement of the subject until the shutter ...

Страница 93: ...s fixed to in the following cases In BABY1 BABY2 and PET in scene mode In INDOOR PORTRAIT NORMAL SPORTS OUTDOOR SPORTS and INDOOR SPORTS in advanced scene mode Programme Shift cannot be activated when the ISO sensitivity is set to You cannot select in Shutter Priority AE Mode and Manual Exposure Mode Also you cannot select AUTO in Manual Exposure Mode To avoid picture noise we recommend reducing t...

Страница 94: ...cessing to create a picture with particular characteristics The shutter speed may become very slow at this time The camera will not be able to operate with 3 4 2 1 if the DIRECT FOCUS AREA P141 is set to ON Set using the Quick Menu P34 Item Effect STANDARD COLOUR This is the standard setting DYNAMIC COLOUR The saturation and contrast of the stored colours are increased SMOOTH COLOUR The contrast i...

Страница 95: ...ode _ is displayed beside the Film Mode icon on the screen You cannot adjust SATURATION in the black and white settings in Film Mode Film Mode cannot be adjusted in the Intelligent auto mode advanced scene mode and scene mode Adjusting each Film Mode to the desired setting Item Effect CONTRAST r Increases the difference between the brightness and the darkness in the picture s Decreases the differe...

Страница 96: ...ures by keeping the shutter button pressed when it is set to burst mode Up to 3 pictures When using a self timer up to 3 pictures with set film will be taken if the shutter button is pressed It will operate same as even if it is set to Multi film indication displayed on the screen will flash until all pictures of preset amount are taken Note STANDARD is registered in MULTI FILM 1 MULTI FILM 2 and ...

Страница 97: ...utter speed Set the mode dial to Rotate the rear dial to set the shutter speed It will switch between shutter speed setting operation and Exposure Compensation operation every time the rear dial is pressed Rotate the rear dial to display the EXPO METER P142 Take a picture Note It will be a normal motion picture recording when recording a motion picture How the Exposure Compensation is switched can...

Страница 98: ...tter speed on the screen counts down in Shutter Priority AE Mode and cannot be set for Shutter Priority AE Mode The SENSITIVITY is automatically set to AUTO when you switch the recording mode to Shutter Priority AE Mode while the SENSITIVITY is set to Intelligent REC mode Taking picture by setting the exposure manually Determine the exposure by manually setting the aperture value and the shutter s...

Страница 99: ...It will be a normal motion picture recording when recording a motion picture It is possible to change the switching method of aperture and shutter speed settings with the EXPO SETTINGS P143 in the CUSTOM menu In the Quick Menu P34 while in touch operation setting of the aperture value or shutter speed can be set by touching the aperture value or shutter speed and then touching the exposure meter b...

Страница 100: ...shutter speed When the shutter speed is set for high speed display in the shutter speed preview will be displayed like a time release film It is used in cases such as stopping the movement of running water Press DISPLAY while displaying the preview screen Shutter speed preview screen is displayed It will return to previous screen by pressing DISPLAY again Note Operation method of can be changed wi...

Страница 101: ...vanced scene mode flash setting is reset to the initial setting when the advanced scene mode is changed and then used When you take a picture with a advanced scene mode that is not adequate for the purpose the hue of the picture may differ from the actual scene The following items cannot be set in advanced scene mode because the camera automatically adjusts them to the optimal setting SENSITIVITY ...

Страница 102: ...itivity level becomes ISO400 The initial setting for the AF mode is š PORTRAIT NORMAL PORTRAIT Shades the background and photographs skin colour beautifully SOFT SKIN Makes the skin surface appear especially smooth When SOFT SKIN is selected if a part of the background etc is a colour close to skin colour this part is also smoothed When SOFT SKIN is selected this mode may not be effective when the...

Страница 103: ...able for recording sports The initial setting for the AF mode is Ø SCENERY NORMAL SCENERY The focus adjusts onto far away subjects as a priority NATURE The best setting for photographing natural scenery ARCHITECTURE This setting takes sharp photographs of architecture The guide lines are displayed P66 CREATIVE SCENERY The shutter speed P97 can be changed in the NORMAL SCENERY setting SPORTS NORMAL...

Страница 104: ...bject it may become difficult to focus on it again Close up mode gives priority to a subject close to the camera so it takes longer to focus on the further subjects When you take pictures at close range the resolution of the periphery of the picture may decrease slightly This is not a malfunction If the lens becomes dirty with fingerprints or dust the lens may not be able to focus on the subject c...

Страница 105: ...re This is due to signal processing and is not a malfunction NIGHT PORTRAIT NIGHT PORTRAIT Uses when taking photographs of people with night scenery as a background Open the flash You can set to The initial setting for the AF mode is š NIGHT SCENERY Night scenery is vividly photographed with a slow shutter The flash setting is fixed to Œ The initial setting for the AF mode is When the AF mode is s...

Страница 106: ...urn to above step 2 by pressing 1 while selecting the scene mode menu by pressing 3 4 2 1 The scene mode flash setting is reset to the initial setting when the scene mode is changed and then used When you take a picture with a scene mode that is not adequate for the purpose the hue of the picture may differ from the actual scene The following items cannot be set in scene mode because the camera au...

Страница 107: ... 4 Press MENU SET to finish To cancel AGE and NAME Select the OFF setting in step 2 of the Birthday Name setting procedure Note During motion picture recording settings for NORMAL PORTRAIT are used Also still pictures recorded during motion picture recording P115 will not record age or name The age and name can be printed out using the PHOTOfunSTUDIO 5 0 HD Edition bundled software on the CD ROM s...

Страница 108: ...kground to make the subject stand out Setting the AF area 1 Touch the subject to move the AF area AF area can also be moved by pressing the cursor button toward 3 4 2 1 You can position the AF area anywhere on the screen except at the edges 2 Take the picture Note It will be a normal motion picture recording during the motion picture recording Quick AF is performed automatically Set the WHITE BALA...

Страница 109: ...at gives the appearance of a tarnished photograph PURE This is an image effect that uses a cool bright light to give a feeling of freshness The image will come out bright and slightly bluish ELEGANT This is an image effect that creates a tranquil atmosphere and projects a feeling of stateliness The image will come out slightly dark and amberish MONOCHROME This is an image effect that captures the ...

Страница 110: ... to set Recording screen is displayed Return CUSTOM settings to default 1 Select RESET in above step 2 2 Touch YES Adjusted value for each item returns to standard centre point Note Adjustments made with CUSTOM are not in effect in other recording modes Icons for the adjusted items are displayed in the screen when the CUSTOM are adjusted Displayed icon is the one for direction of adjustment AF tra...

Страница 111: ...et to register and then press MENU SET Press 3 to select YES and then press MENU SET When YES is selected the settings that were previously stored are overwritten You cannot save the following menu items because they affect other recording modes CLOCK SET TRAVEL DATE NO RESET RESET LANGUAGE and SCENE MENU BABY1 BABY2 or PET birthday and name settings in Scene Mode Data registered with FACE RECOG P...

Страница 112: ...ettings A Saving of the selected custom settings is displayed on the screen When changing the menu settings Even if the menu settings are changed temporarily with SET1 SET2 or SET3 selected what has been registered will remain unchanged To change what has been registered overwrite the registered data using CUST SET MEM P111 on the CUSTOM menu Note You cannot register the settings of the following ...

Страница 113: ... camera will set the most appropriate settings to match the subject and the recording conditions so you can leave the settings to the camera and take motion pictures easily mode Record motion pictures by automatically setting aperture and shutter speed Motion Picture P mode P118 You can record motion pictures with changed Exposure Compensation and aperture settings Custom mode Record motion pictur...

Страница 114: ...microphone with your fingers or other objects Focus mode CONTINUOUS AF Settings AFS AFC ON You can have the camera focus continuously Alternatively you can have the camera focus when you press the shutter button halfway OFF You can have the camera focus when the shutter button is pressed halfway MF ON You can focus manually OFF Start recording by pressing the motion picture button A Elapsed record...

Страница 115: ...T SET It is recommended to use a fully charged battery or AC adaptor P183 when recording motion pictures If while recording motion pictures using the AC adaptor P183 the power supply is cut off due to a power cut or if the AC adaptor is disconnected etc the motion picture being recorded will not be recorded Colour or brightness of the screen may change or horizontal streaks may appear on the scree...

Страница 116: ...ctures in an intended scene it is recommended that you take pictures in the appropriate recording mode Press 3 4 to select the item and then press MENU SET The SD Speed Class Rating is the speed standard for successive writes i PORTRAIT i SCENERY i LOW LIGHT i MACRO Changing REC MODE and REC QUALITY Select REC MODE from the MOTION PICTURE mode menu and press 1 P33 Recording format Features AVCHD L...

Страница 117: ...Per Second and it represents the speed of transmission When MOTION JPEG is selected in step 2 3 This item cannot be set in the Intelligent Auto Mode With the AVCHD Lite or for MOTION JPEG high quality motion picture can be enjoyed on the TV by using the HDMI mini cable optional For details see Playing back on the TV with HDMI socket on P165 Press MENU SET to close the menu You can also press the s...

Страница 118: ...English only Motion picture recorded in AVCHD Lite does not comply with the DCF Exif so some information will not display while playback Sound from motion pictures When REC MODE is set to MOTION JPEG or pictures with audio recorded by this camera cannot be played back by older models of Panasonic digital cameras LUMIX launched before July 2008 REC mode Recording motion pictures with the desired se...

Страница 119: ...st from 1 50 1 60 1 100 or 1 120 and adjust to the optimal setting while viewing the screen Note that you cannot set the degree of peripheral defocus in this case Note ISO sensitivity will be fixed to AUTO REC AREA P144 is fixed to REMAINING DISP P144 is fixed to REMAINING TIME As the aperture is controlled within a certain range to get an adequate exposure in this mode for some cases depending on...

Страница 120: ...halfway down a different person s picture information may be added when the camera is turned to a different subject to photograph FACE RECOG cannot be used with the FOOD in CLOSE UP NIGHT SCENERY and ILLUMINATIONS in NIGHT PORTRAIT PERIPHERAL DEFOCUS in Scene Mode and in recording motion pictures When the focus mode is set to MF automatic registration is not available The data registered with FACE...

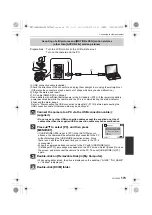
Страница 121: ...g P124 When a person who is registered is not recognised correct by re registering Example of faces that are hard to recognise Face Recognition may not be possible or may not recognise faces correctly even for registered faces in the following instances depending on the facial expression and environment Hair is covering the eyes or the eyebrows A The face is dark the light is at an angle B The fac...

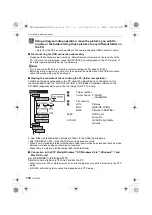
Страница 122: ...d then press MENU SET Take the picture adjusting the face with the guide The faces of subjects other than people pets etc cannot be registered When recognition fails a message will appear and the display will return to the recording screen In this case try taking the picture again Press 3 to select YES and then press MENU SET Registering face image of new person DMC G2K G2W G2EB VQT2S42_eng book 1...

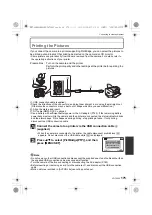
Страница 123: ...characters refer to Entering Text section on P146 AGE It is possible to register the birthday 1 Press 4 to select SET and then press MENU SET 2 Press 2 1 to select the items Year Month Day and then press 3 4 to set and then press MENU SET ADD IMAGES To add additional face images Add Images 1 Select the unregistered face recognition frame and then press MENU SET 2 Perform steps 4 and 5 in Registeri...

Страница 124: ... information for a registered person Item Description of settings INFO EDIT Changing the information of an already registered person Perform step 6 in Registering face image of new person PRIORITY The focus and exposure are preferentially adjusted for higher priority faces Press 3 4 2 1 to select the priority and then press MENU SET DELETE Deleting information of a registered person Press 3 to sel...

Страница 125: ...3 Perform the operation in Step 6 and following in Registering face image of new person Note If the registration screen will not display it may display easier by recording in the same conditions or with the same expressions If a face is not recognised even though it is registered it will make the recognition easier by registering the person again using the FACE RECOG in the REC Mode menu in that e...

Страница 126: ...at have passed since the departure date can be printed out using the PHOTOfunSTUDIO 5 0 HD Edition bundled software on the CD ROM supplied Select CLOCK SET to set the current date and time in advance P31 Recording which Day of the Vacation You Take the Picture Select TRAVEL DATE from the SETUP menu and then press 1 Press 3 to select TRAVEL SETUP and then press 1 Press 4 to select SET and then pres...

Страница 127: ...ed If you set a departure date and then take a picture on a date before this departure date minus is displayed in orange and the day of the vacation that you took the picture is not recorded If the travel date is displayed as minus in white there is a time difference that involves date change between the HOME and DESTINATION It will be recorded TRAVEL DATE cannot be set for motion pictures recorde...

Страница 128: ...e home area on the screen in step 3 Press 4 to select HOME and then press MENU SET Press 2 1 to select the home area and then press MENU SET A Current time B Time difference from GMT Greenwich Mean Time If daylight saving time is used at the home area press 3 Press 3 again to return to the original time The daylight saving time setting for the home area does not advance the current time Advance th...

Страница 129: ... cut at printing so check before printing P201 For details on REC mode menu settings refer to P33 Set the number of pixels The higher the numbers of pixels the finer the detail of the pictures will appear even when they are printed onto large sheets Applicable modes When the aspect ratio is X When the aspect ratio is Y ASPECT RATIO X ASPECT RATIO of a 4 3 TV Y ASPECT RATIO of a 35 mm film camera W...

Страница 130: ...nu settings refer to P33 Set the compression rate at which the pictures are to be stored Applicable modes 1 If you delete a RAW file from the camera the corresponding JPEG image will also be deleted 2 It is fixed to maximum recordable pixels L for each image aspect ratio 9M 4000k2248 pixels 4 5M 2816k1584 pixels 2M 1920k1080 pixels 9M 2992k2992 pixels 4 5M 2112k2112 pixels 2M 1504k1504 pixels A QU...

Страница 131: ...FF ON MEMORY SET Note Refer to P120 for details For details on REC mode menu settings refer to P33 Type of optical measurement to measure brightness can be changed Applicable modes Note When the AF mode is set to š while C is selected exposure is adjusted to the face of a person and when it is set to exposure is adjusted to the locked subject FACE RECOG C METERING MODE C Multiple This is the metho...

Страница 132: ... careful of camera jitter when you press the shutter button The panning effect in MODE3 is more difficult to achieve in the following cases In brightly lit places such as in broad daylight on a summer s day When the shutter speed is faster than 1 100th of a second When you move the camera too slowly because the subject is moving slowly The background will not become a blur When the camera does not...

Страница 133: ...to the 2nd curtain synchro Applicable modes 1ST 2ND Note Refer to P72 for details For details on REC mode menu settings refer to P33 You can adjust the flash output Applicable modes s2 EV s1 2 3 EV s1 1 3 EV s1 EV s2 3 EV s1 3 EV 0 EV r1 3 EV r2 3 EV r1 EV r1 1 3 EV r1 2 3 EV r2 EV Note Refer to P71 for details For details on REC mode menu settings refer to P33 Pictures with sharp profile and reso...

Страница 134: ...ing on the brightness of the subject Applicable modes OFF 200 400 800 1600 Note The upper limit of the ISO sensitivity can be set The higher the value set for the ISO sensitivity the more the jitter is reduced but the greater the amount of picture noise It will work when the SENSITIVITY is set to AUTO or For details on REC mode menu settings refer to P33 ISO sensitivity settings between ISO100 and...

Страница 135: ...d is slowed to take pictures This does not operate during motion picture recording For details on REC mode menu settings refer to P33 Enlarging a picture with no picture quality deterioration Applicable modes OFF ON Note Refer to P56 for details For details on REC mode menu settings refer to P33 This can enlarge subjects even more than the Optical Zoom or Extra Optical Zoom Applicable modes OFF 2t...

Страница 136: ...cable modes Note Depending on the colour space setting the file name of the recorded picture changes as shown Set to sRGB if you are not very familiar with AdobeRGB The setting is fixed to sRGB when recording motion pictures AUTO BRACKET STEP 3 1 3 3 2 3 5 1 3 5 2 3 7 1 3 7 2 3 SEQUENCE 0 j i j 0 i SELF TIMER COLOR SPACE sRGB Colour space is set to sRGB colour space This is widely used in computer...

Страница 137: ... the following cases When recording with Auto Bracket During burst shooting When SELF TIMER is set to When recording with White Balance Bracket When recording with Multi Film Bracket When QUALITY is set to or Using the MOTION PICTURE Mode Menu METERING MODE I EXPOSURE EX OPT ZOOM and DIGITAL ZOOM are common to both the REC mode menu and MOTION PICTURE mode menu Changing these settings in one of th...

Страница 138: ...ocus or fix the focus Applicable modes OFF ON Note Set to OFF when you would like to fix the focus It is recommended to set the Auto Focus to OFF if the sound of operation bothers you For details on MOTION PICTURE mode menu settings refer to P33 This reduces the wind noise in the audio recording Applicable modes OFF LOW STANDARD HIGH Note Sound quality will be different than usual when WIND CUT is...

Страница 139: ... Up to 3 current camera settings can be registered as custom settings Fn BUTTON SET Assign REC mode menu or CUSTOM menu to 4 button It is convenient to register functions that are used often FOCUS AREA SET ASPECT RATIO QUALITY METERING MODE I RESOLUTION I EXPOSURE EX OPT ZOOM GUIDE LINE REC AREA REMAINING DISP HISTOGRAM This allows you to set either to display or not display the histogram P66 OFF ...

Страница 140: ...all will adjust the focus at all times continuous AF operation The camera will adjust the focus automatically and the focus adjustment when the shutter button is pressed becomes faster It is effective when you do not want to miss the photo opportunity AF AE LOCK This will set what will be fixed by the AF AE LOCK button when taking a picture with fixed focus or exposure AE Only the exposure is lock...

Страница 141: ...hen you do not want to use the AF assist lamp e g when taking pictures of animals in dark places set the AF ASSIST LAMP to OFF In this case it will become more difficult to focus on the subject The AF assist lamp gets slightly blocked when the lens included in the DMC G2K or DMC G2W is used but it does not affect the performance The AF assist lamp may be greatly blocked and it may become harder to...

Страница 142: ...lf way pressed or AF lock with AF AE LOCK MF ASSIST In Manual Focus the assistance screen appears on the screen to facilitate focusing on the subject OFF ON Centre of the screen will be enlarged automatically when the focus ring is rotated MF GUIDE In Manual Focus it is possible to check if the focus position is near side or far side OFF ON MF guide is displayed on the screen when the focus ring i...

Страница 143: ...aperture setting and shutter speed setting SWITCH BY PRESSING THE LVF LCD BUTTON Press LVF LCD to switch between Exposure Compensation Programme Shift aperture setting and shutter speed setting Programme Shift Exposure Compensation Aperture Exposure Compensation Shutter speed Exposure Compensation Shutter speed Aperture LVF DISP STYLE This will set the display style of the viewfinder Viewfinder st...

Страница 144: ...BUTTON Enables disables the motion picture button OFF ON REC AREA This changes the angle of view during motion picture recording and still picture recording Picture Motion picture REMAINING DISP This will switch display between the number of recordable pictures and available recording time REMAINING SHOTS This will display the number of recordable pictures for still pictures REMAINING TIME This wi...

Страница 145: ...er function is disabled ON Touch Shutter icon is displayed on the screen and ON OFF of the Touch Shutter function can be switched when the icon is touched TOUCH GUIDE When playing back the pictures this allows you to set either to display or not display the guide screen of the touch panel OFF ON TOUCH SCROLL This allows you to set the speed of continuously forwarding or rewinding pictures using to...

Страница 146: ... entry position cursor can be moved left and right with the rear dial To enter a blank move the cursor to SPACE to delete an entered character move the cursor to DELETE or to stop editing during text entry move the cursor to CANCEL and press MENU SET A maximum of 30 characters can be entered Maximum of 9 characters when setting names in FACE RECOG Press 3 4 2 1 to move the cursor to SET and then p...

Страница 147: ...speed increases if you press 2 1 again The display on the screen changes from 5 to Press 3 to resume normal playback speed When using a high capacity card it is possible that fast rewinding may be slower than usual Note Please note that the bundled software includes QuickTime or PHOTOfunSTUDIO 5 0 HD Edition to play back motion picture files created with the camera on the PC QuickTime Motion JPEG ...

Страница 148: ...k Press MENU SET Press 3 to select YES and then press MENU SET QUALITY is fixed to Note Still pictures cannot be created from motion pictures recorded with MOTION JPEG set to or You may not be able to save still pictures from a motion picture taken on other equipment Pictures with audio Select a picture with the audio icon and then press 3 to play back A Audio icon Refer to AUDIO REC P137 for info...

Страница 149: ...ecting the camera to a TV Select SLIDE SHOW on the PLAYBACK mode menu P33 Press 3 4 to select the item and then press MENU SET FAVORITE can be selected only when FAVORITE on the PLAYBACK menu P160 is at ON and there are pictures already set as favourites During CATEGORY SELECTION press 3 4 2 1 to select a category and then press MENU SET to proceed to step 3 For details on categories refer to P151...

Страница 150: ...setting Note It is not possible to add new music Playback in NORMAL PLAY PICTURE PLAY AVCHD Lite PLAY MOTION JPEG PLAY CATEGORY PLAY or FAVORITE PLAY can be selected Select PLAYBACK MODE on the PLAYBACK mode menu P33 Press 3 4 to select the item and then press MENU SET FAVORITE PLAY can be selected only when FAVORITE on the PLAYBACK menu P160 is at ON and there are pictures already set as favourit...

Страница 151: ...ultiple faces that are already registered in the picture it will be categorized only once to the person found first in the registration You can add text comments to pictures After text has been registered it can be included in prints using TEXT STAMP P152 Only alphabetic characters and symbols can be entered Select TITLE EDIT on the PLAYBACK mode menu P33 Press 3 4 to select SINGLE or MULTI and th...

Страница 152: ...es taken with or Pictures recorded with other equipment You can stamp the recording date time name location travel date or title onto the recorded pictures It is suitable for regular size printing Pictures with a picture size larger than S will be resized when stamping the date etc on them Select TEXT STAMP on the PLAYBACK mode menu P33 Press 3 4 to select SINGLE or MULTI and then press MENU SET S...

Страница 153: ...ct the picture Press 3 4 2 1 to select the pictures Item Setting item SHOOTING DATE OFF W OTIME Stamp the year month and date WITHTIME Stamp the year month day hour and minutes NAME OFF Name registered in Face Recognition will be stamped Stamps names on pictures that already have been registered name settings of BABY1 BABY2 or PET in Scene Mode LOCATION OFF ON Stamps the travel destination name se...

Страница 154: ...print pictures stamped with text the date will be printed over the stamped text if you specify printing of the date at the photo shop or on the printer You can set up to 50 pictures at one time in MULTI The picture quality may deteriorate when text stamping is carried out Depending on the printer being used some characters may be cut at printing Check before printing Text and dates cannot be stamp...

Страница 155: ...s will change if divided It is recommended to display these motion pictures by using Calendar Playback P60 or MOTION JPEG PLAY in the PLAYBACK MODE P150 With AVCHD Lite motion pictures the order of pictures will not change Motion pictures cannot be divided in the following cases Motion pictures set as FAVORITE Protected motion pictures Motion pictures with a short recording time VIDEO DIVIDE Press...

Страница 156: ...ther equipment Motion pictures pictures with audio pictures stamped with TEXT STAMP and pictures taken with or cannot be resized Q RESIZE Reducing the picture size number of pixels Press 3 4 to select SINGLE or MULTI and then press MENU SET Select the picture and size SINGLE setting 1 Press 2 1 to select the picture and then press MENU SET 2 Press 2 1 to select the size and then press MENU SET Onl...

Страница 157: ... picture will deteriorate It may not be possible to crop pictures recorded with other equipment Motion pictures pictures with audio pictures stamped with TEXT STAMP and pictures taken with or cannot be cropped Information regarding the Face Recognition in the original picture will not be copied to images having undergone CROPPING CROPPING Press 2 1 to select the picture and then press MENU SET Use...

Страница 158: ...performed on the motion pictures pictures with audio pictures stamped with TEXT STAMP and pictures taken with or Information regarding the face recognition in the original picture will not be copied to images having undergone ASPECT CONV ASPECT CONV Press 3 4 to select Y X or and then press MENU SET Press 2 1 to select a picture taken with W aspect ratio and then press MENU SET Press 2 1 to determ...

Страница 159: ...the rotated direction unless the OS or software is compatible with Exif Exif is a file format for still pictures which allows recording information etc to be added It was established by JEITA Japan Electronics and Information Technology Industries Association It may not be possible to rotate pictures that have been recorded with other equipment The display is not rotated during Multi Playback P59 ...

Страница 160: ... selected when in PLAYBACK MODE Note You can set up to 999 pictures as favourites When printing pictures at a photo printing store ALL DELETE EXCEPTÜ P62 is useful so only the pictures you want to be printed remain on the card You may not be able to set pictures taken with other equipment as favourites The pictures that were taken with the QUALITY set to cannot be set to FAVORITE Ü FAVORITE Press ...

Страница 161: ...hen press MENU SET 2 Press 3 to select YES and then press MENU SET 3 Press MENU SET to close the menu You cannot select CANCEL if not even one picture has been set for printing To print the date After setting the number of prints set cancel printing with the recording date by pressing DISPLAY When you go to a photo printing store for digital printing be sure to order the printing of the date addit...

Страница 162: ...Cancelling all the PROTECT settings 1 Select CANCEL on the screen shown in step 2 and then press MENU SET 2 Press 3 to select YES and then press MENU SET 3 Press MENU SET to close the menu If you press MENU SET while cancelling protection the cancelling will stop halfway Note The protect setting may not be effective on other equipment Even if you protect pictures on a card they will be deleted if ...

Страница 163: ...formation of protected pictures FACE REC EDIT Press 3 4 to select REPLACE or DELETE and then press MENU SET Press 2 1 to select the picture and then press MENU SET You cannot select pictures for which Face Recognition information has not been registered Press 2 1 to select the person and then press MENU SET DELETE step 6 You cannot select a person who has not been registered Press 3 4 2 1 to selec...

Страница 164: ...e camera on and then press Note Depending on the ASPECT RATIO black bands may be displayed on the top and bottom or the left and right of the pictures Do not use any other AV cables except the supplied one Read the operating instructions for the TV When you play back a picture vertically it may be blurry You can view pictures on TVs in other countries regions which use the NTSC or PAL system when ...

Страница 165: ...ith an SD Memory Card slot Playing back on the TV with HDMI socket What is HDMI HDMI is the interface for digital devices When this unit is connected to a HDMI compatible device the image and audio can be output with a digital signal If you connect this unit to a HDMI compatible high definition TV and then play back the recorded high definition images you can enjoy them in high resolution with hig...

Страница 166: ...onnect the USB connection cable while it is outputting via the HDMI mini cable During HDMI output no picture is displayed on the LCD monitor or Viewfinder When pictures are displayed they may not be displayed properly depending on the type of TV Read the operating instructions for the TV Audio will be played back in monaural Audio recorded with the stereo microphone DMW MS1 optional in STEREO will...

Страница 167: ...device using a HDMI mini cable optional for automatic linked operations Not all operations are possible VIERA Link is a unique Panasonic function built on a HDMI control function using the standard HDMI CEC Consumer Electronics Control specification Linked operations with HDMI CEC compatible devices made by other companies are not guaranteed When using devices made by other companies that are comp...

Страница 168: ...pes of data to play back OPTION Display the Playback Mode selection screen The type of data for playback changes in the order of ALL ALL Either the NORMAL PLAY SLIDE SHOW CATEGORY PLAY FAVORITE PLAY or the CALENDAR can be selected in the Playback Mode selection screen when ALL is selected One screen display Select the image while in Multi Playback and then press OK 2 1 Go to previous next image 3 ...

Страница 169: ... are unsure whether or not the TV you are using are compatible with VIERA Link read the operating instructions for the TV Available linked operations between this unit and a Panasonic TV is different depending on the types of Panasonic TVs even if they are compatible with VIERA Link Refer to the operating instructions of the TV for the operations that support on the TV Operation is not possible wi...

Страница 170: ...tart the playback of this unit 3 Start the recording on the recording equipment When ending the recording copying stop the playback on this unit after stopping the recording in recording equipment Note When you play back motion pictures on 4 3 aspect ratio TV you must set TV ASPECT P38 on this unit to 4 3 before starting a copy The image will be vertically long if you play back motion pictures cop...

Страница 171: ... Edition to the PC Read the separate operating instructions for the supplied software for more information about the software in the CD ROM supplied and how to install it 2 Connect camera to PC For details on connecting refer to Connecting to a PC P172 3 Copy the images to a PC using PHOTOfunSTUDIO 5 0 HD Edition For details refer to the operating instructions of PHOTOfunSTUDIO 5 0 HD Edition PDF ...

Страница 172: ...the supplied software for more information about the software in the CD ROM supplied and how to install it PC that can be used PC with Windows 98 98SE or older or Mac OS 8 x or older cannot be connected via USB but it can acquire the pictures if an SD memory card reader writer can be used 1 It is necessary for Internet Explorer 6 0 or newer to be installed PC with higher processing performance is ...

Страница 173: ...cintosh the drive is displayed on the desktop LUMIX NO_NAME or Untitled is displayed Double click DCIM folder Acquiring of still pictures and MOTION JPEG motion pictures other than AVCHD Lite motion pictures Preparations Turn the LCD monitor so the LCD will show out Turn on the camera and the PC A USB connection cable supplied Check the directions of the connectors and plug them straight in or unp...

Страница 174: ...d back on the camera It is recommended to use the PHOTOfunSTUDIO 5 0 HD Edition bundled software on the CD ROM supplied when you write the image from PC to a card A new folder is created when pictures are taken in the following situations After NO RESET P40 in the SETUP menu has been executed When a card containing a folder with the same folder number has been inserted Such as when pictures were t...

Страница 175: ...or disconnecting the AC adaptor P183 Before inserting or removing a card turn the camera off and disconnect the USB connection cable Motion pictures recorded in AVCHD Lite cannot be printed out Preparations Turn on the camera and the printer Perform the print quality and other settings at the printer before printing the pictures A USB connection cable supplied Check the directions of the connector...

Страница 176: ...s pressed é appears on the pictures to be printed When DISPLAY is pressed again the setting is cancelled After the pictures have been selected press MENU SET SELECT ALL Prints all the stored pictures PRINT SET DPOF Prints the pictures set in PRINT SET only P161 FAVORITE Prints the pictures set as favourites only P160 Press 3 to select PRINT START and then press MENU SET Refer to P177 for the items...

Страница 177: ...ver the print with date setting check the printer s print with date setting as well When printing images with a text stamp please remember to set print with date to OFF or the date will print on top In some printers the picture date for pictures taken with the aspect ratio set to will be printed vertically Note When asking the photo shop to print the pictures By stamping the date using TEXT STAMP ...

Страница 178: ...s with the printer If the number of prints is high the pictures may be printed several times In this case the remaining number of prints indicated may differ from the number set When the pictures in RAW files are to be printed the JPEG pictures recorded simultaneously by the camera will be printed If JPEG pictures do not exist RAW file pictures cannot be printed PAPER SIZE Item Description of sett...

Страница 179: ...sitivity to match the settings on the camera Set to Aperture Priority AE mode or Manual Exposure mode on the camera and then set the same aperture value and ISO sensitivity on the external flash The exposure cannot be compensated adequately due to the change on the aperture value in Shutter Priority AE mode and the external flash cannot control the light adequately in Programme AE mode because the...

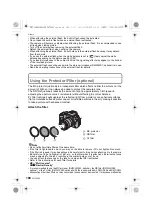
Страница 180: ...unt of light to approximately 1 8th equal to adjusting the aperture value 3 increments without affecting the colour balance PL filter optional will suppress the reflected light from a metal or non spherical surfaces flat non metallic surfaces water vapour or invisible particles in the air making it possible to take a picture with enhanced contrast Attach the filter Note Do not attach multiple filt...

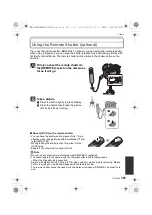
Страница 181: ...CK on the remote shutter You can keep the shutter button pressed fully This is effective when taking pictures with Burst Mode P74 or in B Bulb P99 While pressing the shutter button fully slide it to the LOCK side Slide it to the other side to cancel LOCK Note Do not use any other remote shutters except DMW RSL1 optional You cannot operate the camera with the remote shutter in the following cases W...

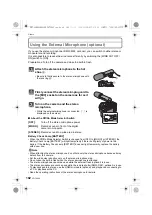
Страница 182: ...k Lamp BATTERY will light temporarily if there is still plenty of power in the battery If the Battery Check Lamp BATTERY does not light temporarily replace the battery with a new one Note When attaching the stereo microphone do not hold only the stereo microphone because it may detach from the camera Set the wind noise reduction only on the stereo microphone side Do not open the built in flash whe...

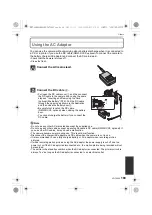
Страница 183: ... You cannot charge the battery if you connect the DC cable Note Do not use any other AC mains leads except the supplied one Do not use any other cables except a genuine Panasonic DC cable DMW DCC3 optional If you use other DC cables it may cause a malfunction The camera becomes warm during use This is not a malfunction Disconnect the charger AC adaptor and DC cable when the camera is not in use It...

Страница 184: ... P27 11 Card P30 displayed only during recording 12 Recording state Flashes red Focus P54 Lights green 13 Touch Quick Menu 2 P34 14 Touch Shutter 2 P55 15 Dial operation guide P145 Elapsed recording time P114 16 Number of recordable pictures 3 P203 17 White balance P88 18 ISO sensitivity P92 19 Exposure compensation value P73 Manual exposure assistance P98 20 Shutter speed P54 21 Aperture value P5...

Страница 185: ... the LCD recording information window 2 Only displayed in the LCD monitor 3 It is possible to switch the display between the number of recordable pictures and available recording time with the REMAINING DISP setting in the CUSTOM menu In displays other than the LCD recording information display 9999i is displayed if there are more than 10000 pictures remaining 4 This is displayed for about 5 secon...

Страница 186: ...7 19 Stamped with text indication P152 20 Favourites P160 Cable disconnection warning icon P175 21 Recorded date and time World Time P128 22 Folder File number 7 P174 23 Colour space 9 P136 24 Histogram P66 7 This is not displayed for motion pictures recorded in AVCHD Lite 8 It is displayed in order of TITLE LOCATION NAME BABY1 BABY2 PET NAME FACE RECOG 9 This is not displayed for motion pictures ...

Страница 187: ...connect AC adaptor Then reinsert the battery or reconnect AC adaptor and turn the camera on Do not use the camera near radio transmitters or high voltage lines If you record near radio transmitters or high voltage lines the recorded pictures and sound may be adversely affected Always use the supplied cords and cables If you use optional accessories use the cords and the cables supplied with them D...

Страница 188: ...ently wipe it with a dry and soft cloth and be careful not to remove it If you wipe the eye cup too hard and it is removed consult the dealer or your nearest Service Centre Do not press the LCD monitor with excessive force Uneven colours may appear on the LCD monitor and it may malfunction If the camera is cold when you turn it on the picture on the LCD monitor Viewfinder will be slightly darker t...

Страница 189: ...camera will damage the camera Bring charged spare batteries when going out Be aware that the operating time of the battery becomes shorter in low temperature conditions such as at a ski resort When you travel do not forget to bring the battery charger supplied and the AC mains lead supplied so that you can charge the battery in the country that you are travelling in Dispose of unusable battery The...

Страница 190: ...direct or indirect damage from the alteration or vanishing of information or personal information When requesting a repair transferring to another party or disposing Reset the settings to protect the personal information P40 Remove the memory card from the camera when requesting a repair Settings may return to factory default when camera is repaired Please contact the dealer where you purchased th...

Страница 191: ...d to attach the tripod adaptor DMW TA1 optional before mounting on the tripod unipod Read the operating instructions for the tripod or unipod carefully If you attach a heavy interchangeable lens more than about 1 kg to the camera body do not carry the camera by the soulder strap Hold the camera and the lens when carrying them Message Display Confirmation messages or error messages will be displaye...

Страница 192: ...eica lens mount adaptor DMW MA2M or DMW MA3R optional set SHOOT W O LENS P146 to ON in the custom menu Detach the lens once and then attach it again without pressing the lens release button P22 Turn on the power again and if it is still displaying contact the dealer MEMORY CARD PARAMETER ERROR THIS MEMORY CARD CANNOT BE USED Use a card compatible with this unit P30 SD Memory Card 8 MB to 2 GB SDHC...

Страница 193: ... be used P174 Format the card after saving necessary data on a PC etc P40 If you execute NO RESET in the SETUP menu after formatting the folder number is reset to 100 P40 PICTURE IS DISPLAYED FOR 16 9 TV PICTURE IS DISPLAYED FOR 4 3 TV The AV cable is connected to the camera Press MENU SET if you want to delete this message at once Select TV ASPECT in the SETUP menu if you want to change the TV as...

Страница 194: ... you connect to a TV compatible with VIERA Link with a HDMI mini cable optional and turn off the power on the TV with the remote control for the TV the power on this unit also turns off If you are not using VIERA Link set VIERA Link to OFF P39 Is the temperature of the battery excessively high or low If it is it will take longer than usual to charge the battery or charging may remain incomplete Ar...

Страница 195: ...Is FOCUS PRIORITY in the CUSTOM menu set to OFF P141 In this case the picture may not be properly focused even if AFS or AFC in Focus Mode is set Is the AF Lock P86 applied incorrectly The shutter speed will become slower and the Optical Image Stabilizer function may not work properly when taking pictures especially in dark places We recommend holding the camera firmly with both hands when taking ...

Страница 196: ...ght or any other source of strong light This could be an inactive pixel Perform the PIXEL REFRESH P145 in the CUSTOM menu Are you in Exposure Compensation operation Press the rear dial to switch to Exposure Compensation operation P73 Set the AF area to the distinctive colour of the subject if there is a part that is different from the surrounding colour P82 The recorded picture looks rough Noise a...

Страница 197: ...e the level of audio recording or audio may not record at all Also be careful because the operation sound of lenses can easily be recorded at this time Depending on the lens used picture may be warped slightly or you may see colours along the edge depending on the zoom factor due to the characteristics of the lens Also the peripherals of the image might look warped because the perspective is enhan...

Страница 198: ...er Press LVF LCD to switch to LCD monitor display P43 Is the LCD monitor switched off Switch the display by pressing DISPLAY P64 Is the EXPO SETTINGS set to SWITCH BY PRESSING THE LVF LCD BUTTON P143 It is only displayed on the LCD monitor when the camera is connected to a PC or printer This is not a malfunction These pixels do not affect the recorded pictures In dark places noise may appear to ma...

Страница 199: ... mentioned above P40 Other pictures will be deleted as well and it will not be possible to restore them Therefore check well before formatting Is the clock in the camera set properly P31 Images edited on a PC or images recorded on other cameras might display a different date to the recorded date during the Calendar Playback You see red green or blue flashes when you move your eyes in the viewfinde...

Страница 200: ...on the camera P164 165 Motion pictures recorded in AVCHD Lite can be played back on Panasonic televisions VIERA with the AVCHD logo Check TV ASPECT setting P38 Is it connected properly with the HDMI mini cable optional P165 Confirm that the HDMI mini cable optional is firmly fitted Press on this unit Is the VIERA Link on this unit set to ON P39 Depending on HDMI terminal of the TV the input channe...

Страница 201: ...e operation when the power is turned ON or OFF and it is not a malfunction You may hear a sound from the lens and image in the LCD monitor may suddenly change when the brightness has changed by zoom operation or moving the camera but there is no effect on recording The sound is caused by the automatic adjustment of the aperture This is not a malfunction Press MENU SET select the SETUP menu icon an...

Страница 202: ...rded in folders with different numbers from the ones used prior to the operation P174 If the battery was inserted or removed without first turning the camera s power off the folder and file numbers for the pictures taken will not be stored in the memory When the power is then turned back on and pictures are taken they may be stored under file numbers which should have been assigned to previous pic...

Страница 203: ...n 10000 pictures remaining Aspect ratio X Picture size 12M 6M Quality A A Card 256 MB 34 71 11 13 63 125 13 14 512 MB 70 140 22 26 125 250 26 29 1 GB 140 280 45 54 250 510 52 59 2 GB 290 570 92 105 520 1020 105 120 4 GB 570 1130 180 210 1030 2000 210 230 6 GB 870 1720 270 320 1560 3050 320 350 8 GB 1160 2310 370 440 2090 4090 430 480 12 GB 1760 3490 550 660 3160 6170 650 720 16 GB 2350 4660 740 88...

Страница 204: ...2910 7280 14000 2390 2840 64 GB 24710 44930 3680 3950 9880 19010 3250 3860 Aspect ratio Y Picture size 5M 2 5M Quality A A Card 256 MB 68 135 14 16 105 200 15 17 512 MB 135 270 29 32 210 410 31 34 1 GB 270 540 58 65 420 820 63 68 2 GB 550 1070 115 130 850 1610 125 135 4 GB 1090 2110 230 260 1670 3170 250 270 6 GB 1660 3210 350 390 2540 4820 380 410 8 GB 2230 4300 470 530 3400 6460 510 550 12 GB 33...

Страница 205: ... 13490 26010 3190 3600 64 GB 11230 21490 3770 4490 18300 35300 4330 4890 Aspect ratio W Picture size 2M 9M Quality A A Card 256 MB 220 430 20 21 47 94 14 17 512 MB 440 860 40 42 95 185 29 34 1 GB 900 1720 81 84 190 380 59 69 2 GB 1800 3410 160 170 380 760 120 140 4 GB 3540 6700 320 330 760 1500 230 270 6 GB 5390 10190 490 510 1160 2290 350 420 8 GB 7220 13640 650 680 1560 3060 480 560 12 GB 10890 ...

Страница 206: ...13350 24700 1270 1320 24 GB 8150 15940 1630 1800 19390 35870 1840 1920 32 GB 11260 22020 2250 2490 26790 49560 2540 2660 48 GB 15170 28010 3190 3530 36420 60710 3640 3790 64 GB 20590 38020 4330 4780 49430 82380 4940 5140 Aspect ratio X Y W Quality Card 256 MB 16 18 22 21 512 MB 33 37 44 42 1 GB 67 75 89 86 2 GB 135 150 180 170 4 GB 260 300 350 340 6 GB 400 450 540 520 8 GB 540 610 720 690 12 GB 82...

Страница 207: ... min 00 s 1 GB 7 min 00 s 9 min 00 s 13 min 00 s 3 min 55 s 10 min 00 s 10 min 20 s 28 min 50 s 2 GB 15 min 00 s 19 min 00 s 28 min 00 s 8 min 10 s 20 min 40 s 21 min 30 s 59 min 30 s 4 GB 30 min 00 s 39 min 00 s 57 min 00 s 16 min 20 s 40 min 50 s 42 min 30 s 1 h 57 min 6 GB 46 min 00 s 1 h 00 min 1 h 27 min 24 min 50 s 1 h 02 min 1 h 04 min 2 h 59 min 8 GB 1 h 02 min 1 h 21 min 1 h 58 min 33 min...

Страница 208: ...N OFF simple enlargement compatible with lenses from other manufacturers Focus Auto focus Manual Focus Face detection AF Tracking 23 area focusing 1 area focusing Touch focus area selection possible Shutter system Focal plane shutter Burst recording Burst speed 3 2 pictures second High speed 2 6 pictures second Middle speed 2 pictures second Low speed Number of recordable pictures Max 7 pictures w...

Страница 209: ...lash synchronization speed Equal to or smaller than 1 160th of a second Microphone Monaural Speaker Monaural Recording media SD Memory Card SDHC Memory Card SDXC Memory Card Picture size Still picture When the aspect ratio setting is X 4000k3000 pixels 2816k2112 pixels 2048k1536 pixels When the aspect ratio setting is Y 4000k2672 pixels 2816k1880 pixels 2048k1360 pixels When the aspect ratio setti...

Страница 210: ...e when using an AC adaptor use optional DC cable Dimensions Approx 124 mm W k83 6 mm H k74 0 mm D 4 88q W k3 29q H k2 91q D excluding the projecting parts Mass Approx 593 g 1 31 lb with the 14 42 mm F3 5 5 6 lens included in DMC G2K DMC G2W card and battery Approx 810 g 1 79 lb with the 45 200 mm F4 0 5 6 lens included in DMC G2W card and battery Approx 371 g 0 82 lb camera body Operating temperat...

Страница 211: ...05 inch Max diameter Approx 60 6 mm 2 39 inch Overall length Approx 63 6 mm 2 50 inch from the tip of the lens to the base side of the lens mount Mass Approx 165 g 0 22 lb Focal length f 45 mm to 200 mm 35 mm film camera equivalent 90 mm to 400 mm Aperture type 7 leaf shutters iris diaphragm circular diaphragm Aperture range F4 0 Wide to F5 6 Tele Minimum aperture value F22 Lens construction 16 el...

Страница 212: ...gistered trademarks of Apple Inc used under license therefrom Adobe is a trademark or registered trademark of Adobe Systems Incorporated in the United States and or other countries Microsoft product screen shot s reprinted with permission from Microsoft Corporation Other names company names and product names printed in these instructions are trademarks or registered trademarks of the companies con...

Отзывы: