ENGLISH
–
67
Basic Operation
Press ENTER.
10.
The “BRIGHT ADJUST” screen will be
•
displayed.
BRIGHT ADJUST
BRIGHT INSIDE
BRIGHT OUTSIDE
Press
▲▼
to select “BRIGHT
11.
INSIDE”.
Press ENTER.
12.
The “BRIGHT INSIDE” adjustment screen will
•
be displayed.
BRIGHT INSIDE
INTERLOCKED
WHITE
RED
GREEN
BLUE
ON
0
0
0
0
When “INTERLOCKED” is set to “OFF”,
•
individual adjustment of “RED”, “GREEN” and
“BLUE” will be possible.
Press
▲▼
to select an item, and
13.
press
◄►
to adjust the setting.
Once adjustment is complete, press MENU to
•
return to “BRIGHT ADJUST”.
Press
▲▼
to select the part of
14.
“UPPER”, “LOWER”, “RIGHT”,
“LEFT”.
Use
◄►
to adjust the width for
15.
correcting the “BRIGHT INSIDE”
setting (0 to 255).
Press
▲▼
to select “BRIGHT
16.
OUTSIDE”.
BRIGHT INSIDE
BRIGHT OUTSIDE
OUTSIDE AREA
Press ENTER.
17.
The “BRIGHT OUTSIDE” adjustment screen will
•
be displayed.
BRIGHT OUTSIDE
INTERLOCKED
WHITE
RED
GREEN
BLUE
ON
0
0
0
0
When “INTERLOCKED” is set to “OFF”,
•
individual adjustment of “RED”, “GREEN” and
“BLUE” will be possible.
Press
▲▼
to select an item, and
18.
press
◄►
to adjust the setting.
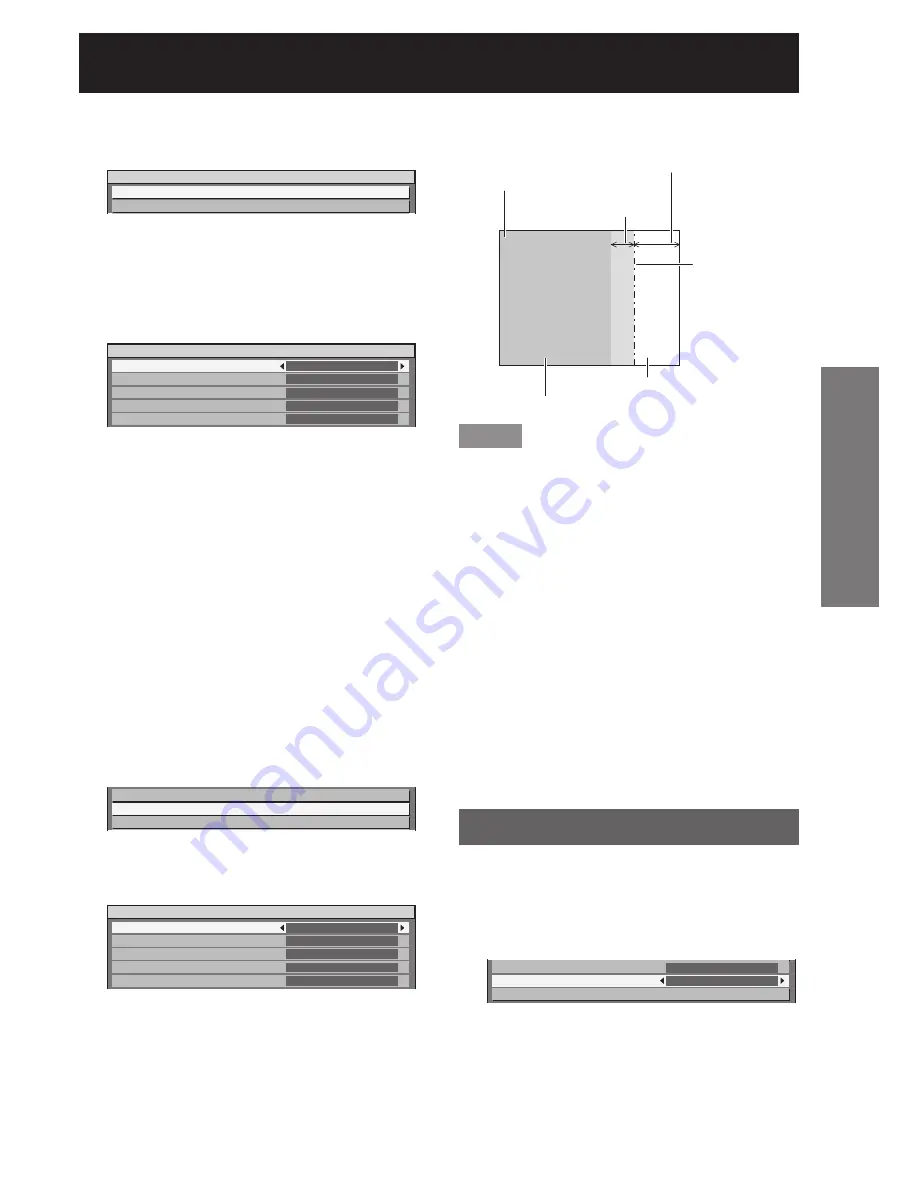
BRIGHT adjustment
(right)
Edge blending width (right)
Projection
range
Marker
BRIGHT OUTSIDE
BRIGHT INSIDE
Note
The BRIGHT adjustment is a function for making
•
the brightening of the BRIGHT level in those areas
where the pictures overlap less conspicuous
when multi-screens have been configured using
edge blending. The optimal point is where, after
the BRIGHT INSIDE has been adjusted, the
compensation amount is the same for the BRIGHT
levels in the areas where the pictures overlap and
where the pictures do not overlap. If, after the
BRIGHT INSIDE adjustment, only the vicinity of the
borders of the areas where the pictures overlap
and where the pictures do not overlap becomes
bright, proceed to adjust the top, bottom, left and
right widths. Alternatively, if only the vicinity of
the borders has darkened as a result of the width
adjustments, proceed with the BRIGHT OUTSIDE
adjustment.
When a rear screen or screen with a high gain is
•
used, the joints may appear to be discontinuous
depending on the viewing position.
Frame delay
When 1 080/60i, 1 080/50i and 1 080/24sF signals are
being input, this simplifies image processing so that
the frame delay for pictures can be shortened.
Press
▲▼
to select “FRAME
1.
DELAY”.
EDGE BLENDING
FRAME DELAY
RASTER POSITION
OFF
DEFAULT


