64
–
ENGLISH
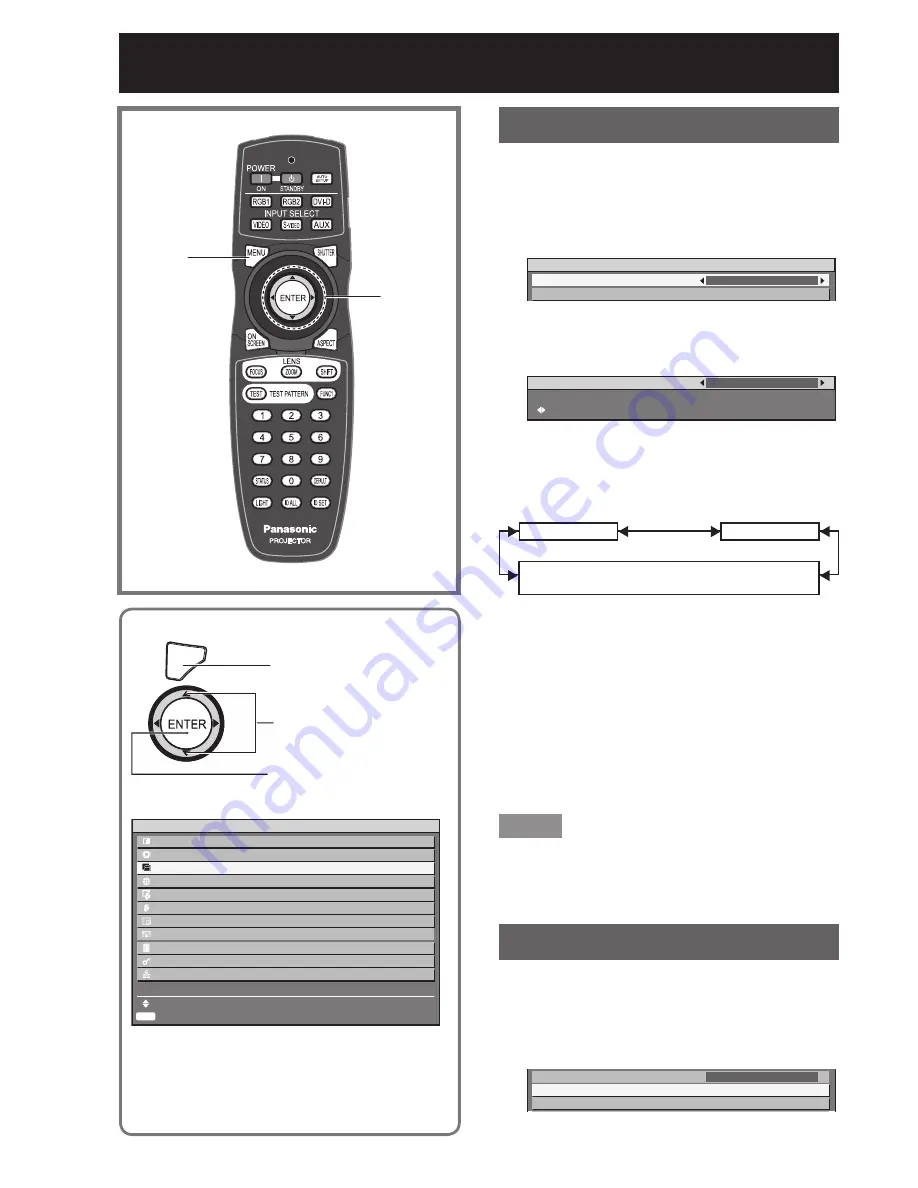
How to use ADVANCED MENU
Digital cinema reality
Increase the vertical resolution when the PAL (or
SECAM) 576i signal input or the NTSC 480i, 1 080/50i
and 1 080/60i signal input is applied.
Press
▲▼
to select “DIGITAL
1.
CINEMA REALITY”.
ADVANCED MENU
DIGITAL CINEMA REALITY
BLANKING
AUTO
Press
◄►
or ENTER.
2.
The “DIGITAL CINEMA REALITY” individual
•
adjustment screen will be displayed.
DIGITAL CINEMA REALITY
CHANGE
AUTO
Press
◄►
to switch “DIGITAL
3.
CINEMA REALITY”.
The setting will change as follows each time
•
◄►
is pressed.
AUTO
30p FIXED: When 480i or 1 080/60i signals are input
25p FIXED: When 576i or 1 080/50i signals are input
OFF
AUTO:
•
Performs automatic detection and cinema
processing. (factory default)
OFF:
•
Unforced cinema processing
25p FIXED:
•
Forced cinema processing (2:2 pulldown) is
performed when a 576i or 1 080/50i signal is input.
30p FIXED:
•
Forced cinema processing (2:2 pulldown) is
performed when a 480i or 1 080/60i signal is input.
Note
In DIGITAL CINEMA REALITY mode, the image
•
quality will be deteriorated if 30p FIXED or 25p
FIXED is selected when the signal is not a 2:2
pulldown signal.
Blanking adjustment
Blanking adjustment fine-tunes the images projected
by the video deck or other devices when the noise
appears on the edges of the screen or if a part of the
image lies slightly offscreen.
Press
▲▼
to select “BLANKING”.
1.
DIGITAL CINEMA REALITY
BLANKING
INPUT RESOLUTION
AUTO
Fine settings are possible.
MENU
Press to display the MAIN
MENU screen.
Press to select
“ADVANCED MENU”.
Press to display the
“ADVANCED MENU”
menu.
ENTER
MAIN MENU
PICTURE
POSITION
ADVANCED
MENU
DISPLAY
LANGUAGE
DISPLAY
OPTION
PROJECTOR SETUP
P IN P
TEST
PATTERN
SIGNAL
LIST
SECURITY
NETWORK
MENU
SELECT
SUB MENU
▲▼◄►
ENTER
MENU


