Easy IP Setup Software
Installing and starting the software
Easy IP Setup Software (EasyIPSetup.exe) is on the supplied CD-ROM.
Be sure to read “Readme.txt” on the supplied CD-ROM before installing the software.
1. Insert the CD-ROM supplied with the unit into the CD-ROM drive of the personal computer on which the
application is going to be installed.
2. Copy the entire [EasyIPSetup] folder on the CD-ROM to the hard disk drive of the personal computer.
3. Double-click [EasyIPSetup.exe] in the copied [EasyIPSetup] folder.
Easy IP Setup Software starts.
Setting IP addresses of devices
Use Easy IP Setup Software to set the IP address of each device.
With this software, the ROP and CCU are also displayed as cameras.
If you are using Microsoft
®
Windows
®
Vista, you may be asked to enter the password for the administrator account when you start
Easy IP Setup Software. If that happens, disable [User Account Control] from the Control Panel.
Easy IP Setup Software cannot be used from a different subnet via a router.
IPv6 is not supported.
Setting Procedure
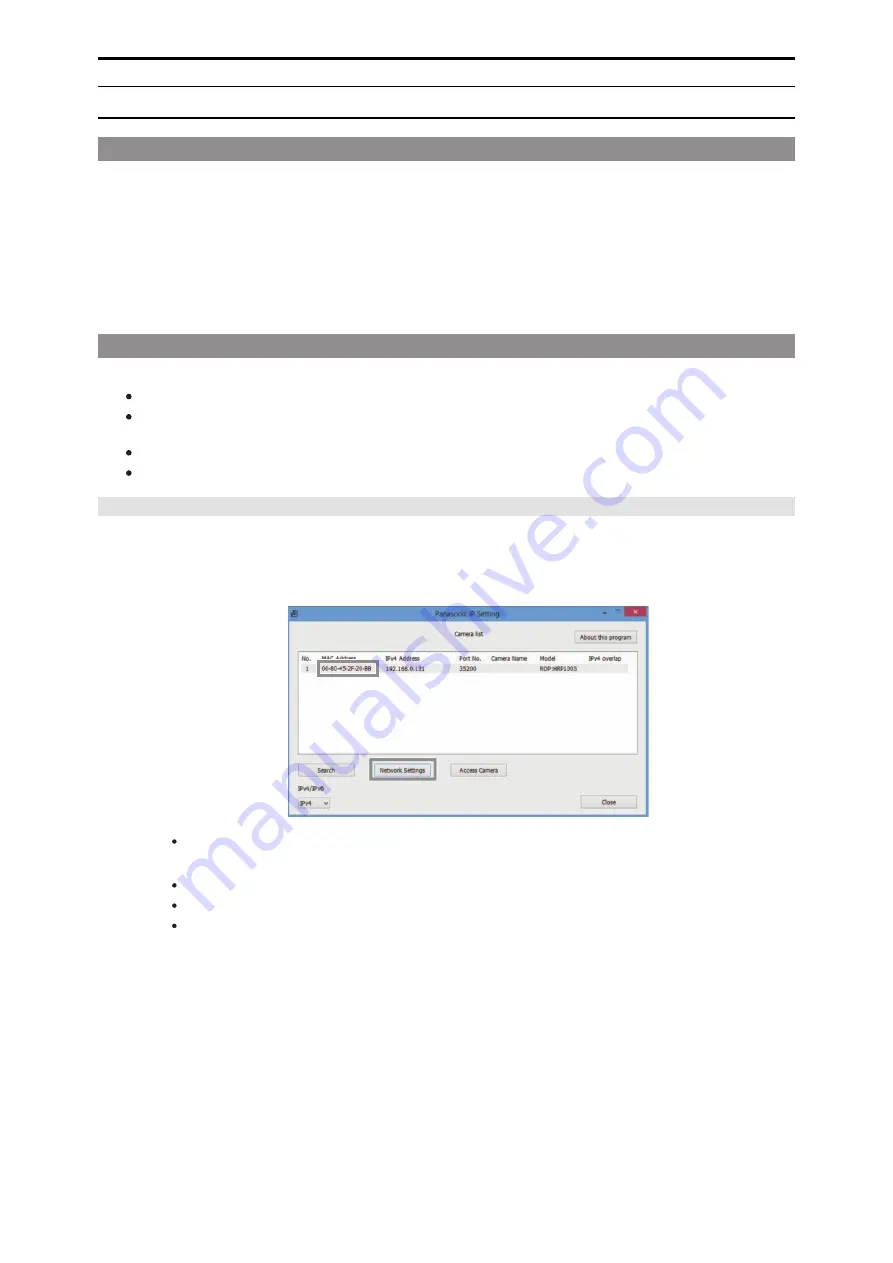
1. Start the Easy IP Setup Software.
A list of the devices connected with IP connections is displayed.
2. Click the MAC address of the ROP or CCU you wish to set, and then click the [Network Settings] but-
ton.
If there is an IP address conflict, the MAC addresses of the corresponding cameras are displayed with drop shadows.
3. Enter each of the network items and then click the [Save] button.
Set [Connection Mode] to “Static IP”.
Enter the setting information in [IPv4 Address], [Subnet Mask], and [Default Gateway].
Do not change any of the other settings.
- 127 -
Software


