Editing: Recording Voice-Overs
107
Ed
it
in
g
1
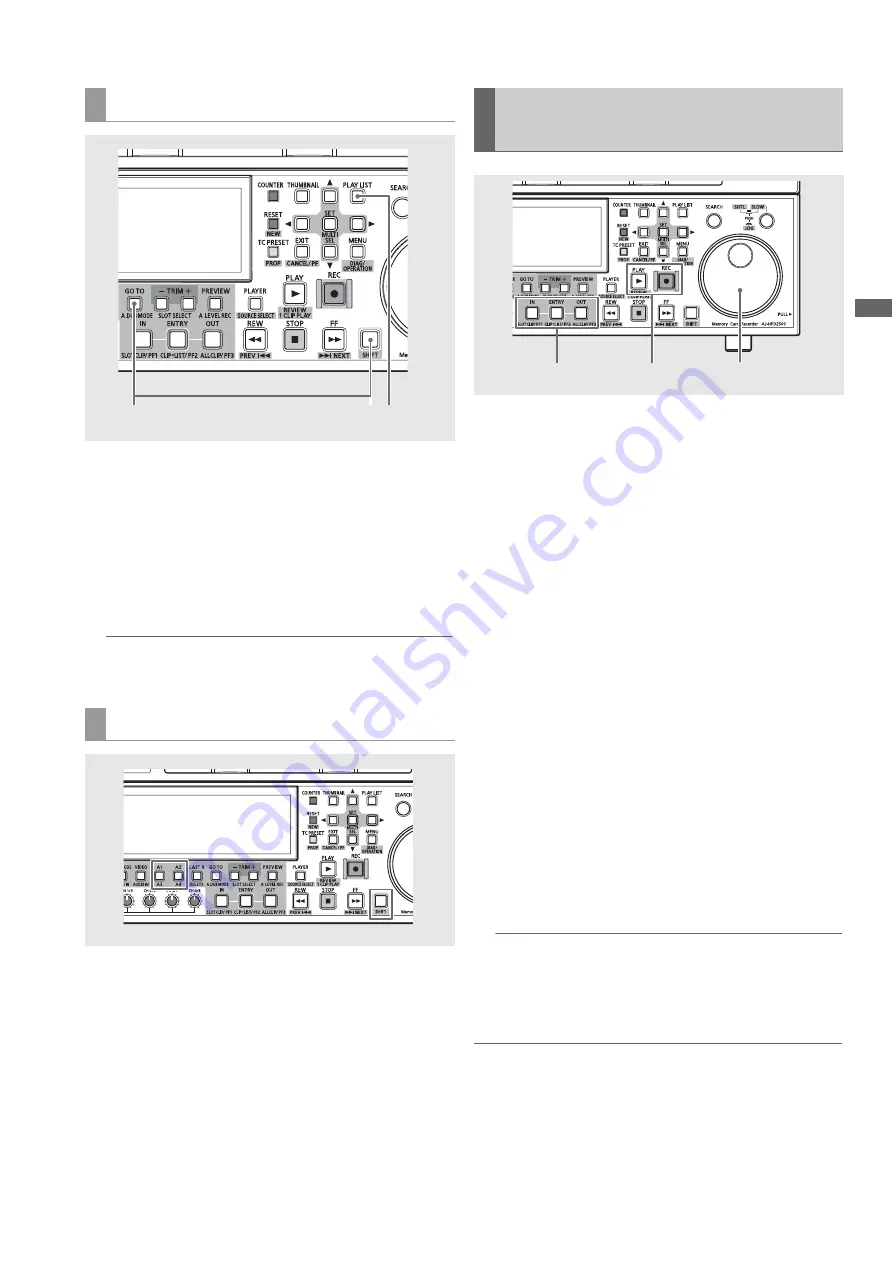
Press the PLAY LIST button to open the playlist
screen.
2
Press the A. DUB MODE (SHIFT + GOTO) button to
engage the voice-over mode.
“A.DUB” appears on the player screen in the voice-over
mode.
◆
NOTE:
• Use the A. DUB MODE (SHIFT + GOTO) button to exit the voice-
over mode.
Use the A1/A2/A3 (SHIFT + A1)/A4 (SHIFT + A2) buttons to
select track for voice-over. The names of selected tracks are
indicated in orange on the left side of the timeline. One or two
tracks can be selected. Selecting a third track will disable a
voice-over recording.
1
Find the starting point of the voice-over, and press
the IN + ENTRY button.
Use the operation buttons or the search dial to find the
starting point of the voice-over. Then, press the IN and
ENTRY buttons simultaneously to assign an IN point. The
IN button turns on.
2
Find the ending point of the voice-over, and press the
OUT + ENTRY button.
Use the operation buttons or the search dial to find the
ending point of the voice-over. Then, press the OUT and
ENTRY buttons simultaneously to assign an OUT point.
The OUT button turns on.
3
Hold down the REC button and press the PLAY
button.
The P2 card is returned to start of set preroll time and
recording starts after preroll. Recording stops when the
OUT point is reached, an OUT POINT is registered again
by the OUT + ENTRY button during recording or the STOP
button is pressed.
Use the audio volume controls (VR) as necessary to adjust
the playback sound level.
◆
NOTE:
• It is possible to start voice-over recording without setting an
OUT point at step 2, if so required. The voice-over recording
then continues to the end of the timeline, or until the STOP or
OUT + ENTRY button is pressed.
◆
NOTE:
• When the 24PN playlist format is set in setup menu No. 026 (PLY LST
FMT), the audio IN and OUT points are set in 4-frame increments. If
the recording starts or stops elsewhere, the IN and OUT points are
automatically corrected to fall within the recording range.
• Starting the voice-over recording at the beginning of the timeline is
now allowed. Start recording at least 1 second from the beginning
of the timeline.
Starting voice-over recording
Setting recording tracks
2
1
Voice-Over after Assigning the IN
and OUT Points
1,2
3
1,2


