14 (E)
ENGLISH
Performing initial settings
1
Set the power switch to ON.
2
Set the PROGRAM switch to the MENU position.
The setting menu screen is shown on the TV
monitor.
3
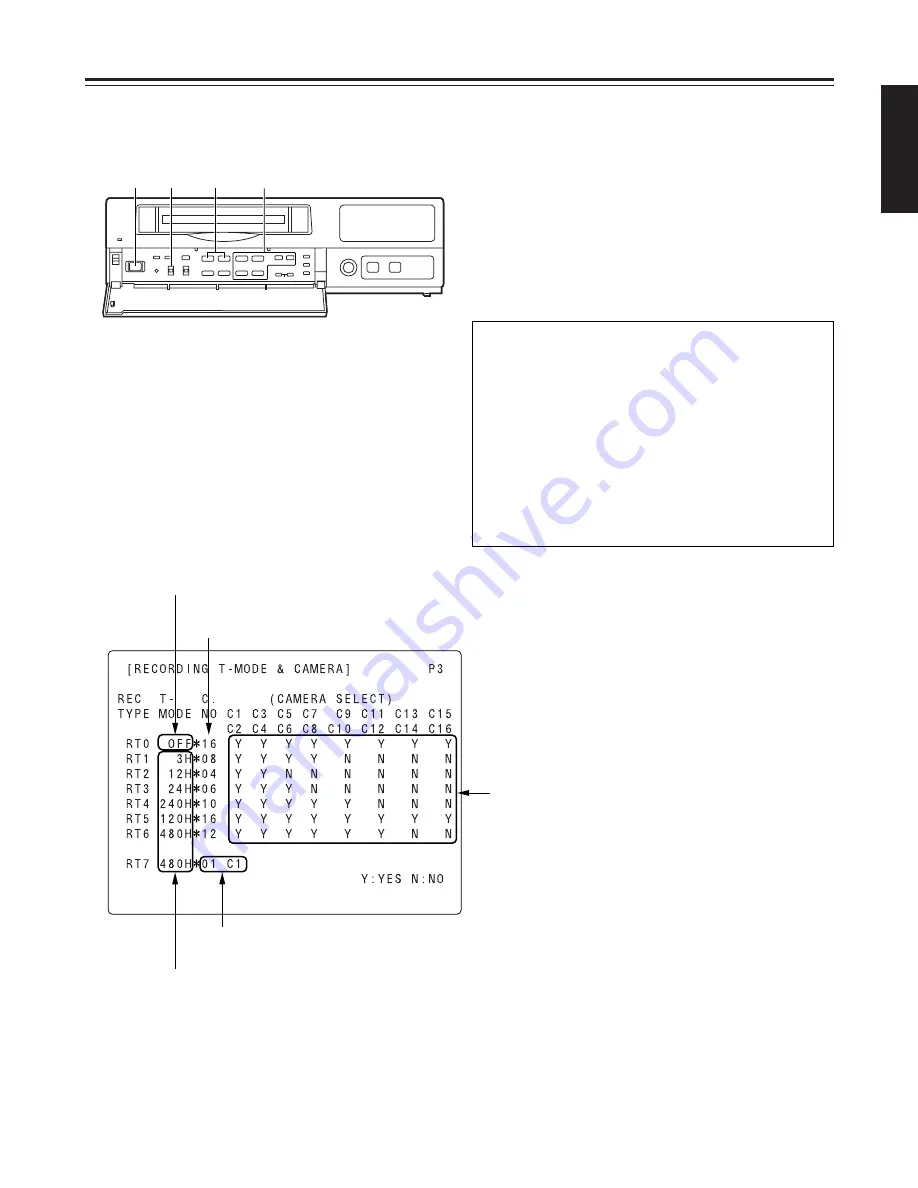
Press the PAGE (+) or PAGE (–) button to display
the P3 RECORDING T-MODE & CAMERA screen.
The flashing items are ones that can be set.
Fixed at 01 C1.
The cameras to be used are set here.
The cameras are set in pairs: C1-C2, C3-C4 and so on up to
C15-C16.
“Y” (YES) is set for each pair of cameras that is to be used.
A black burst signal (black screen) is recorded if no video
signals are supplied from a camera even when “Y” (YES)
has been set for that camera.
The number of cameras to be used is
displayed automatically here.
The recording time mode is set here.
Fixed at OFF.
$
Setting the recording time mode and
number of cameras
4
Follow the steps below to set the recording time
mode and number of cameras.
O
Use the (
4
), (
3
), (
2
) and (
1
) SHIFT buttons
to move the flashing part to the item whose
setting is to be changed.
O
Press the (+) and (–) SET buttons to change the
setting.
<
2
1
2
1
6
5
∫
;
3
4
3
4
3
4
H
H
1
2•7
3•5
4•6
On the P3 RECORDING T-MODE & CAMERA
screen, set the number of cameras to be used and
their recording time modes for RT0 through RT7 in
the REC TYPE column ahead of time.
Different kinds of recordings can be undertaken by
setting these two items when normal recording or
timer recording is to be performed.
<Notes>
O
For RT0, T-MODE (recording time mode) is fixed
at OFF.
O
For RT7, the setting for the number of cameras to
be used is fixed at 1 unit for C1.
Содержание AG-DTL1E
Страница 59: ......


