22
OPERATING INSTRUCTIONS
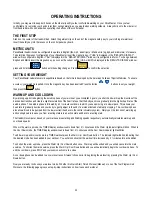
Initially, you may want to keep both hands on the side rails until you feel comfortable walking on your PaceMaster. Once you feel
comfortable, try removing your hands to let them swing naturally, as you would when walking outdoors. Always hold on to the side rail or
front handle bar with one hand when operating the buttons of the control panel.
THE FIRST STEP
Stand on the center of the treadmill belt. Attach the garment clip on the end of the magnetic safety key to your clothing at waist level.
Insert the safety key into the recess on the control panel keyboard.
METRIC UNITS
PaceMaster treadmills can be configured to operate in English (lbs, mph, and miles) or Metric units (kg, kph, and kilometers) of measure.
To determine the present configuration of your PaceMaster insert the magnetic key, if “USA” is displayed in the “RESULTS DISPLAY”
window it is configured in English, if “Eur” is displayed in the “RESULTS DISPLAY” window, it is configured in Metric. To change between
English and Metric insert the magnetic key, as soon as the current setting (USA or EUR) is displayed in the RESULTS DISPLAY window,
press and hold the
Calories
Distance
Aerobic Pts
button until the setting changes. Press
(ENTER)
to confirm the selection.
SETTING YOUR WEIGHT
Your PaceMaster calculates caloric expenditure based on the formula developed by the American College of Sports Medicine. To ensure
accuracy, your weight is required. Once the magnetic key has been inserted Press the Incline
buttons to set your weight,
then press the
(ENTER)
button.
WARM UP AND COOL DOWN
By warming up prior to beginning the aerobic phase of your workout, you accomplish 2 goals; you stretch and warm up the muscles of the
back and extremities and create a slight acceleration of the heart rate so that the body can move gradually into the higher heart rate of the
aerobic phase. The aerobic phase is followed by a 2 ½ minute cool down in which you keep moving at a slower pace. This allows your
heart rate to gradually decline and your body to gently adjust to the end of a workout instead of abruptly stopping. The cool down phase
also allows blood to be pumped from the lower extremities back to the central circulatory system. Simply put, the function of warming up
and cooling down is to ease you from a resting state into an active state and back to a resting state.
The treadmill’s computer, based on your main exercise starting and finishing speeds respectively, automatically calculates warm up and
cool down speeds.
When in the warm up mode, the TIMER display window counts down from 2 ½ minutes and the Warm Up indicator light will blink. When in
the Cool Down mode, the TIMER display window counts down from 2 ½ minutes and the Cool Down indicator light will blink.
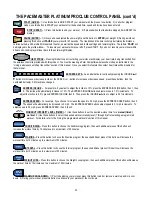
To add warm up and/or cool down to a TIMED workout press the Warm Up / Cool Down button. The indicator light will blink, indicating that
the desired mode has been added to your workout. You will also notice that the workout time increases by 2 ½ minutes for each addition.
To shorten the warm up mode, press the Warm Up / Cool Down button once. Warm up will be ended and you will advance into the main
exercise. To shorten the main exercise, press the Warm Up / Cool Down button and you will automatically begin the cool down phase. To
end the cool down, press STOP and your session will come to a close.
A cool down phase can be added to any workout (even if it wasn’t chosen prior to beginning the workout) by pressing the Warm Up / Cool
Down button.
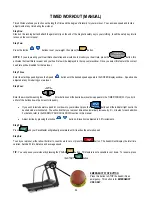
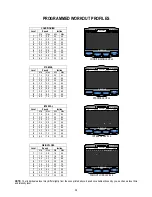
Now you are ready to choose your workout mode. Whether it is Quick Start, Timed Workout (Manual), or one of the four Programmed
Workouts, the following pages give you step-by-step instructions on how to use each workout.


