background image

Instruction Manual 

Updated11/2013

14 

| 24

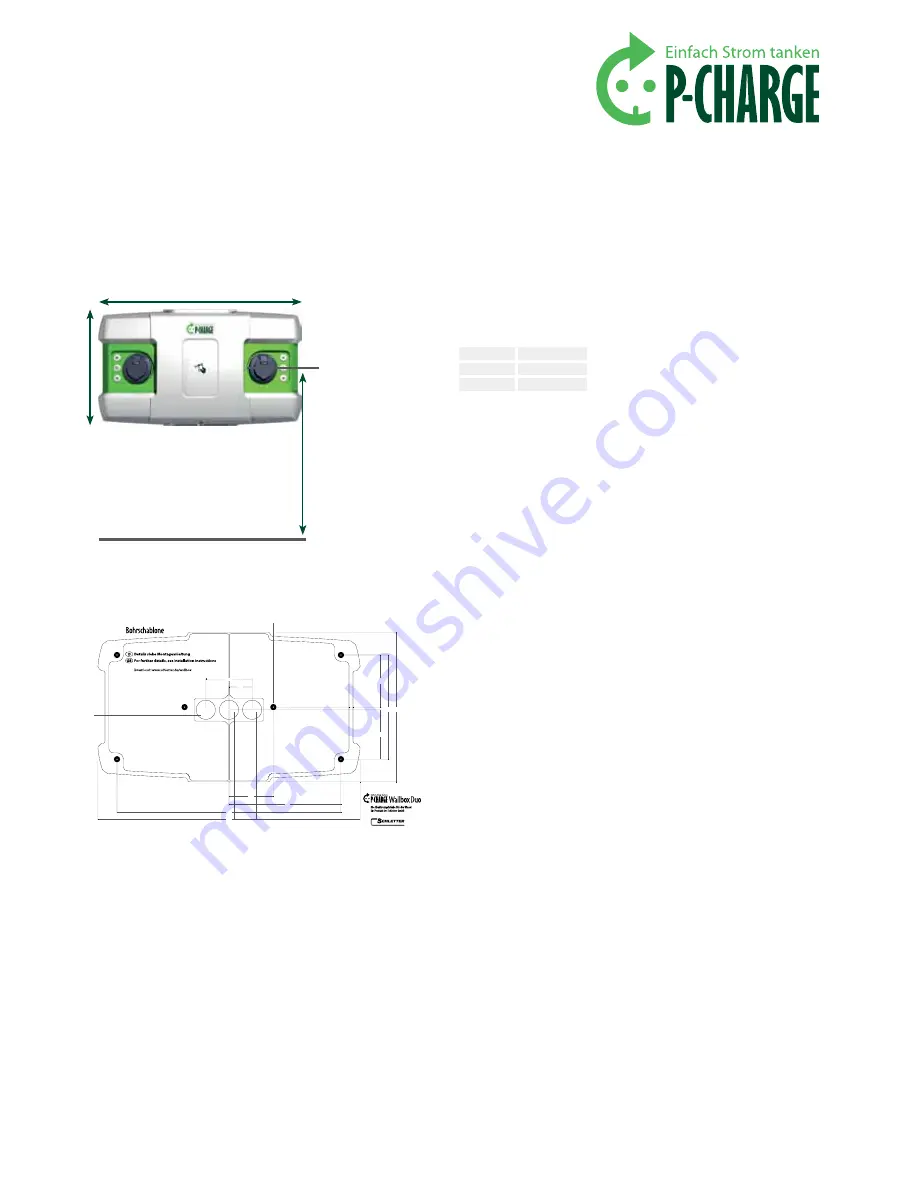
387,2

270,0

135,0

128,0

679,2

580,2

120,0

60,0

290,1

115,0

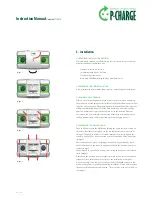
5.6 mounting the Wallbox

The desired location and position of the Wallbox should be determined prior 
to installation. Please take the measurements of the Wallbox Duo into account!

We recommend that the charging points be located at a height of approx. 
1300mm above ground level, see 

image 5

.

Please be aware of the Wallbox in-wall supply line when positioning the drill-
ing template. The left bushing is for the customer-installed ventilation system, 
the middle bushing for the voltage supply line to the Wallbox and the right 
bushing for a data cable to the EWS Box, see 

image 6

.

The Wallbox should be mounted in a position which allows for optimal access-
ibility by the user. Please ensure that you take into account the position of the 
charging sockets on the electric vehicle and that the charging cables are of 
appropriate length.

5.6.1 mounting the Wallbox rear panel

1. 

Position the enclosed drilling template horizontally in the desired Wall-
box location and secure the drilling template (with tape if necessary) to 
the wall. Mark the 6 drill holes with a pencil, see 

image 6

.

2. 

Remove the drilling template and drill 6 holes using a drill bit with a dia-
meter of 10.0mm. Ensure that the holes are drilled to a sufficient depth to 
receive the wall-plugs/dowels.

3. 

Fit each of the 6 M8x100 wafer-head screws with a sealing rubber washer. 
Position the cable bushing openings at the rubber seals in such a way as 
to facilitate the feed-through of your connecting cables 

(image 6)

.

from here on, the Wall-mounting shoulD be performeD by at 
least tWo people.

4. 

Laying the supply lines 
a.   on-wall: Feed supply lines into the glands (only once rear panel has  
      been mounted should the glands be secured) 
b.   in-wall: Feed the connecting cables through the rear panel

5. 

One person should now hold the rear panel while the second person fits 
the base plate with the housing onto it. Position the rear panel with its 
base plate on the prepared wall (drilled holes) and insert each of the 6 
M8x100 wafer-head screws into its designated drill hole. The position of 
the holes in the wall for the wafer-head screws should correspond to the 
positions of the holes drilled in the template.

6. 

Tighten the screws lightly with a 6-Lobe screwdriver TX40.

7. 

Re-align the Wallbox Duo and fully tighten the screws appropriately.

8. 

Connect the Wallbox voltage supply cable to the designated main con-
nection terminal at X1. Check that the terminals are secure.

700 mm

335 mm

1300 mm

Ground level

Image 5

height


335 mm

Width


700 mm

Depth


170 mm

Image 6


6x drilled holes

 

Bushing - data cable

 

Bushing - power supply cable


Activation of customer-installed  


ventilation system

Содержание Wallbox Duo

Страница 1: ...Compact design for wall mounting for various areas of operation Instruction Manual Updated11 2013 Image P CHARGE Wallbox Duo RFID Image P CHARGE Wallbox Duo push buttons Please keep these instructions...

Страница 2: ...elements 8 4 3 Electrical components 9 4 4 Socket equipment 9 4 5 Communication via EWS Box 10 4 6 Technical data independent of variant 10 4 7 Technical data independent of equipment 11 5 Installatio...

Страница 3: ...l Updated11 2013 3 24 8 General information 20 8 1 Rating plate 20 8 2 Service notes 20 8 3 Trouble shooting 20 9 Conformity 22 9 1 Associated guidelines and standards 22 10 Links for support 23 11 Se...

Страница 4: ...er additional functionality Working in conjunction with the SmartPvCharge or another embedded system the electric vehicle can be charged using surplus PV energy only if so required Systems such as cha...

Страница 5: ...ecognize potential hazards 2 3 Person instructed in electrics The operation of the P CHARGE Wallbox Duo must be driven by a person who is fully conversant with the electrics of the system and in full...

Страница 6: ...taller Warning Danger of suffocation asphyxiation Charging gassing batteries in an interior space can lead to asphyxiation According to the IEC 61851 1 the customer installed exhaust ventilation syste...

Страница 7: ...on must be observed 3 Scope of delivery Please first check the physical condition of your delivered product and en sure that it is complete Please do not throw the package as this may result in damage...

Страница 8: ...use of economi cal night time energy or time apportioned prioritized fleet management This functionality is only available if the Wallbox is connected to a server Left charging socket RFID card reader...

Страница 9: ...er phase 100 Imp kWh Pulsation according to output kWh Consumption is displayed in kWh units L1 L2 L3 With P U I or error message the relative phase is displayed Error With missing phases or incorrect...

Страница 10: ...request Dimensions Weight W H D approx 700 x 335 x 170 mm Weight variant specific approx 17 kg Installation and assembly Wall mounting Recommended installation height 1300 mm above top ground surface...

Страница 11: ...60 hPa 4 7 technical Data inDepenDent of eQuipment variant e car basic e car mixed e car premium variant e car basic e car mixed e car premium item no 261010 000 261010 300 261010 400 item no 261010 0...

Страница 12: ...t in damage to cabling particularly to cable strings leading to the charging sockets 5 4 Preparing the Wallbox Duo Open the front cover to the Wallbox by turning the key in the lock located on the und...

Страница 13: ...ful dust amount protection against splashing water from any direction is safeguarded following mounting and installation of the cable entry glands i e appropriate cable entries must be used Cable glan...

Страница 14: ...10 0mm Ensure that the holes are drilled to a sufficient depth to receive the wall plugs dowels 3 Fit each of the 6 M8x100 wafer head screws with a sealing rubber washer Position the cable bushing op...

Страница 15: ...ar panel 2 Next push the housing from the front up and over the rear panel Position the housing carefully to ensure that the slots fit around the respective cable bushings of the electrical components...

Страница 16: ...puter laptop via Ethernet and the EWS Box has to be configured properly For more detailed information on these EWS Box configuration settings please refer to the Links for support stated in Chapter 10...

Страница 17: ...lash Press the green flashing button to start the charging process The button is backlit in green throughout the entire charging process terminate charging process step 1 To end a charging session hol...

Страница 18: ...tions under Chapter 4 Installation System parameters Start charging process Step 1 To start a charging session plug the cable for the electric vehicle into the ap propriate charging socket Step 2 The...

Страница 19: ...icle into the ap propriate charging socket Step 2 The Optimized Charging process is selected by pressing Button 2 or 5 respectively Depending on the parameters chosen for server connection the chargin...

Страница 20: ...t intervals Type of function ality audit Inspector Electrical plants and fixed electrical installations in special installations or locations DIN VDE 0100 Group 700 1 year for an orderly condition Qua...

Страница 21: ...EWS Box pins may not be correct In this case please contact your service partner Error Activate contactor Here there is a faulty contact in the EWS Box in the contactor terminal X102 at contactor EV 1...

Страница 22: ...mmunity test IEC 61000 4 2 2009 and or EN 61000 4 2 Testing and measurement techniques Electrostatic discharge immunity test IEC 61000 2 2 2002 and or EN 61000 2 2 Environment Compatibility levels for...

Страница 23: ...tructions_V1_I800025GB pdf EWS Box Quick guide to operations HTML configuration www schletter de EN download traffic engineering ews box html P CHARGE_EWS Box_ _Administration_V1_I800024GB pdf EWS Box...

Страница 24: ...In the event of a warranty claim the company Schletter GmbH shall bear the costs required for transport travel labour and materials only excluded are the additional and potentially substantial costs i...

Отзывы: