background image

19 


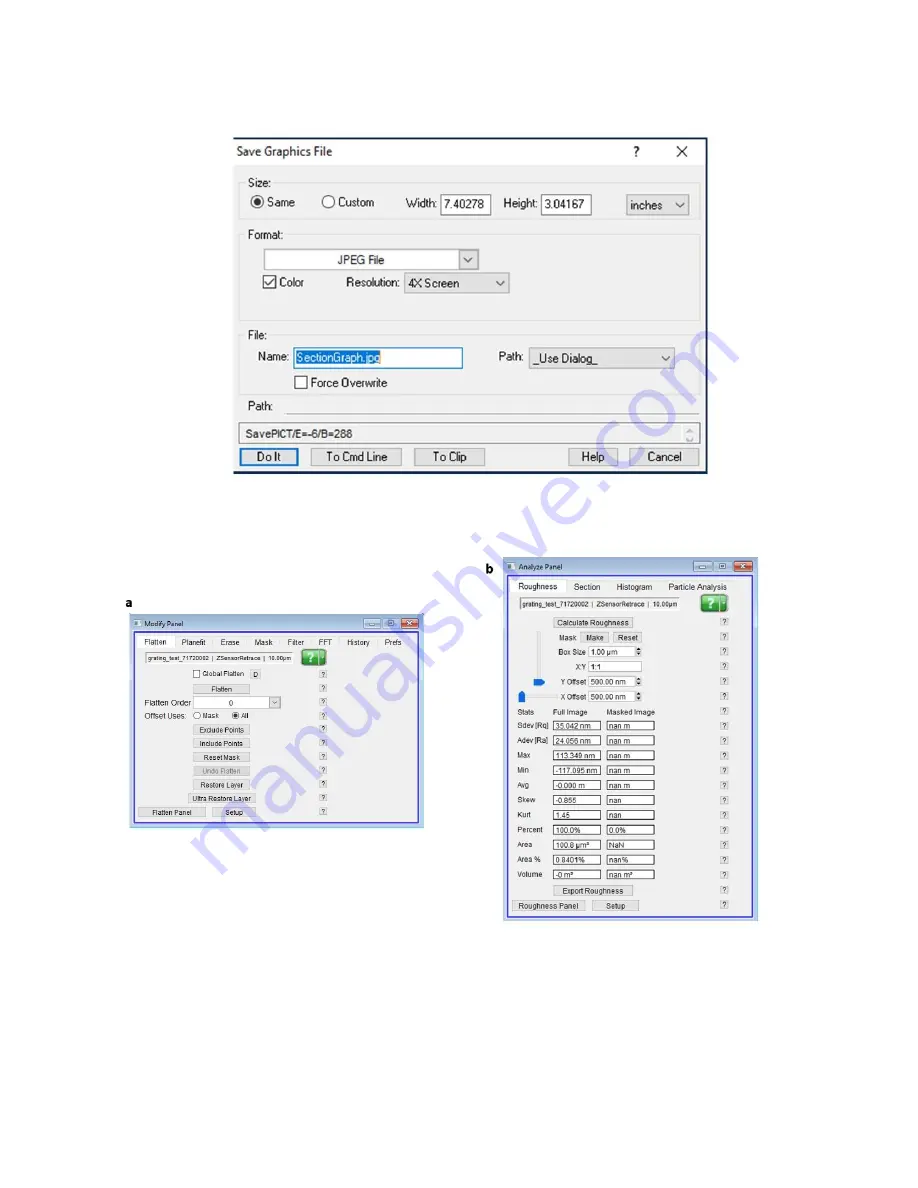
Figure 15. An image of the Save Graphics File window that allows the user to export data as an image  


Figure 16. An image of the Modify panel (a), in 

which the user may “ultra restore” data back to the raw 

format. An image of the Analyze panel (b) is also included, where the user may obtain useful 
information about the surface roughness of a sample. 


Содержание Asylum Jupiter XR

Страница 1: ...tion 11 Toggle back to tip view and click Move to Pre Engage Height 12 Tune cantilever for 1V amplitude 13 Click Start Tip Approach 14 Set up Master Panel Input scan size and rate Set Setpoint to 800 mV Give file a name and designate a file path for saving data 15 Click Frame Up Frame Down to start tip raster Optimize data image a Lower and tune setpoint until image shows up in Height data window ...

Страница 2: ...2 Table of Contents Introduction and Hardware Overview pg 3 Before You Get Started pg 6 Performing Tapping Mode AFM pg 6 Saving data as an image and image processing pg 18 Changing the AFM Probe pg 21 ...

Страница 3: ...ugh in this tool the laser appears red Another exciting improvement is the capability of a fast scan mode A surface scan that would take 4 5 minutes in traditional tapping mode takes about 1 minute with fast scan tapping mode This mode requires a tip especially designed for fast scans and the tool has some hardware differences that make fast scan possible The Hardware The large module to the left ...

Страница 4: ...with the hood opened Including a an image of the stage in the foreground and the z scanner head in the background indicated by a green box Also pictured b is an image of the stage from the top down The locations of the embedded sample clamping magnets are indicated by red circles and are labeled with letters that match the labeling in the Jupiter software Computer components that are control the t...

Страница 5: ...re One is the joystick Fig 4a The other piece of hardware is a dark blue box with silver wheels referred to as the hamster wheel it has 2 wheels inner and outer that move independently of each other Figs 4b and 4c The hamster wheel is useful in the software to optimize data scanning parameters Figure 4 Images of the desktop hardware including a the joystick In b the user s finger is manipulating t...

Страница 6: ...rce is provided by an external pump and is delivered through circular channels on the sample stage The smallest sample that can by clamped by the vacuum is 2 cm x 2 cm Additional screws may be removed from the stage to expand the clamping area to accommodate an 8 wafer If your sample is too small to be clamped by the vacuum we recommend mounting the sample to a magnetic disk with paste Magnetic di...

Страница 7: ...ir Topography Configure screen Drag the Jupiter software window in the bottom right hand corner to expand the Jupiter software into both monitors Left click on any panel and drag it to move it to a new location A useful configuration would be to put the Engage Panel Video Panel the Sum and Deflection meter and the Master Panel on the left and to put the Height Retrace Amplitude Retrace Phase Retra...

Страница 8: ...ith 4 numbered panels these panels are the Master panel the Engage panel the Sum and Deflection panel and the Video panel In b an image of the right hand screen is shown with 5 numbered panels including the Height Retrace Phase Retrace Z Sensor Retrace Amplitude Retrace and the Master Channel panel ...

Страница 9: ...etail channels on the AFM head Lock the z scanner in place with the green lever Figure 7 The Stage Control section of the Engage panel that shows the locations of the Change Cantilever and Move to Position buttons Load sample In the Engage panel click on Change Sample This moves the sample stage from beneath the AFM head and toward front of the tool where the user can access it Open the hood If th...

Страница 10: ...ck transduces force as velocity in movement Pressing the joystick all the way to its travel path in any direction moves the stage more quickly than lightly tapping the joystick in any direction The goal here is to get the AFM head in a general location relative to the sample Finding a location for scanning and fine tuning the location is done later Press 3 on the joystick when you are satisfied wi...

Страница 11: ...tion is satisfactory zero the detector by clicking the red dot in the center of the crosshair on the left hand side of the Engage Panel You should see the Deflection value in the Sum and Deflection panel decrease to 0 0 10 Fig 10 In the Video panel Fig 9b use the mouse pointer to indicate a location very close to the base of the cantilever and right click in this location to spot on the BlueDrive ...

Страница 12: ...eDrive laser are circled in blue the arrow keys for moving the sample stage are indicated by green boxes the light intensity slider I is indicated with an orange arrow and the image zoom in out slider is indicated with a purple arrow Figure 10 An image of the Sum and Deflection Meter panel The Deflection value is circled in green When the detector laser is in the correct location this can be zeroe...

Страница 13: ...n crosshair used to mark the tip location indicates to the user where the AFM tip will land during the scan When the user is satisfied with the location click on the SET button to the right of the Focus on Sample button in the Engage panel The user should click on Focus on Tip to toggle back to the tip view and check that the tip is still in focus Then the user should click Focus on Surface to tog...

Страница 14: ...plitude indicated by the red circle is set to 1 00 V The GetReal button indicated by the green square opens a menu of commonly used AFM probes Figure 12 The thermal tune window with a Gaussian curve Right click on the apex of the curve as indicated with the red arrow and select Fit Thermal Data ...

Страница 15: ...Figure 13 The Cantilever tune window after clicking Auto Tune indicated by the red arrow The computer calculates the resonance frequency of the cantilever black trace Figure 14 An image of the Master Panel ...

Страница 16: ...ticks or flash drives to retrieve data from the computer C drive to minimize the risk of transferring viruses When the user is satisfied with the initial changes to the Master panel begin the tip raster and data collection by clicking Frame Up or Frame Down in the Master panel As data fills in in the data windows on the right hand side of the screen the user will modify image parameters in order t...

Страница 17: ...he AFM head far above the sample stage and moves the sample stage out of the tool toward the user The user will remove their sample from the stage Turn off the pump If screws were removed to expand the stage vacuum clamp please replace them If desired the user may unload the tip and reclaim it Fill out the log book Log out of Windows Turn off the pump if it was in use replace screws in sample stag...

Страница 18: ...ta by toggling between the HtR AmR PhR and ZSr respectively tabs in this window The user may be curious about the difference between height and z sensor data The shortest explanation is that for data in the micron range down to 100 nm the z sensor data tends to be the best image with less noise For images with height data that is less than 100 nm the height channel is the best The other data chann...

Страница 19: ... user to export data as an image Figure 16 An image of the Modify panel a in which the user may ultra restore data back to the raw format An image of the Analyze panel b is also included where the user may obtain useful information about the surface roughness of a sample ...

Страница 20: ...ughness tab Fig 16b The fields are automatically populated with surface roughness data related to the full image The user can define a box shaped mask to calculate roughness of a box shaped subsection of the image The Section tab of this window allows the user to draw a line on the data image and the software will calculate the length of the line or cursors may be dropped on the line in order to m...

Страница 21: ...d replace a probe from the AFM z scanner The user will need to provide a new probe and a pair of sharp tipped tweezers The user will also need a very small Phillips head screwdriver this is provided in the small clear toolbox on the control desk Figure 18a Figure 18 Image of a the tools of the trade including a box of fresh tips sharp tipped tweezers and a small Phillips head screwdriver and b and...

Страница 22: ...ure 19 Images of a the user disengaging the green lever on the AFM head and b the correct technique for grasping and removing the z scanner Carefully carry the z scanner over to the stereoscope and place it on the table The beige disk that forms the tip holder should face upward Fig 18b Use the Phillips head screwdriver to loosen the central screw by a few turns BUT DO NOT REMOVE IT COMPLETELY Fig...

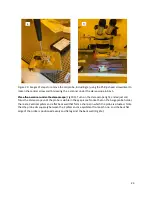
Страница 23: ...0b Turn on the stereoscope light and adjust and focus the stereoscope until the probe is visible in the eyepieces Notice that on the beige probe holder there are 2 vertical pillars and a flat back wall that form a channel in which the probe is situated Note that the probe sits squarely between the 2 pillars and is equidistant from each one and the back flat edge of the probe is positioned evenly a...

Страница 24: ...he tip holder Use the sharp tips of the tweezers to make very fine adjustments of the probe position Again the flat edge of the probe shall lie flush and square against the back wall of the channel and equidistant from either pillar Fig 21a Use one hand to manipulate the tweezers and steady the hand with the opposite hand This step is where viewing the tip holder under the stereoscope is the most ...

Отзывы: