Orthman 125-082-01-EN-OM Скачать руководство пользователя страница 80

MAINTENANCE AND SPECIFICATIONS

1TRIPR II Row Units OM-EN 

7-6

ORM000263

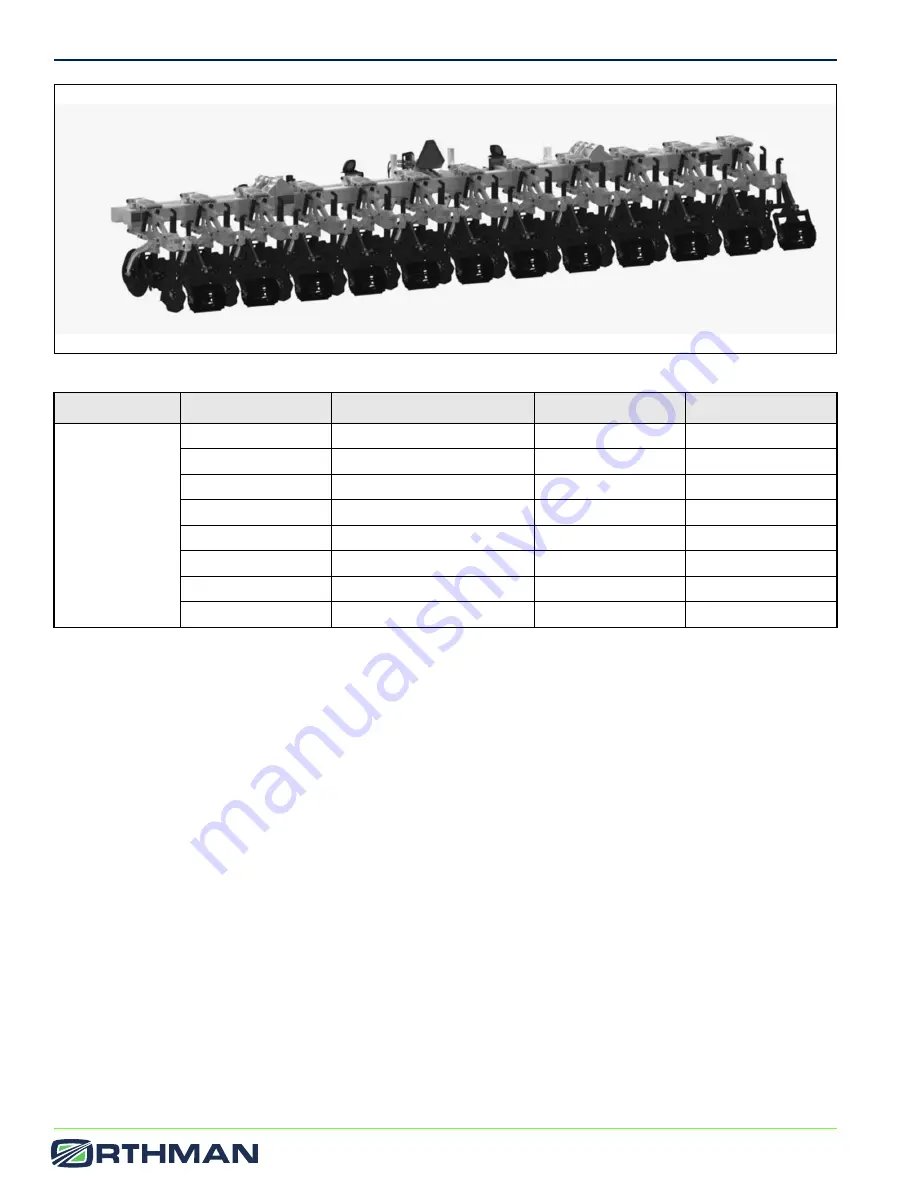
Figure 7-2: Folding Machine (12 rows)

Number of Rows

Row Spacing

Weight

Transport Width

Mounted 

Folding 

Machines

8

30 in (76.2 cm)

6790 lb (3080 kg)

11.7 ft (3.9 m)

8

36 in (91.4 cm)

7072 lb (3208 kg)

13.8 ft (4.6 m)

8

38–40 in (96.5–101.6 cm)

7164 lb (3250 kg)

14.7 ft (4.9 m)

12

30 in (76.2 cm)

9660 lb (4382 kg)

16.7 ft (5.6 m)

12

36 in (91.4 cm)

9883 lb (4483 kg)

19.3 ft (6.4 m)

12

38–40 in (96.5–101.6 cm)

10155 lb (4606 kg)

21.3 ft (7.1 m)

16

30 in (76.2 cm)

12368 lb (5610 kg)

21.7 ft (7.2 m)

16

38–40 in (96.5–101.6 cm)

15764 lb (7150 kg)

28.1 ft (9.4 m)

Содержание 125-082-01-EN-OM

Страница 1: ...Operator s Manual 1TRIPR II ROW UNITS Part 125 082 01 EN OM Rev A ...

Страница 2: ...Intentionally Left Blank Page ...

Страница 3: ... of Signal Words 2 4 Shutdown and Storage 2 4 For Your Protection 2 4 Equipment Safety Guidelines 2 5 Safe Transport 2 5 Safe Operation 2 5 Warning and Safety Lights 2 6 Rear View of Toolbar 2 6 Slow Moving Vehicle SMV 2 7 No Riders 2 7 Prepare for Emergencies 2 7 Safety Never Hurts 2 7 Practice Safe Maintenance 2 8 Anhydrous Ammonia NH3 and Liquid Fertilizer 2 9 Orthman Serial Number Plate 2 9 Sa...

Страница 4: ...t Installation 4 15 Mole Shank Shin Cap Installation 4 16 Automatic Reset AR Trip Linkage Installation 4 17 Operation and Field Settings Toolbar Height and Orientation 5 2 Row Unit Depth 5 2 Field Adjustments 5 4 Row Unit Down Pressure 5 4 Row Unit Down Pressure Adjustment 5 5 Row Cleaner Assembly Depth 5 6 Row Cleaner Assembly Width 5 8 Fore and Aft Adjustment 5 8 Rigid Row Cleaner 5 9 Floating R...

Страница 5: ...aner Assembly and Tillage Shank 6 2 Row Unit Plugs With Field Residue Between the Tillage Shank and Wavy Coulters 6 2 Field Residue Plugs Between Row Units 6 3 Row Unit Does Not Trip or Trips Too Easily 6 3 Shear Bolt Will Not Shear or Shears Too Easily 6 3 Maintenance and Specifications Practice Safe Maintenance 7 2 Torque Specifications 7 2 Standard Fasteners 7 2 Metric Fasteners 7 3 Lubrication...

Страница 6: ...1TRIPR II Row Units OM EN TOC iv Page Intentionally Blank ...

Страница 7: ...Chapter 1 1TRIPR II Row Units OM EN 1 1 Introduction To the Dealer 1 2 Delivery 1 2 Product Description 1 3 Purpose of This Manual 1 3 Warranty 1 4 ...

Страница 8: ...erator s manual is included Date set up Signature Delivery Checklist Introduce the machine to the customer Give the customer the operator s manual and encourage them to read it Make the customer aware of all the safety precautions that must be exercised when using and transporting the machine Make customer aware of the different tooling options available The machine does not come set to run in the...

Страница 9: ...rground obstructions and then automatically resets An adjustable row cleaner features rugged notched disc blades to remove plant residue from the strip clearing a path for rear tooling and the subsequent planter operation Orthman s precision tillage shank shatters compaction eliminates subsoil voids increases water infiltration and promotes vigorous root growth through all stages of seed developme...

Страница 10: ...l warranty repair OMI reserves the right to adjust warranty labor credits so as not to exceed believed normal repair times as directed by warranty governing laws OMI obligation under this warranty shall be limited to repairing or replacing free of charge to the purchaser any part in our judgment showing evidence of such defect provided further that such part shall be returned within thirty 30 days...

Страница 11: ... Signal Words 2 4 Shutdown and Storage 2 4 For Your Protection 2 4 Equipment Safety Guidelines 2 5 Safe Transport 2 5 Safe Operation 2 5 Warning and Safety Lights 2 6 Rear View of Toolbar 2 6 Slow Moving Vehicle SMV 2 7 No Riders 2 7 Prepare for Emergencies 2 7 Safety Never Hurts 2 7 Practice Safe Maintenance 2 8 Anhydrous Ammonia NH3 and Liquid Fertilizer 2 9 Orthman Serial Number Plate 2 9 Safet...

Страница 12: ... information on these hazards to your workers High Risk Factors on Farms The following factors may increase risk of injury or illness for farm workers Age Injury rates are highest among children age 15 and under and adults over 65 Equipment and Machinery Most farm accidents and fatalities involve machinery Proper machine guarding and performing equipment maintenance according to manufacturers reco...

Страница 13: ...t help when the load is too heavy Inspect all lifting chains straps or cables routinely to make sure they are in good condition Livestock handling Serious injury or death resulting from being pinned struck or trampled Always make sure you have adequate room and an escape route Machinery Equipment Cuts abrasions amputations or death Thoroughly read and understand your Owners Equipment Manual OEM Ne...

Страница 14: ...f the implement before lowering Lower the implement to the ground place the tractor in park turn off the engine and remove the key DANGER Avoid crushing Failure to follow this information will result in death or serious injury Use bar stands and cylinder stops to support the implement Store the implement on a clean dry and level surface An uneven surface could cause the implement to shift or fall ...

Страница 15: ...use independent braking with the implement in tow as loss of control and or rollover can result Reduce speed if the towed implement is not equipped with brakes Do not coast Always keep the tractor or towing device in gear to provide engine braking when traveling downhill Comply with state and local laws governing implement transport Safe Operation CAUTION Read and understand the entire contents of...

Страница 16: ...n Replace missing or damaged lights immediately Comply with state and local laws governing implement safety lighting Rear View of Toolbar See Figure 2 1 NOTES Two sided amber lights 3 must be visible from the front and rear of the implement Orthman double bar toolbar is shown Orthman rigid toolbar is similar ORM000298 Figure 2 1 1 Orange fluorescent non reflective decal 6 used 3 Two sided amber li...

Страница 17: ...sible fire extinguisher at all times Keep a readily accessible stocked first aid kit and emergency phone numbers for your doctor hospital ambulance and fire department Wear protective clothing and equipment Wear clothing appropriate for the situation Protect your eyes ears hands and feet with the use of protective goggles ear plugs gloves boots etc Safety Never Hurts CAUTION Read and understand th...

Страница 18: ...he tractor and implement when connecting or disconnecting the implement Always place the tractor in park and turn off the engine before connecting or disconnecting the implement Injury or death can result from being trapped between the tractor and implement DANGER Avoid high pressure fluid hazards Failure to follow this information will result in death or serious injury Relieve hydraulic pressure ...

Страница 19: ...lable from the following recognized sources American National Standards Institute ANSI www ansi org 212 642 4900 Material Safety Data Sheets MSDS www msdsonline com National Safety Council www nsc org necas The Fertilizer Institute www tfi org United States Department of Transportation USDOT www dot gov Compressed Gas Association www cganet com Orthman Serial Number Plate The Orthman serial number...

Страница 20: ...Orthman Right Side Decals NOTE Orthman double bar toolbar is shown Orthman rigid toolbar is similar ORM000250 Figure 2 5 C A U T I O N 1 Read and understand all operator manuals before implement use 2 Follow all tractor or towing device operating procedures and safety guidelines 3 Do not allow riders on implement 4 Lower implement to the ground place tractor in park turn off engine and remove key ...

Страница 21: ...s on implement 4 Lower implement to the ground place tractor in park turn off engine and remove key Wait for all moving parts to come to a complete stop before working on implement 5 Be extremely careful working around unshielded sharp edges 6 Make sure all safety lighting and decals are clean Use hazard lights when in transport 7 Engage all safety devices before transporting or working beneath im...

Страница 22: ...SAFETY INFORMATION 1TRIPR II Row Units OM EN 2 12 Page Intentionally Blank ...

Страница 23: ...Chapter 3 1TRIPR II Row Units OM EN 3 1 Major Components Main Frame 3 2 Tail Section 3 3 Rolling Basket Assembly 3 4 Coastal Plains Roller Assembly 3 5 ...

Страница 24: ...ow cleaner assembly 6 is shown The floating row cleaner assembly is similar ORM000251 Figure 3 1 1 Toolbar mount 5 Main frame 2 Parallel linkage 2 used 6 Row cleaner assembly 3 Down pressure spring 2 used 7 Scraper 4 Shear bolt 8 Depth band coulter assembly 2 6 8 1 7 3 4 5 2 ...

Страница 25: ...llage shank assembly 2 is shown The liquid fertilizer boot dry fertilizer 1 5 inch boot shallow tillage shank mole knife shank and AA knife shank assemblies are similar ORM000252 Figure 3 2 1 Auto reset AR trip linkage optional 3 Tail section 2 Tillage shank assembly 4 Wavy coulter assembly 3 2 1 4 ...

Страница 26: ...3 4 Rolling Basket Assembly NOTE The 14 inch berm promoting rolling basket is shown The 14 inch standard 8 inch narrow standard and 10 inch vertical tillage rolling baskets are similar ORM000058 Figure 3 3 1 Spring 2 Basket frame 3 Basket 1 2 3 ...

Страница 27: ...ow Units OM EN 3 5 Coastal Plains Roller Assembly NOTE The 12 5 inch coastal plains roller is shown The 20 inch coastal plains roller is similar ORM000255 Figure 3 4 1 Turnbuckle 3 Scraper 5 Guard 2 Roller frame 4 Roller 1 2 3 4 5 ...

Страница 28: ...MAJOR COMPONENTS 1TRIPR II Row Units OM EN 3 6 Page Intentionally Blank ...

Страница 29: ...ket Assembly Installation 4 8 Tillage Shank 4 9 Shallow Tillage Assembly 4 9 Liquid Fertilizer Mole Shank Assembly 4 9 Mole Knife Assembly 4 10 AA Knife Assembly 4 10 Dry Mole Shank Assembly 4 11 Air Diffuser Installation 4 11 Tillage Shank Installation 4 12 Mole Shank Assembly Fertilizer Tube Installation 4 13 Mole Knife Assembly Fertilizer Tube Installation 4 14 Dry Mole Shank Assembly Fertilize...

Страница 30: ...nits to the shipping configuration to avoid placing weight on the row cleaner or tillage shank assembly For more information on implement storage see Implement Storage on page 7 4 DANGER Avoid crushing Failure to follow this information will result in death or serious injury Make sure all personnel are clear of the implement before lowering CAUTION Be extremely careful working around unshielded sh...

Страница 31: ...are with hardware of an identical grade in order to restore the implement to original specifications See Implement Inspection on page 7 4 Implement to Tractor Connection DANGER Avoid crushing Failure to follow this information will result in death or serious injury Make sure all personnel are clear of the implement before lowering DANGER Avoid crushing Failure to follow this information will resul...

Страница 32: ...or in park turn off the engine and remove the key 2 Remove buildup of grease oil and debris prior to installing row unit mounts See Implement Inspection on page 7 4 3 Remove mount 3 from front of parallel linkage 5 of row unit 6 4 Leave wedge bolt 1 installed Slightly start wedge bolt threads into wedge 8 and position on toolbar 7 5 Install U bolts 4 and locking nuts 2 until mount is secure on too...

Страница 33: ...REPARATION AND SETUP 1TRIPR II Row Units OM EN 4 5 ORM000257 Figure 4 2 1 Wedge bolt 3 Mount 5 Parallel linkage 2 used 7 Toolbar 2 Locking nut 4 used 4 U bolt 2 used 6 Row unit 8 Wedge 3 1 8 7 5 6 5 4 2 ...

Страница 34: ...ry level surface DANGER Avoid crushing Failure to follow this information will result in death or serious injury Use bar stands and cylinder stops to support the implement 1 Lower the implement to the ground place the tractor in park turn off the engine and remove the key 2 Remove buildup of grease oil and debris prior to installing row unit mounts See Implement Inspection on page 7 4 3 Remove row...

Страница 35: ...D SETUP 1TRIPR II Row Units OM EN 4 7 ORM00528 Figure 4 3 1 Set back clamp 3 Adjustment bolt 2 used 5 Washer as needed 2 Parallel linkage 2 used 4 Bolt 6 used 6 Hole distance of 14 in 35 7 cm A A 2 4 4 3 1 2 5 1 6 3 ...

Страница 36: ... as well as implement damage Park the implement on a clean dry level surface DANGER Avoid crushing Failure to follow this information will result in death or serious injury Use bar stands and cylinder stops to support the implement 1 Lower the implement to the ground place the tractor in park turn off the engine and remove the key 2 Remove buildup of grease oil and debris prior to installing row u...

Страница 37: ...ions see Tillage Shank Installation on page 4 12 Shallow Tillage Assembly The shallow tillage assembly is a lower disturbance option that aids in Seedbed Preparation ORM000275 Figure 4 5 For tillage shank depth settings see Tillage Shank Depth Adjustment Chart on page 5 12 Liquid Fertilizer Mole Shank Assembly Two adjustable liquid fertilizer tubes 4 allow precision fertilizer placement at two sep...

Страница 38: ...izer tube allows for precise fertilizer placement as deep as the knife Precision fertilizer placement provides crop plants with timely fertilizer access to maximize development from germination through maturity ORM000302 Figure 4 8 For tillage shank depth settings see Tillage Shank Depth Adjustment Chart on page 5 12 1 Roll pin 5 Liquid fertilizer tube 2 Height adjustment hole 11 used 6 Shear bolt...

Страница 39: ...ble Liquid Tubes on page 5 18 and see Adjustable Dry Fertilizer Boot on Dry Mole Shank on page 5 19 For tillage shank depth settings see Tillage Shank Depth Adjustment Chart on page 5 12 Air Diffuser Installation The air diffuser can be mounted on either side of the row unit tail The air diffuser is designed to work with an input hose size of 2 in 5 cm inside diameter The output hose size is 1 1 4...

Страница 40: ... of grease oil and debris prior to installing tillage shank See Implement Inspection on page 7 4 CAUTION Be extremely careful working around unshielded sharp edges Injury may result from contact with sharp edges 4 Loosen jam nuts 2 and set bolts 3 to provide adequate shank housing clearance for the shank to be inserted in the bottom side of the tail NOTE Tail tapped holes are cast to both sides of...

Страница 41: ... this information will result in death or serious injury Use bar stands and cylinder stops to support the implement 1 Lower the implement to support blocks to attain proper height for fertilizer tube installation 2 Place the tractor in park turn off the engine and remove the key 3 Remove buildup of grease oil and debris prior to installing fertilizer tubes See Implement Inspection on page 7 4 CAUT...

Страница 42: ... Avoid crushing Failure to follow this information will result in death or serious injury Use bar stands and cylinder stops to support the implement 1 Lower the implement to support blocks to attain proper height for fertilizer tube installation 2 Place the tractor in park turn off the engine and remove the key 3 Remove buildup of grease oil and debris prior to installing fertilizer tubes See Impl...

Страница 43: ... blocks to attain proper height for fertilizer tube and dry fertilizer boot installation 2 Place the tractor in park turn off the engine and remove the key 3 Remove buildup of grease oil and debris prior to installing fertilizer tube and dry fertilizer boot See Implement Inspection on page 7 4 CAUTION Be extremely careful working around unshielded sharp edges Injury may result from contact with sh...

Страница 44: ... tractor in park turn off the engine and remove the key 2 Remove buildup of grease oil and debris prior to installing shin caps See Implement Inspection on page 7 4 CAUTION Be extremely careful working around unshielded sharp edges Injury may result from contact with sharp edges Avoid implement damage Do not strike foot piece ear 8 with hammer 3 Remove upper roll pin 1 from foot piece 2 ORM000281 ...

Страница 45: ...ease oil and debris prior to installing row unit mounts See Implement Inspection on page 7 4 NOTES It may be easier to manipulate the tail section of the row unit with the tillage shank in a raised position It may be desirable to have the 1tRIPr II machine lifted up with a tractor so there is no pressure on the tail section of the row units If machine is not hooked to a tractor it is important to ...

Страница 46: ... 13 and spring pins 11 13 Align springs and insert bolts 12 ORM000293 Figure 4 21 14 Insert bolts 1 jam nuts 2 and left down pressure spring 3 see Figure 4 19 on page 4 17 CAUTION Avoid injury Springs are under tension Adjust spring tension slowly Failure to follow this information will result in serious injury 15 Tighten spring tension bolts to factory settings See Automatic Reset AR Trip Linkage...

Страница 47: ... Cleaner 5 10 Rolling Basket Down Pressure 5 11 Rolling Basket Down Pressure Adjustment 5 11 Tillage Shank Assembly Depth 5 12 Tillage Shank Assembly Depth Adjustment 5 12 Tillage Shank Depth Adjustment Chart 5 12 Wavy Coulter Assembly Depth and Width 5 14 Wavy Coulter Assembly Depth Adjustment 5 14 Wavy Coulter Assembly Width Adjustment 5 15 Wavy Coulter Assembly Fore and Aft 5 16 Adjustable Liqu...

Страница 48: ... adjustments accordingly until the top and bottom of the toolbar operate parallel with the ground surface and the bottom of the toolbar operates at an approximate height of 30 32 in 76 81 cm above the ground surface For more information see the toolbar s operator manual After desired toolbar height and orientation is established set the tractor lower hitch stop lift assist wheels and or toolbar ga...

Страница 49: ...ETTINGS 1TRIPR II Row Units OM EN 5 3 ORM000260 Figure 5 1 Parallel Linkage ORM000261 Figure 5 2 Angled Linkage 1 Approximate height of 30 32 in 76 81 cm 2 Bottom of toolbar 3 Top of toolbar 4 Ground surface 1 2 3 4 3 1 4 2 ...

Страница 50: ...y Coulter Assembly Fore and Aft on page 5 16 Adjust rolling basket down pressure See Rolling Basket Down Pressure on page 5 11 Adjust automatic reset AR linkage See Automatic Reset AR Trip Linkage on page 5 21 Row Unit Down Pressure Two adjustable down pressure springs 4 supply row unit down pressure to assist with row unit tooling soil penetration After toolbar height and orientation is set row u...

Страница 51: ...UTION Be extremely careful working around unshielded sharp edges Injury may result from contact with sharp edges 3 Loosen the jam nuts 2 from the spring plugs 3 4 Adjust the down pressure adjustment bolts 1 NOTE Adjust both down pressure springs 4 evenly Turn clockwise CW to increase the spring tension creating more row unit down pressure Turn counterclockwise CCW to decrease the spring tension re...

Страница 52: ...round place the tractor in park turn off the engine and remove the key 2 Remove buildup of grease oil and debris prior to adjusting row cleaner assembly depth See Implement Inspection on page 7 4 CAUTION Be extremely careful working around unshielded sharp edges Injury may result from contact with sharp edges NOTE To gently remove surface residue with minimal soil disturbance the recommended row c...

Страница 53: ...OPERATION AND FIELD SETTINGS 1TRIPR II Row Units OM EN 5 7 ORM000286 Figure 5 4 1 Depth adjustment pin 3 Jam nut 5 Row cleaner assembly 2 Hairpin 4 Set bolt 6 Depth setting A A 4 2 1 6 3 5 ...

Страница 54: ...imilar DANGER Avoid crushing Failure to follow this information will result in death or serious injury Make sure all personnel are clear of the implement before lowering DANGER Avoid crushing An uneven surface could cause the implement to shift or fall resulting in injury or death as well as implement damage Park the implement on a clean dry level surface DANGER Avoid crushing Failure to follow th...

Страница 55: ... FIELD SETTINGS 1TRIPR II Row Units OM EN 5 9 Rigid Row Cleaner ORM000287 Figure 5 5 1 Snap ring 3 O ring 5 Row cleaner disc 7 Bushing 9 Nut 2 Cap 4 Bolt 6 Bushing 8 Washer 10 Width setting A A 10 1 3 2 4 5 6 7 8 9 ...

Страница 56: ...ERATION AND FIELD SETTINGS 1TRIPR II Row Units OM EN 5 10 Floating Row Cleaner ORM000299 Figure 5 6 1 Snap ring 3 Bolt 5 Bushing 7 Nut 2 Cap 4 Row cleaner disc 6 Washer 8 Width setting A A 8 3 2 1 4 5 6 7 ...

Страница 57: ...clean dry level surface DANGER Avoid crushing Failure to follow this information will result in death or serious injury Use bar stands and cylinder stops to support the implement 1 Lower the implement to the ground place the tractor in park turn off the engine and remove the key 2 Remove buildup of grease oil and debris prior to adjusting rolling basket down pressure See Implement Inspection on pa...

Страница 58: ...th as well as implement damage Park the implement on a clean dry level surface DANGER Avoid crushing Failure to follow this information will result in death or serious injury Use bar stands and cylinder stops to support the implement 1 Lower the implement to the ground place the tractor in park turn off the engine and remove the key 2 Remove buildup of grease oil and debris prior to adjusting till...

Страница 59: ...RATION AND FIELD SETTINGS 1TRIPR II Row Units OM EN 5 13 ORM000285 Figure 5 8 1 Tillage shank assembly 3 Jam nut 2 used 5 Depth adjustment pin 2 Set bolt 2 used 4 Hairpin 6 Depth setting A A 1 2 4 5 6 1 3 ...

Страница 60: ...lt in death or serious injury Use bar stands and cylinder stops to support the implement 1 Lower the implement to the ground place the tractor in park turn off the engine and remove the key 2 Remove buildup of grease oil and debris prior to adjusting wavy coulter assembly depth and width See Implement Inspection on page 7 4 CAUTION Be extremely careful working around unshielded sharp edges Injury ...

Страница 61: ...dth Adjustment 1 Loosen nuts 4 2 Adjust wavy coulter disc assemblies 3 to desired width 3 Tighten nuts to specification See Torque Specifications on page 7 2 ORM000288 Figure 5 10 1 Width setting 2 used 2 Bolt 2 used 3 Wavy coulter disc assembly 2 used 4 Nut 2 used A A 4 1 2 3 3 2 2 1 ...

Страница 62: ...jury or death as well as implement damage Park the implement on a clean dry level surface DANGER Avoid crushing Failure to follow this information will result in death or serious injury Use bar stands and cylinder stops to support the implement 1 Lower the implement to the ground place the tractor in park turn off the engine and remove the key 2 Remove buildup of grease oil and debris prior to adj...

Страница 63: ...TION AND FIELD SETTINGS 1TRIPR II Row Units OM EN 5 17 ORM000290 Figure 5 11 1 Snap ring 3 Bolt 5 Spacer 7 Nut 2 Cap 4 Left wavy coulter assembly disc 6 Lock washer 8 Fore and aft setting A A 2 3 1 4 5 6 7 8 ...

Страница 64: ...ue to each user s agronomic requirements The tube retainer holes 4 are used to retain the liquid fertilizer tube or tubes Use the innermost hole for retention if you are only utilizing one fertilizer tube and use the outermost hole for retention if you are utilizing dual fertilizer tubes For more information on adjustable liquid tubes see Mole Shank Assembly Fertilizer Tube Installation on page 4 ...

Страница 65: ...er is applying fertilizer NOTE For example if you have the shank set to till at a depth of 9 in 22 86 cm the dry fertilizer boot would be applying the fertilizer at a depth of 4 in 10 16 cm The top holes are used to retain the dry fertilizer boot adjustment 7 This holder may be used in the orientation shown for applying at deeper settings and can be reversed to angle upwards for more clearance fro...

Страница 66: ...e will shear the upper bolt and the tail will rotate upward about the lower pivot pin to clear the obstacle NOTE If the shear bolt is damaged the operator should stop and replace the bolt Orthman recommends using a grade 5 bolt for replacement Higher or lower grade bolts may result in poor performance and cause damage to the implement CAUTION Be careful to not over tighten the shear bolt This coul...

Страница 67: ... shank 2 wavy coulters 3 and optional basket 4 can trip up and out of the ground When the obstacle is passed over four powerful reset springs 5 will drive the 1tRIPr II shank back into the ground The AR trip linkage helps to protect valuable tooling from breaking and bending in rough and rocky soil conditions The AR trip linkage may help but will not prevent damage from occasional glancing blows O...

Страница 68: ...C is from that line the easier it is to trip CAUTION Avoid injury Springs are under tension Adjust spring tension slowly Failure to follow this information will result in serious injury The AR trip linkage comes set from the factory to trip easily Operators can adjust this setting by loosening the jam nut 15 and adjusting the set bolt 16 One full turn of this set bolt represents about 1 8 in 0 32 ...

Страница 69: ...a shear bolt See Shear Bolt Protected Tail on page 5 20 The amount of force it takes to shear this bolt is slightly over 8000 lb 3629 kg Notice that the chart has values that exceeds 8000 lb 3629 kg Orthman Manufacturing recommends using extreme caution when adjusting the AR trip linkage to a setting above 8000 lb 3629 kg Using a setting that exceeds the 8000 lb 3629 kg mark is likely to increase ...

Страница 70: ...OPERATION AND FIELD SETTINGS 1TRIPR II Row Units OM EN 5 24 Page Intentionally Blank ...

Страница 71: ... the Depth Band Coulter Assembly and Row Cleaner Assembly 6 2 Row Unit Plugs With Field Residue Between the Row Cleaner Assembly and Tillage Shank 6 2 Row Unit Plugs With Field Residue Between the Tillage Shank and Wavy Coulters 6 2 Field Residue Plugs Between Row Units 6 3 Row Unit Does Not Trip or Trips Too Easily 6 3 Shear Bolt Will Not Shear or Shears Too Easily 6 3 ...

Страница 72: ...o not allow residue to pass through the row unit as effectively as drier conditions Lower row cleaner assembly to reduce the amount of field residue in front of the tillage shank See Row Cleaner Assembly Depth on page 5 6 Adjust toolbar height and orientation See Toolbar Height and Orientation on page 5 2 Alter ground speed to change rate at which field residue passes through row unit tooling Slow...

Страница 73: ...oling Slower ground speeds generally reduce plugging by allowing residue to pass smoothly through row unit tooling Decrease wavy coulter tillage width See Wavy Coulter Assembly Depth and Width on page 5 14 Increase distance between tillage shank assembly and wavy coulter assembly See Wavy Coulter Assembly Fore and Aft on page 5 16 Adjust row cleaner width See Row Cleaner Assembly Width on page 5 8...

Страница 74: ...TROUBLESHOOTING 1TRIPR II Row Units OM EN 6 4 Page Intentionally Blank ...

Страница 75: ...OM EN 7 1 Maintenance and Specifications Practice Safe Maintenance 7 2 Torque Specifications 7 2 Standard Fasteners 7 2 Metric Fasteners 7 3 Lubrication 7 4 Implement Inspection 7 4 Implement Storage 7 4 Specifications 7 5 Notes 7 8 ...

Страница 76: ...6 in 152 mm long and for all other types of bolts and screws of any length Lubricated means coated with a lubricant such as engine oil fasteners with phosphate and oil coatings or 7 8 in and larger fasteners with JDM F13C zinc flake coating Dry means plain or zinc plated without any lubrication or 1 4 to 3 4 in fasteners with JDM F13B zinc flake coating Bolt or Screw Size inches SAE Grade 1 SAE Gr...

Страница 77: ...zinc plated without any lubrication or M6 to M18 fasteners with JDM F13B zinc flake coating Bolt or Screw Size mm Class 4 8 Class 8 8 or 9 8 Class 10 9 Class 12 9 Lubricated Dry Lubricated Dry Lubricated Dry Lubricated Dry N m lb in N m lb in N m lb in N m lb in N m lb in N m lb in N m lb in N m lb in M6 4 7 42 6 53 8 9 79 11 3 100 13 115 16 5 146 15 5 137 195 172 N m lb ft N m lb ft N m lb ft N m...

Страница 78: ... 2 Before each use check hardware for wear and proper torque Replace damaged or missing hardware with hardware of an identical grade to restore the implement to original specifications Remove any buildup of grease oil and debris Replace all shields and guards Be sure all tools parts and service equipment are removed before you operate the implement Implement Storage Prior to storing the implement ...

Страница 79: ...m 3550 lb 1610 kg 12 ft 3 7 m 6 22 30 in 50 8 76 2 cm 4707 lb 2135 kg 15 ft 4 6 m 6 36 40 in 91 4 101 6 cm 4940 lb 2241 kg 19 ft 5 8 m 8 22 in 50 8 cm 5864 lb 2660 kg 15 ft 4 6 m 8 30 in 76 2 cm 6075 lb 2756 kg 20 ft 6 1 m 8 36 38 in 91 4 96 5 cm 6205 lb 2815 kg 24 ft 7 3 m 8 38 40 in 96 5 101 6 cm 6250 lb 2835 kg 25 ft 7 6 m 10 30 in 76 2 cm 7591 lb 3443 kg 20 1 ft 6 1 m 12 22 in 50 8 cm 8650 lb ...

Страница 80: ... 2 cm 6790 lb 3080 kg 11 7 ft 3 9 m 8 36 in 91 4 cm 7072 lb 3208 kg 13 8 ft 4 6 m 8 38 40 in 96 5 101 6 cm 7164 lb 3250 kg 14 7 ft 4 9 m 12 30 in 76 2 cm 9660 lb 4382 kg 16 7 ft 5 6 m 12 36 in 91 4 cm 9883 lb 4483 kg 19 3 ft 6 4 m 12 38 40 in 96 5 101 6 cm 10155 lb 4606 kg 21 3 ft 7 1 m 16 30 in 76 2 cm 12368 lb 5610 kg 21 7 ft 7 2 m 16 38 40 in 96 5 101 6 cm 15764 lb 7150 kg 28 1 ft 9 4 m ...

Страница 81: ...34 kg 11 3 ft 3 4 m 12 36 in 91 4 cm 19067 lb 8649 kg 18 9 ft 5 8 m 16 30 in 76 2 cm 21845 lb 9909 kg 21 3 ft 6 5 m 16 30 in 76 2 cm 22403 lb 10162 kg 16 3 ft 5 0 m 16 36 in 91 4 cm 22454 lb 10185 kg 25 ft 7 2 m 18 30 in 76 2 cm 23464 lb 10643 kg 26 5 ft 7 6 m 18 30 in 76 2 cm 23749 lb 10772 kg 16 3 ft 5 0 m Number of Rows Row Spacing Weight Transport Width XD Combo Machines 8 30 in 76 2 cm 16210 ...

Страница 82: ...MAINTENANCE AND SPECIFICATIONS 1TRIPR II Row Units OM EN 7 8 Notes ...

Страница 83: ...t 3 4 Row cleaner 3 2 Tail section 3 3 Tillage shank 3 3 Wavy coulter 3 3 D Delivery Checklist 1 2 Pre delivery checklist 1 2 Shipping configuration 4 2 Depth band coulter Component identification 3 2 Dry boot Adjustments 5 19 Installation on dry mole shank 4 15 Dry mole shank Boot and tube installation 4 15 Depth adjustment 5 12 Dry boot adjustments 5 19 Installation 4 12 Overview 4 11 Shin cap i...

Страница 84: ...justment 5 11 Installation 4 8 Row cleaner Component identification 3 2 Depth adjustment 5 6 Troubleshooting 6 2 Width adjustment 5 8 Row unit Adjustments 5 4 Air diffuser 4 11 AR trip linkage 4 17 Down pressure 5 4 Down pressure adjustment 5 5 Mounting 4 4 Orientation 5 2 Preparation 4 2 Rolling basket 4 8 Set back clamp 4 6 Shipping configuration 4 2 Tillage shank 4 9 Troubleshooting 6 2 6 3 S S...

Страница 85: ...0 Overview 4 9 Shallow tillage assembly 4 9 Troubleshooting 6 2 Toolbar See Implement Tooling Air diffuser 4 11 AR trip linkage 4 17 Rolling basket 4 8 Row unit 4 4 Set back clamp 4 6 Tillage shank 4 9 Torque Metric fasteners 7 2 Standard fasteners 7 2 Troubleshooting AR trip linkage 6 3 Row cleaner 6 2 Row unit 6 2 6 3 Shear bolt 6 3 Tillage shank 6 2 Wavy coulters 6 2 W Warranty 1 4 Wavy coulter...

Страница 86: ...m 75765 Road 435 Lexington NE 68850 USA Ag Products 308 324 4654 USA Repair Parts 866 324 7519 South Africa Ag Products 27 12 940 2155 For repair parts or service contact your certified Orthman dealer ORTHMAN MFG ...

Отзывы: