Ormed Artromot-F Скачать руководство пользователя страница 26

1. With power on, press the SET button.

The yellow light will appear indicating
that the controller is ready to receive
new programming. The LCD will flash
all the system icons.

2. Press the PAUSE button. The LCD

will only display the pause icon
(hourglass) and the two EXT and
FLEX hand icons.

3. Select flexion or extension by de-

pressing either the FLEX or EXT
button
. Press + or – buttons to
change the pause setting from 
0 to 30 seconds. Pause may be 
set independently in flexion and/or
extension.

4. When programming is complete,

press the SET button again to store
the settings in the hand-held pro-
gramming unit (yellow light will go
off). Or, press the SET button con-
tinue setting other operating features.

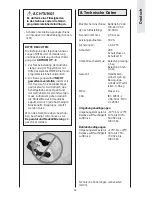
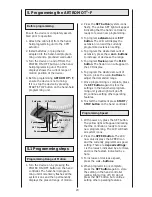
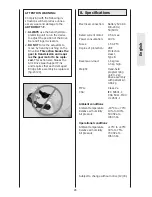
The Warm up feature starts the patient
off with 50 % less range of motion 
than programmed and gradually works
up to the full range of motion over
several cycles (i.e. if programmed range
is 0° to 120° treatment would begin at
half the range, 30° to 90°, and gradually
work up to the full range.) The device
needs 10 cycles to the full range of
motion.

1. Turn off the power from the POWER

ON/OFF switch on the hand con-
troller.

2. Place the Warm Up feature switch

in the ON position and then turn the
power on from the POWER ON/OFF
switch 
again. The thermometer
Warm-up feature icon will appear in
the LCD display.

3. When ready, start the device from the

START/ STOP button.

Reverse-on-load, Lock-Out and Timer
are features to be set by the medical
care giver only. Use by the patient could
result in injury.

The Reverse-on-load setting is pro-
grammed by the medical care giver 
to meet the treatment requirements 
for each patient. This feature is hidden
from the patient for reason and
safety.

1. Turn power off from the POWER

ON/OFF switch.

2. Simultaneously press and hold the

SPEED button and POWER ON
switch. The force icon will be dis-
played and the flexion and extension
icons will blink (-1 is lowest force
setting, 5 is highest force setting).

3. Select which range you wish to set

force in by choosing flexion or exten-
sion. Force may be set independently
in both flexion or extension.

4. With the + or – buttons increase or

decrease force setting.

5. Press the SET button to program the

new force setting.

The lock out feature allows the medical
Care giver to effectively lock out setting
to prevent a patient from making adjust-
ments. If any of the features are locked
out, the Lock-Out icon is displayed at all
times.

24

English

Programming Pause

Warm up feature

5.2 Programming the

special functions

Reverse-on-load

PRECAUTION!

While Warm Up feature is on, 
all settings on the hand-held 
programming unit are locked.

PRECAUTION!

The following are NOT for patient
use.

Lock-Out

Содержание Artromot-F

Страница 1: ...ARTROMOT F Gebrauchsanweisung Operating Instructions...

Страница 2: ...Ger tebeschreibung 2 Device description 6 10 8 7 9 1 3 4 5 20 18 17 16 11 2 19 12 13 15 13 14...

Страница 3: ...7 4 2 Einstellen des Ger tes f r die Daumenbehandlung 8 4 3 Einstellen des Ger tes f r die MP Block Behandlung 8 5 Programmieren der ARTROMOT F 9 5 1 Programmierschritte 9 5 2 Programmieren der Sonde...

Страница 4: ...32 Abbildungen Figures 1 2 3 4 5 6 7 8...

Страница 5: ...33 9 10 11 12 13 14 16 15...

Страница 6: ...ffnung Arthrolyse und Thenolyse bzgl posttraumatischer Steifheit von MCP und PIP Gelenken Offene Reposition und starre interne Fixierung einer intraartikul ren dia phys ren und metaphys ren Fraktur de...

Страница 7: ...ange 7 Fingerf hrer gro 8 Fingerf hrer klein 9 V Klammern 10 Gro es Scharnier 11 Bewegungseinheit 12 Unterarmfixierungsschiene 13 Klettverschl sse 14 Klettverschl sse Hand 15 Befestigungsschlitten 16...

Страница 8: ...gram miereinheit nicht bedienen k nnen z B bei L hmung muss die Behand lung unter st ndiger Betreuung durch Fachpersonal gew hrleistet sein Das Ger t darf nicht verwendet werden wenn die Therapiebefol...

Страница 9: ...armfixierungsschiene Legen Sie die Unterarmfixierungs schiene 12 so auf den Unterarm dass das distale Schienenende in der Mitte der MP Gelenke liegt Klappen Sie die Seiten der Unterarm fixierungsschie...

Страница 10: ...rade Fl che um eine ulnare Deviation des Handgelenks w hrend der Beugung des Daumens zu verhindern Abb 6 zeigt das Ger t in vollst ndiger Opposition Beugung Bringen Sie die ARTROMOT F wie gewohnt an V...

Страница 11: ...ird angezeigt 2 Die Einstelltaste SET dr cken die Piktogramme blinken und die gelbe Leuchte neben der SET Taste geht an Nun ist die Handprogrammier einheit programmierbereit 3 Zum Programmieren der Ex...

Страница 12: ...Aufw rmprogramm beginnt die Behandlung des Patienten mit weniger als 50 des programmierten Bewe gungsbereiches und steigert sich dann schrittweise ber mehrere Zyk len hinweg auf den vollen Bewegungs...

Страница 13: ...Abschluss die SET Taste dr cken Diese Messfunktion berwacht die Zahl der Behandlungsstunden die der Patient absolviert 1 Schalten Sie die Handprogrammier einheit aus POWER EIN AUS 2 Die PAUSE Taste un...

Страница 14: ...chrie ben besch digt wird muss es zur Reparatur und Neukalibrierung ein geschickt werden Elektrischer Anschluss Batterie 6V 4AA 100 240 V AC je nach Einstellung 50 60 Hz Nennstrom Motor 2 5 A max Leis...

Страница 15: ...repariert werden Alle Tasten und Hebel m ssen einsatz f hig sein Alle laufenden Teile m ssen sich ungehindert bewegen k nnen Alle Anzeigen und elektronischen Steuerungen m ssen einwandfrei funktionier...

Страница 16: ...aucht nicht sterilisiert zu werden Wenn das Ger t einem sterilisierten Umfeld ausgesetzt wird kann es besch digt werden und es entsteht eine potentielle Gefahr Gew hrleistung 2 Jahre mechanische Teile...

Страница 17: ...e lose mit dem Klettverschlussriemen Dabei ist zu beachten dass das gr ere Ende der Clips auf die Fingerspitzen weisen muss und die Klettverschlussriemen mit der Mitte des Fingernagel abschlie en Stre...

Страница 18: ...n Ger te sind au er dem Label mit den OrthoMotion Ger ten 6000 bzw W2E identisch Die EU autorisierte Vertretung f r OrthoMotion Inc ist Medical Device Consultants International Ltd M D C I Arundel Hou...

Страница 19: ...nt 21 4 2 Adjusting the device for the thumb treatment 22 4 3 Adjusting the device for MP Block treatment 22 5 Programming the ARTROMOT F 23 5 1 Programming steps 23 5 2 Programming special functions...

Страница 20: ...olysis and tenolysis for post traumatic stiffness of MCP and PIP joints Open reduction and rigid internal fixation of intraarticular diaphyseal and metaphyseal fracture of the phalanges and metacarpal...

Страница 21: ...Right Bridge Arm 5 Left Bridge Arm 6 Drive Bar 7 Finger Actuator large 8 Finger Actuator small 9 V clamps 10 Large hinge 11 Actuator 12 Splint 13 Velcro straps 14 Velcro straps hand 15 Mounting brack...

Страница 22: ...cialists must constantly supervise treatment The doctor or therapist must decide on a case to case basis whether the device can be used with the particular patient Make sure that the characteristic va...

Страница 23: ...lly and distally and laterally and medially First apply the fully adhesive side of the VHB Pad 17 to the underside of the finger clip 16 Next peel the label off the adhesive portion of the VHB Pad and...

Страница 24: ...blocked from both extension and flexion Figure 10 shows the device in flexion The axis is on the PIP and the fingers are flexed at the DIP and PIP only Make sure you adjust the flexion ROM on the con...

Страница 25: ...tons to increase or decrease the range 5 To program flexion press the FLEX button The flexion icon will appear in the LCD display 6 To program the desired amount of flexion press the or buttons to adj...

Страница 26: ...h again The thermometer Warm up feature icon will appear in the LCD display 3 When ready start the device from the START STOP button Reverse on load Lock Out and Timer are features to be set by the me...

Страница 27: ...unting usage hours from 0 The timer counts to a maximum of 999 hours after which is must be reset The ARTROMOT F can be converted easily 1 There are 3 medium finger actuators black and one small finge...

Страница 28: ...Bridge Arm assembly be replaced fig 23 24 Electrical connection Battery 6V 4AA 100 240 V 50 60 Hz Rated current motor 2 5 A max Power consumption 40 VA Fuses 1 5 A PTC Degree of protection VDE Protec...

Страница 29: ...ot and linkage points for smooth operation and secure mechanical connection Make sure all screws nuts bolts rivets pivot pins and other fasteners are secure Gently wipe clean all exposed sur faces wit...

Страница 30: ...r ship ment These boxes can be ordered at ORMED GmbH Co KG A soft comfortable and stretchable fabric fully coated with polymer gel which slowly releases a medical grade mineral oil USP to soften and m...

Страница 31: ...lips to the glove Attach the splint on top of the glove and adjust the splint shape in order to fit the patient s forearm before secur ing the Velcro straps on the splint fig 15 16 Spare parts are giv...

Страница 32: ...he labeling The EU Authorized Representative for OrthoMotion Inc is Medical Device Consultants International Ltd M D C I Arundel House 1 Liverpool Gardens Worthing West Sussex BN 11 1SL United Kingdom...

Страница 33: ...Notes 31...

Страница 34: ...m e d G m b H C o K G M e r z h a u s e r S t r a e 112 D 7910 0 F r e i b u r g Tel 0761 45 66 01 Fax 0761 45 66 55 01 www ormed de E Mail info ormed de St Paul USA Tel 1 800 4402784 Fax 1 651 415740...

Отзывы: