


there will be no space between messages.
1.
Move the jog lever sideways to select the message. Press and hold “DELETE/MODE” for 1.5 sec.
‘‘dEL” and the selected message number will appear flashing. (if there is any message inside)
2.
Press “DELETE/MODE” once more to confirm the deletion of that message.
3.
To delete more individual messages repeat steps 1 & 2 above.
To cancel deletion
Press any button except “DELETE/MODE” before step 2.
Deleting all messages
1.
Press and hold “DELETE/MODE” for 1.5 sec. ‘‘dEL” and the current message number
will appear flashing.
2.
Press “SPECIAL/SELECT” to select ‘‘ALL”, then “ALL” and “DEL” will appear flashing.
3.
Press “DELETE/MODE” once more. All messages are deleted. (It takes around 1 minute
for all 99 messages deletion)
To cancel deletion
Press any button except “DELETE/MODE” before step 3.
ADVANCE OPERATIONS
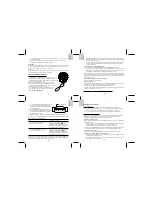
RECORDING A SPECIAL MESSAGE
When you record a message in the Special Message Box, you can find it easily by pressing just one button.
You can record one message in the Special Message Box.
Recording a message
1.
Press “SPECIAL/SELECT”.
‘‘REC” and
appear.
2.
Speak into the built-in microphone. You do not need to keep pressing “SPECIAL/
SELECT” while recording.
3.
Press “SPECIAL/SELECT” again to stop recording.
Note:
If a message is already recorded in the Special Message Box, ‘‘PLAY” appears and that message
will be played back when you press “SPECIAL/SELECT”. To record a new message, erase
the old one first as described in ‘‘Deleting the Special Message”.
Playing back the message
1.
Press “SPECIAL/SELECT”.
‘‘PLAY” appears and
flashes.
2.
Select High/Low volume by sliding the volume switch.
To stop playing back partway through the Special Message
Press “SPECIAL/SELECT”.
When you press “SPECIAL/SELECT” again, the message will be played back from the beginning.
Deleting the Special Message
1.
Press and hold “DELETE/MODE” for 1.5 sec.
2.
Press “SPECIAL/SELECT” to select “SPEC” (if there is any special message inside)
3.
Press “DELETE/MODE” to confirm deletion.
Initializing the unit
1.
Switch On the unit.
2.
Press and hold ‘“DELETE/MODE” and then press “RESET”.
3.
Then 2 beep sounds will be heard and all the data will be initialized, “ALL” will be displayed.
4.
The memory will be cleared and shown on the display.
PRECAUTIONS
On power
•
Operate the unit only on 3 V DC. Use two lithium batteries.
On safety
•
Do not operate the unit while driving, cycling or operating any motorized vehicle.
On handling
•
Do not leave the unit in a location near heat sources, or in a place subject to direct sunlight,
excessive dust or mechanical shock.
•
Should any solid object or liquid fall into the unit, remove the batteries and have the unit
checked by qualified personnel before operating it any further.
On noise
•
Noise may be heard when the unit is placed near an AC power source, a fluorescent lamp
or a mobile phone during recording or playback.
On maintenance
•
To clean the exterior, use a soft cloth slightly moistened in water. Do not use alcohol,
benzine or thinner.
Keep personal credit cards using magnetic coding or spring-wound watches, etc., away form
the unit to prevent possible damage from the magnet used in the speaker.
CAUTION
1.
Technical specifications are subject to changes without notice.
2.
The content of this manual is subject to change without further notice.
3.
Due to printing limitation, the displays shown in this manual may differ from the actual
display.
4.
The manufacturer and its suppliers held no responsibility to you or any other person for
any damage expenses, lost profits, or any other claim arise by using this product.
5.
The contents of this manual may not be reproduced without the permission of the
manufacturer.
5
6
7
8
English
English
English
French
MISE EN ROUTE
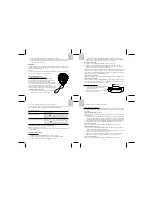
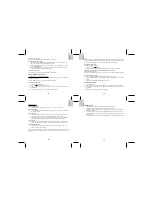
INSTALLATION DES PILES
1.
Dévissez la vis située à l’arriére de l’appareil puis ouvrez le compartiment à piles en
faisant glisser le couvercle.
2.
Installez deux piles lithium de type CR2032 (fournies) dans le compartiment, les bornes
positives (+) vers l’extérieur.
3.
Refermez le couvercle du compartiment à piles.
Enlèvement des piles lithium
Si les piles restent coincées dans le compartiment, appuyez sur le bord de la pile avec un objet pointu.
REMPLACEMENT DES PILES
L’icône “
”est affiché à l’écran lorsque les piles s’affaiblissent; remplacez les alors par
des piles neuves.
Prenez soin de retirer les piles usées avant d’installer les neuves.
Durée de vie des piles
Pile lithium CR2032 : 1 mois environ
Cette durée suppose une utilisation quotidienne de 2 minutes en enregistrement et de 3 minutes
en lecture (avec le volume au minimum).
Remarques:
•
La durée de vie des piles peut être plus courte selon le type d’utilisation.
•
Les messages enregistrés seront sauvegardés en cas de changement des piles.
Remarques concernent la pile lithium
•
Gardez la pile lithium hors de la portée des enfants. En cas d’ingestion, consultez
immédiatement un médecin.
•
Nettoyez la pile à l’aide d’un chiffon sec afin d’assurer un contact optimal.