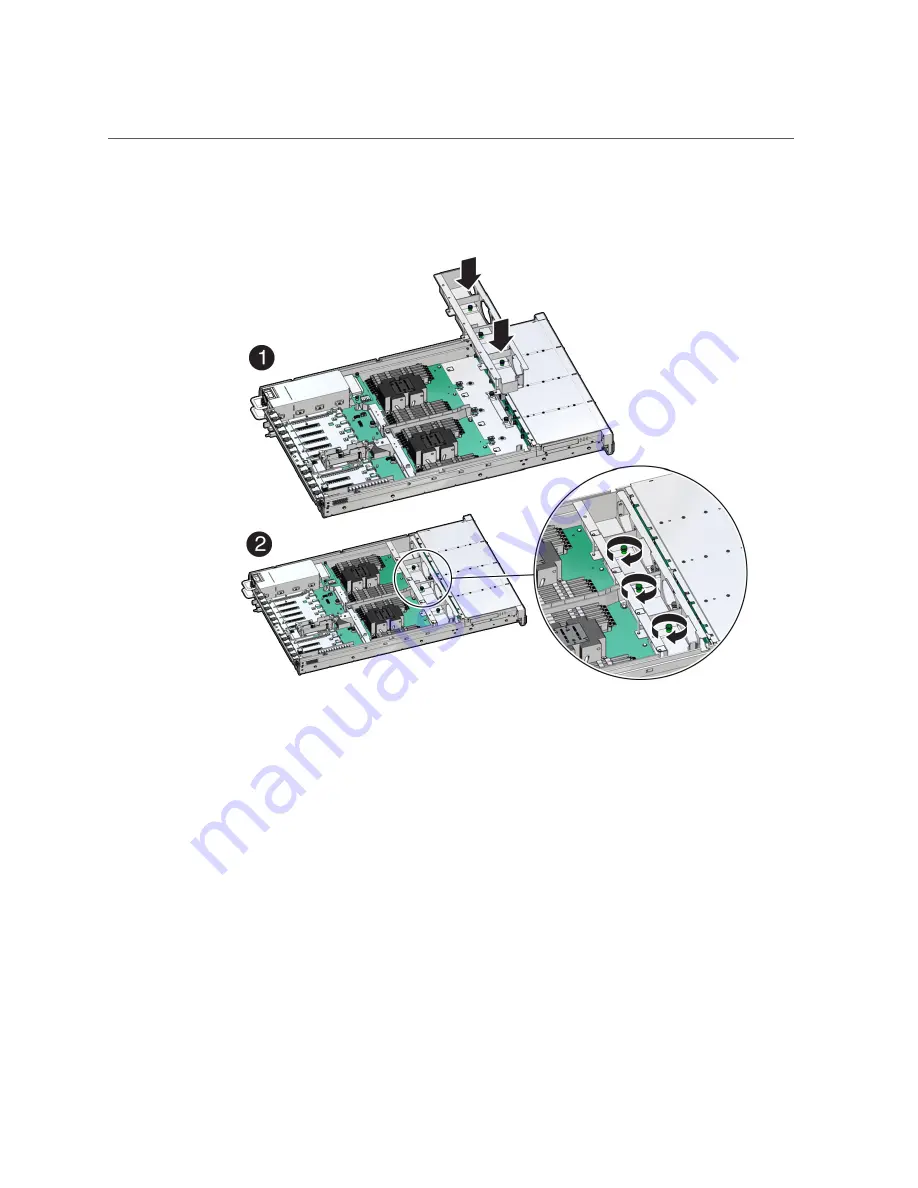
Install the Fan Tray
1.
Lower the fan tray into the server [1].
2.
Using a Torx T25 screwdriver, tighten the three spring-mounted screws that
secure the fan tray to the server chassis [2].
3.
Continue with the next step in the service procedure.
Related Information
■
“Install a Fan Module” on page 87
■
“Servicing the Disk Backplane (FRU)” on page 157
■
“Servicing SAS Cables (FRU)” on page 187
■
“Servicing NVMe Cables (FRU)” on page 193
■
“Servicing the Motherboard Assembly (FRU)” on page 199
Servicing Fan Modules (CRU)
91
Содержание X7-2L
Страница 1: ...Oracle Server X7 2L Service Manual Part No E72474 02 October 2017 ...
Страница 2: ......
Страница 12: ...12 Oracle Server X7 2L Service Manual October 2017 ...
Страница 14: ...14 Oracle Server X7 2L Service Manual October 2017 ...
Страница 48: ...48 Oracle Server X7 2L Service Manual October 2017 ...
Страница 66: ...66 Oracle Server X7 2L Service Manual October 2017 ...
Страница 84: ...84 Oracle Server X7 2L Service Manual October 2017 ...
Страница 92: ...92 Oracle Server X7 2L Service Manual October 2017 ...
Страница 110: ...110 Oracle Server X7 2L Service Manual October 2017 ...
Страница 130: ...130 Oracle Server X7 2L Service Manual October 2017 ...
Страница 138: ...138 Oracle Server X7 2L Service Manual October 2017 ...
Страница 142: ...142 Oracle Server X7 2L Service Manual October 2017 ...
Страница 156: ...156 Oracle Server X7 2L Service Manual October 2017 ...
Страница 164: ...164 Oracle Server X7 2L Service Manual October 2017 ...
Страница 172: ...172 Oracle Server X7 2L Service Manual October 2017 ...
Страница 178: ...178 Oracle Server X7 2L Service Manual October 2017 ...
Страница 218: ...218 Oracle Server X7 2L Service Manual October 2017 ...
Страница 224: ...USB Ports Reconnect Power and Data Cables on page 216 224 Oracle Server X7 2L Service Manual October 2017 ...
Страница 254: ...254 Oracle Server X7 2L Service Manual October 2017 ...


