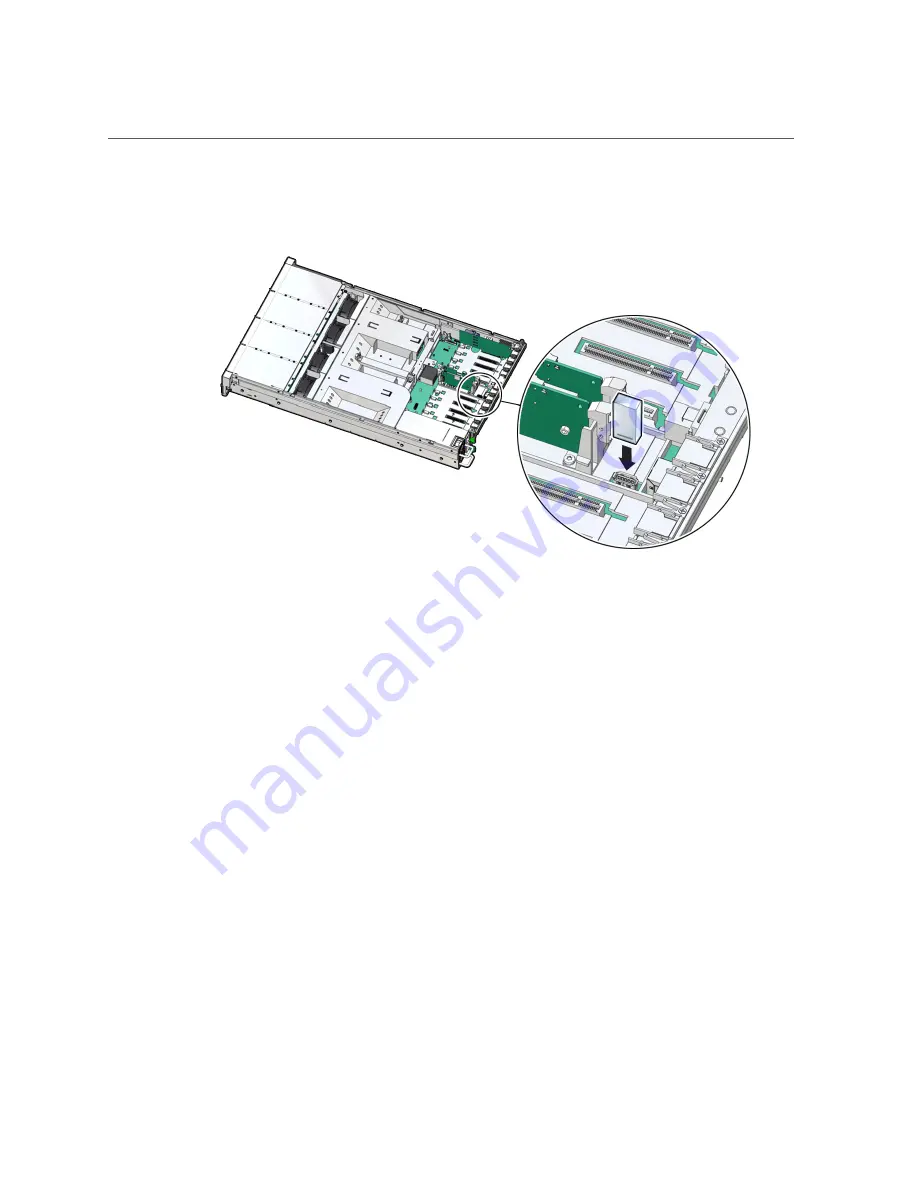
Install an Internal USB Flash Drive
2.
Insert the flash drive into the USB slot.
3.
Return the server to operation.
a.
Install the server top cover.
“Install the Server Top Cover” on page 212
.
b.
Return the server to the normal rack position.
“Return the Server to the Normal Rack Position” on page 214
c.
Reconnect the power cords and data cables to the server.
“Reconnect Power and Data Cables” on page 216
d.
Power on the server.
“Power On the Server” on page 216
.
Verify that the power supply AC OK LED is lit.
Related Information
■
“Remove an Internal USB Flash Drive” on page 107
Servicing an Internal USB Flash Drive (CRU)
109
Содержание X7-2L
Страница 1: ...Oracle Server X7 2L Service Manual Part No E72474 02 October 2017 ...
Страница 2: ......
Страница 12: ...12 Oracle Server X7 2L Service Manual October 2017 ...
Страница 14: ...14 Oracle Server X7 2L Service Manual October 2017 ...
Страница 48: ...48 Oracle Server X7 2L Service Manual October 2017 ...
Страница 66: ...66 Oracle Server X7 2L Service Manual October 2017 ...
Страница 84: ...84 Oracle Server X7 2L Service Manual October 2017 ...
Страница 92: ...92 Oracle Server X7 2L Service Manual October 2017 ...
Страница 110: ...110 Oracle Server X7 2L Service Manual October 2017 ...
Страница 130: ...130 Oracle Server X7 2L Service Manual October 2017 ...
Страница 138: ...138 Oracle Server X7 2L Service Manual October 2017 ...
Страница 142: ...142 Oracle Server X7 2L Service Manual October 2017 ...
Страница 156: ...156 Oracle Server X7 2L Service Manual October 2017 ...
Страница 164: ...164 Oracle Server X7 2L Service Manual October 2017 ...
Страница 172: ...172 Oracle Server X7 2L Service Manual October 2017 ...
Страница 178: ...178 Oracle Server X7 2L Service Manual October 2017 ...
Страница 218: ...218 Oracle Server X7 2L Service Manual October 2017 ...
Страница 224: ...USB Ports Reconnect Power and Data Cables on page 216 224 Oracle Server X7 2L Service Manual October 2017 ...
Страница 254: ...254 Oracle Server X7 2L Service Manual October 2017 ...


