


2-6
Sun Blade X6275 Server Module Service Manual • September 2013
1. Log in as a superuser or equivalent.
Depending on the type of problem, you might want to view server module status
or log files, or run diagnostics before you shut down the server module.
2. Notify affected users.
3. Save any open files and quit all running programs.
Refer to your application documentation for specific information.
4. Open an SSH session to the SP.
5. Log into the Service Processor.
The default user name is
root
and the password is
changeme
.
6. Type:
stop /SYS
or
cd /SP/CtrlInfo
set powerctrl=off
7. Repeat this procedure for the second compute node.
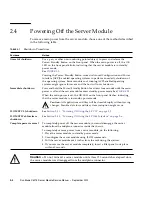
2.4.2
Powering Off Using the SP Web Interface
You can use the service processor web interface to perform a graceful shutdown of
the server module and ensure that all of your data is saved and the server module is
ready for restart.
Refer to the ILOM and operating system documentation for additional information.
1. Log in as a superuser or equivalent.
Depending on the type of problem, you might want to view server module status
or log files, or run diagnostics before you shut down the server module.
2. Notify affected users.
3. Save any open files and quit all running programs.
Refer to your application documentation for specific information.
4. Open a web browser and enter the SP IP address in the location bar.
5. Log in to the Service Processor Web Interface.
The default user name is
root
and the password is
changeme
.
6. Click the
Remote Control
tab
,
the
Remote Power Control
tab and then select
Graceful Shutdown and Power Off
from the drop-down list. See
FIGURE 2-3
.
Содержание Sun Blade X6275
Страница 1: ...Sun Blade X6275 Server Module Service Manual Part No Part No 820 6849 16 September 2013 Rev A ...
Страница 26: ...1 16 Sun Blade X6275 Server Module Service Manual September 2013 ...
Страница 47: ...Chapter 3 Servicing Server Module Components 3 7 FIGURE 3 3 DIMM Numbering and Position ...
Страница 54: ...3 14 Sun Blade X6275 Server Module Service Manual September 2013 FIGURE 3 7 Replacing Flash Modules ...
Страница 59: ...Chapter 3 Servicing Server Module Components 3 19 FIGURE 3 10 Processor Fault LEDs and Remind Button Locations ...
Страница 61: ...Chapter 3 Servicing Server Module Components 3 21 FIGURE 3 11 Removing a Processor ...
Страница 64: ...3 24 Sun Blade X6275 Server Module Service Manual September 2013 FIGURE 3 12 Replacing a Processor ...
Страница 72: ...3 32 Sun Blade X6275 Server Module Service Manual September 2013 FIGURE 3 14 Removing the RTC Batteries ...
Страница 80: ...3 40 Sun Blade X6275 Server Module Service Manual September 2013 ...
Страница 86: ...4 6 Sun Blade X6275 Server Module Service Manual September 2013 ...
Страница 90: ...A 4 Sun Blade X6275 Server Module Service Manual September 2013 FIGURE A 1 BIOS Utility Menu Tree ...
Страница 107: ...Appendix A BIOS Screens A 21 FIGURE A 29 BIOS Setup Utility Chipset FIGURE A 30 BIOS Setup Utility Chipset CPU Bridge ...
Страница 112: ...A 26 Sun Blade X6275 Server Module Service Manual September 2013 ...
Страница 116: ...Index 4 Sun Blade X6275 Server Module Service Manual September 2013 ...