4 Maintenance and Inspection
4-4 Cleaning
BU150R
76
6.
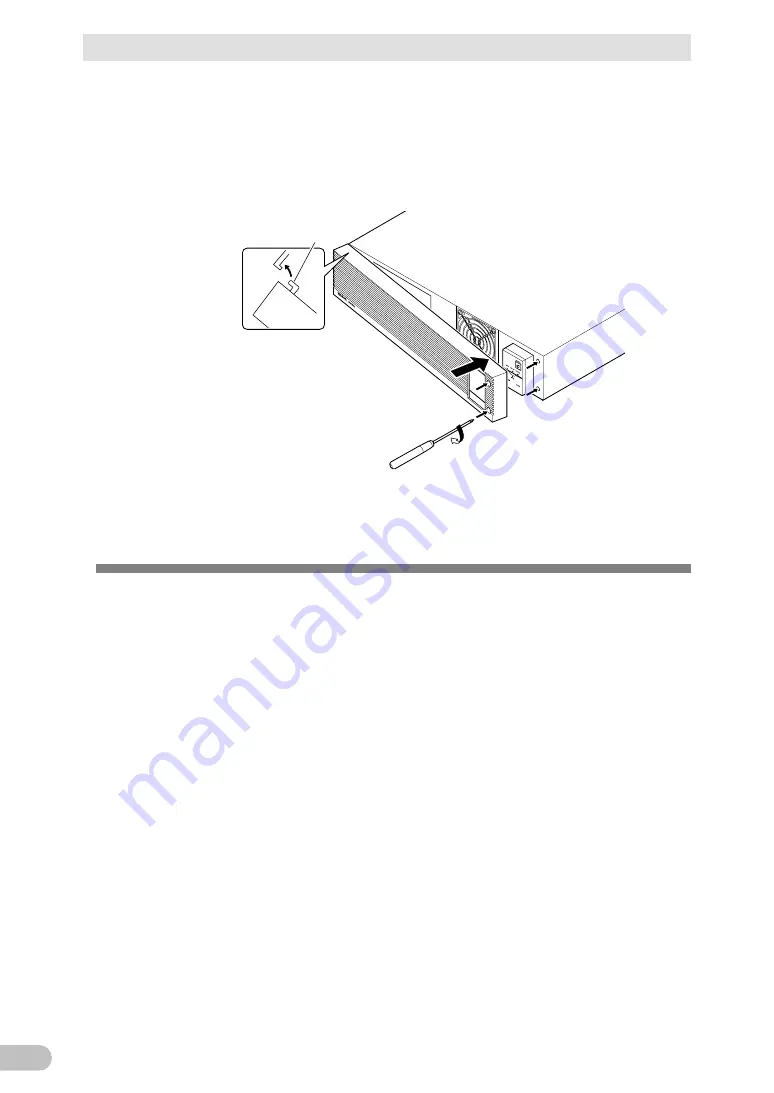
Attach the front panel to the unit.
Insert the clamp on the left side of the front panel into a groove on the UPS unit
(
①
), and push the right side of the front panel in (
②
).
Securely tighten the two screws on the right side of the front panel with a +
screwdriver (
③
)
Fan replacement is now complete.
4-4 Cleaning
Moisten a soft cloth with water or detergent, squeeze it tightly, and wipe the product lightly.
Do not use chemicals such as thinner and benzene. (They cause deformation or
discoloration.)
③
Tighten the two screws
②
Push the right side of
the front panel in
①
Insert the clamp on the left
side of the front panel into a
groove on the UPS unit
Clamp
Front panel
side
Содержание BU150R
Страница 22: ...2 Installation and connection 2 1 Installation BU150R 22 Incorrect Positions...
Страница 92: ...7 How to use option cards 7 3 SNMP Web card BU150R 92 7 3 SNMP Web card LAN 10 100...
Страница 101: ...10 References 10 2 Dimensions BU150R 101 10 10 2 Dimensions Unit mm Tolerance 2mm BU150R 438 480 87...
Страница 102: ...10 References 10 2 Dimensions BU150R 102 Stand for vertical layput 200 200 70 50 70 50...
Страница 103: ...10 References 10 2 Dimensions BU150R 103 10 Rubber feet 23 25 405 50 40 358 40 3...
Страница 104: ...10 References 10 2 Dimensions BU150R 104 Using Ear brackets 44 5 22 0 13 5 455 25 465...


