38
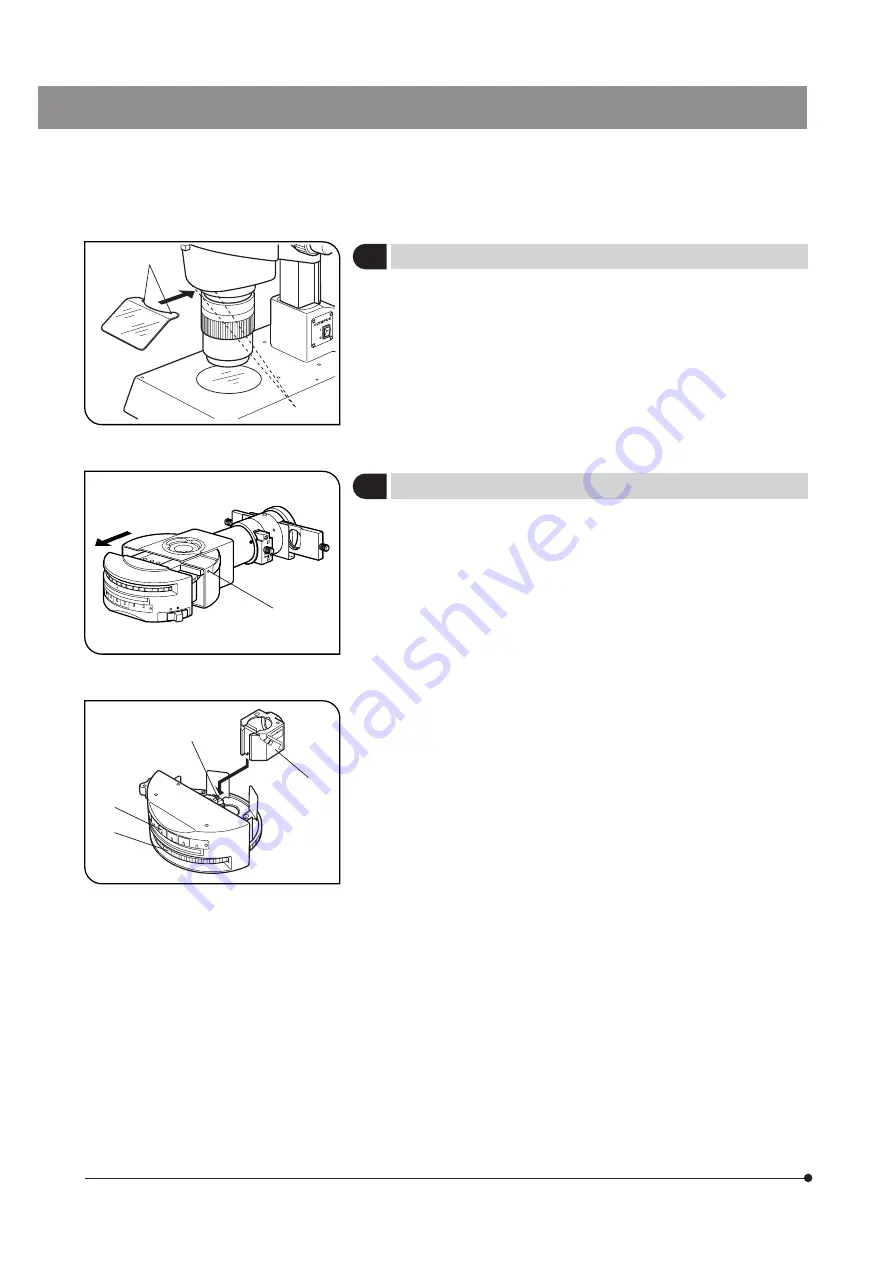
}Fluorescence mirror units can be mounted by in every other dovetail,
or in positions with turret numbers 1, 2 and 3, of the six dovetails of
the mirror unit.
1. Using the Allen screwdriver, loosen the clamping screw hole @ on
the right end of the illuminator.
2. Slide out the turret and place it upside down.
}After completion of assembly of the microscope, it is difficult to slide
out the turret because the trinocular head comes in the way. In this
case, hold the two sides of the turret with two hands and pull.
3. Rotate the mirror unit so that the mirror unit position number (one of
1, 2 or 3) comes at the turret number indicator ².
4. Loosen the clamping screw ³ using the Allen wrench.
5. Insert the desired mirror unit | all the way into the dovetail position so
that the abbreviation of the mirror unit name is upside down, and then
tighten the clamping screw ³ firmly,
# If the clamping screw ³ is loose, it may interfere with the inner surface
of the turret cover, making impossible to rotate the turret.
6. Select the optimum indicator plate from the provided indicator plate sheet,
and insert the plate upside down in the mirror unit indicator pocket ƒ.
}If the optimum indicator plate is not present, write the original name in a
blank indicator plate using an oil-ink pen.
7. Mount the other required mirror units by repeating the above steps.
8. Place the turret in the original position and tighten the clamping screw @
while pushing the turret.
Fig. 35
@
²
Fig. 36
@
Fig. 37
ƒ
²
³
|
5
Mounting the Fluorescence Mirror Units
(Figs. 36 & 37)
4
Attaching the UV Shield Plate
(Fig. 35)
Align the mounting groove ² of the UV shield plate with the two
mounting pins @ on the lower part of the zoom microscope body
and fit the groove with a strong force.
Содержание MVX10
Страница 2: ......
Страница 13: ...9 MVX10 Make a photocopy of this spread and post it near the microscope for quick reference...
Страница 52: ...MEMO...
Страница 53: ...MEMO...
Страница 54: ...MEMO...
Страница 55: ......


