Toll Free 1-888-658-1658 www.outdoorlivingtoday.com [email protected]
Page 22
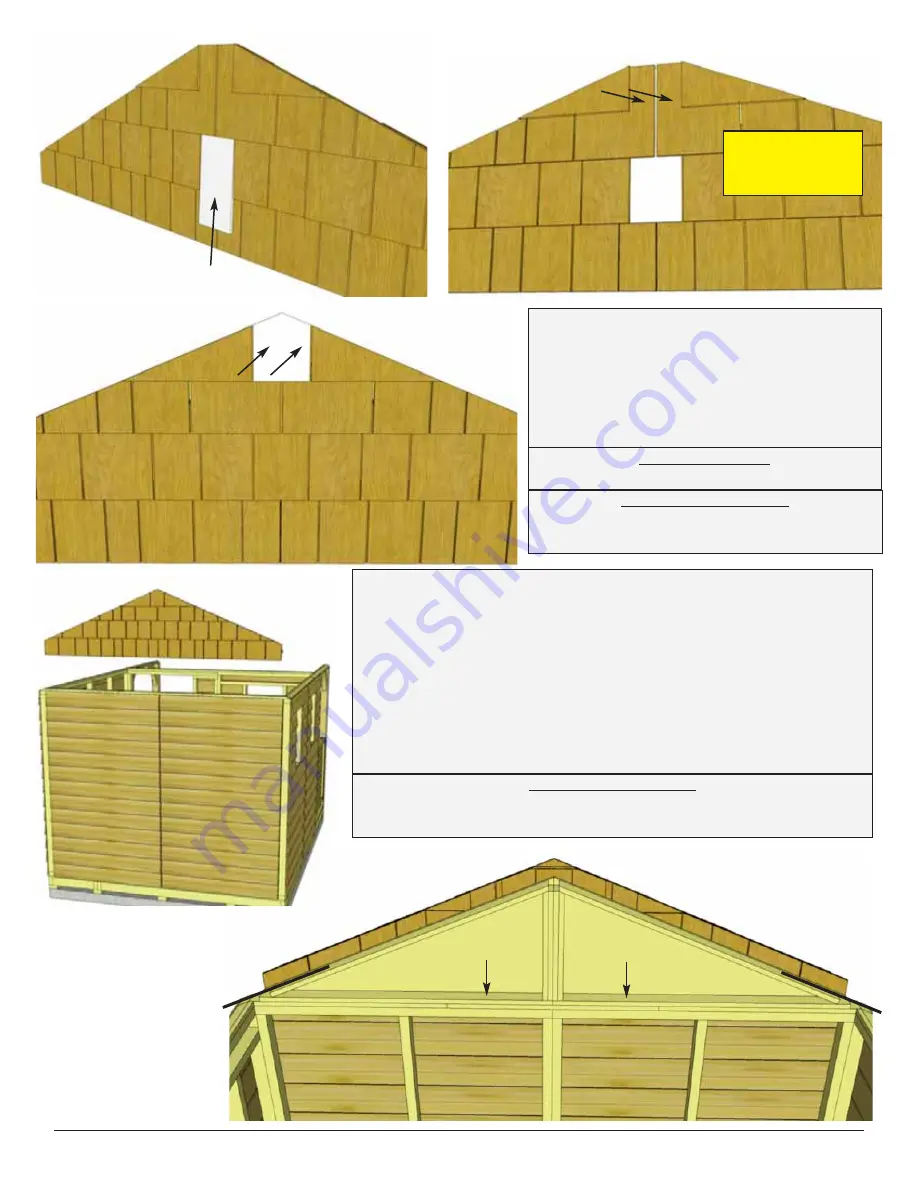
32.
Position the
Rear Gable Wall
on top of the Rear Top Plate.
The rear gable framing should sit flush with the inside of the top
plate. It should also be centered sideways on the top plate.
Hint:
use a straight edge to check the angle of the gable framing and
top plate. Both angles should line up. Adjust gable accordingly.
Temporarily attach to walls and Top Plate with
2 - 2” screws
.
Gables may need slight adjustment in
Step 46.
Complete
attachment in
Step 50
with additional
8 - 2” screws
. Screw from
the bottom of gable framing down into Top Plate and Wall.
31.
From the outside, slide in a Rear Gable
Wall
Filler Shingle
to cover gable seam.
Nail down above the exposure line with
2 - 1
1/2” Shingle Nails
.
Complete by attaching the short 7 1/2” top
Filler Shingle with
2 - 1 1/2” Shingle Nails
.
See
Step 57
for
explanation of
exposure line.
Parts (Steps 31)
Rear Gable Filler Shingles x2
Hardware (Steps 31)
N2 - 1 1/2” Shingle Nail
x 4 total
Hardware (Steps 32)
S3 - 2” Screws
x 2 total


