- 34 -
Installing Additional Tray Units
1
2
4
5
6
3
3
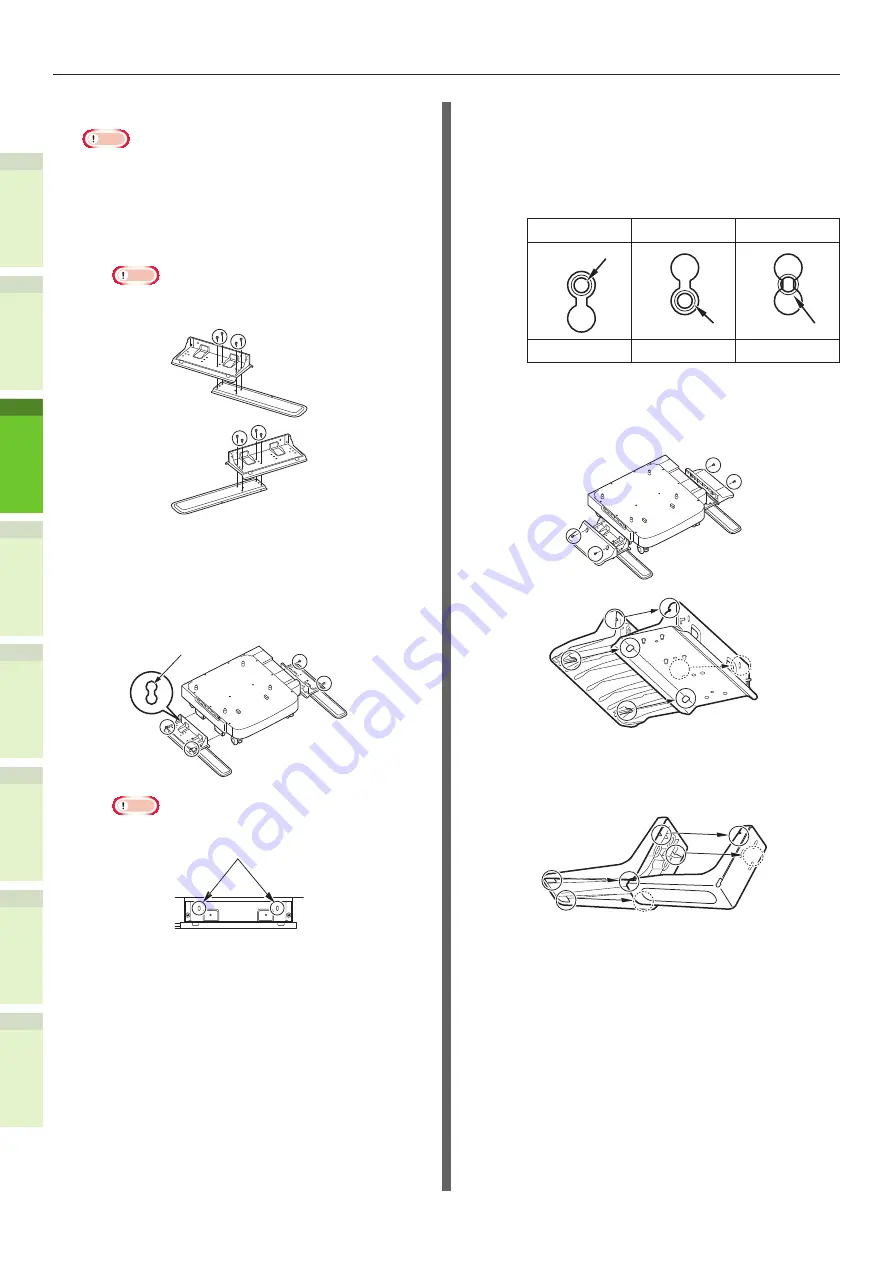
Attach the caster unit.
Note
•
When the casters are not used, this step is not
necessary.
(1)
Attach the anti-tip feet (both
sides and front) with four
screws.
Note
•
Attachment directions are different for the left side
and the right side.
(2)
Put the bottoms of the anti-tip
feet (both sides) on the floor,
align the sides to the cabinet
and tighten them with the two
screws each.
Screw Hole
Note
•
Do not tighten the upper screws.
Screw Hole
•
When you tighten the bottom screws, attach the
anti-tip foot to the location where a screw does
not incline.
*
You can attach the screws to Case1 and Case2.
As the screw inclines when you tighten the screw
in Case3, lift the anti-tip foot and attach the
screw to Case2.
Case 1
Case 2
Case 3
Screw Hole
Screw Hole
Screw Hole
OK
OK
NG
(3)
Tighten the anti-tip foot covers
(both sides) and anti-tip feet
with two screws each.
(4)
Align the anti-tip foot cover
(rear) to the rear side of the
anti-tip foot.
Содержание ES7460 MFP
Страница 54: ...1 2 4 5 6 3 4 About Paper About Paper P 55 How to Load the Paper P 62 Paper Output P 70 ...
Страница 71: ...1 2 4 5 6 3 5 About Document Copies About Document Copies P 72 Loading Documents P 76 ...
Страница 78: ...1 2 4 5 6 3 6 Using Each Function Configuration of the Printer Fax and Scanner Functions P 79 ...
Страница 81: ...1 2 4 5 6 3 Index ...
Страница 85: ...January 2013 45510602EE Rev1 ...


