background image

- 23 -

Checking the product

Appendix

B

efore use

1

Setting Up

2

Printing

3

Basic D

evice Oper

ations

4

Index

1. Before use

This chapter explains the package contents of the product and the nomenclature and functions of the parts.

Note


z

The C941/ES9541dn Spot Color kit is a separate package. For the set-up method, see the "Separate Volume  Spot Color Guide".

z

z

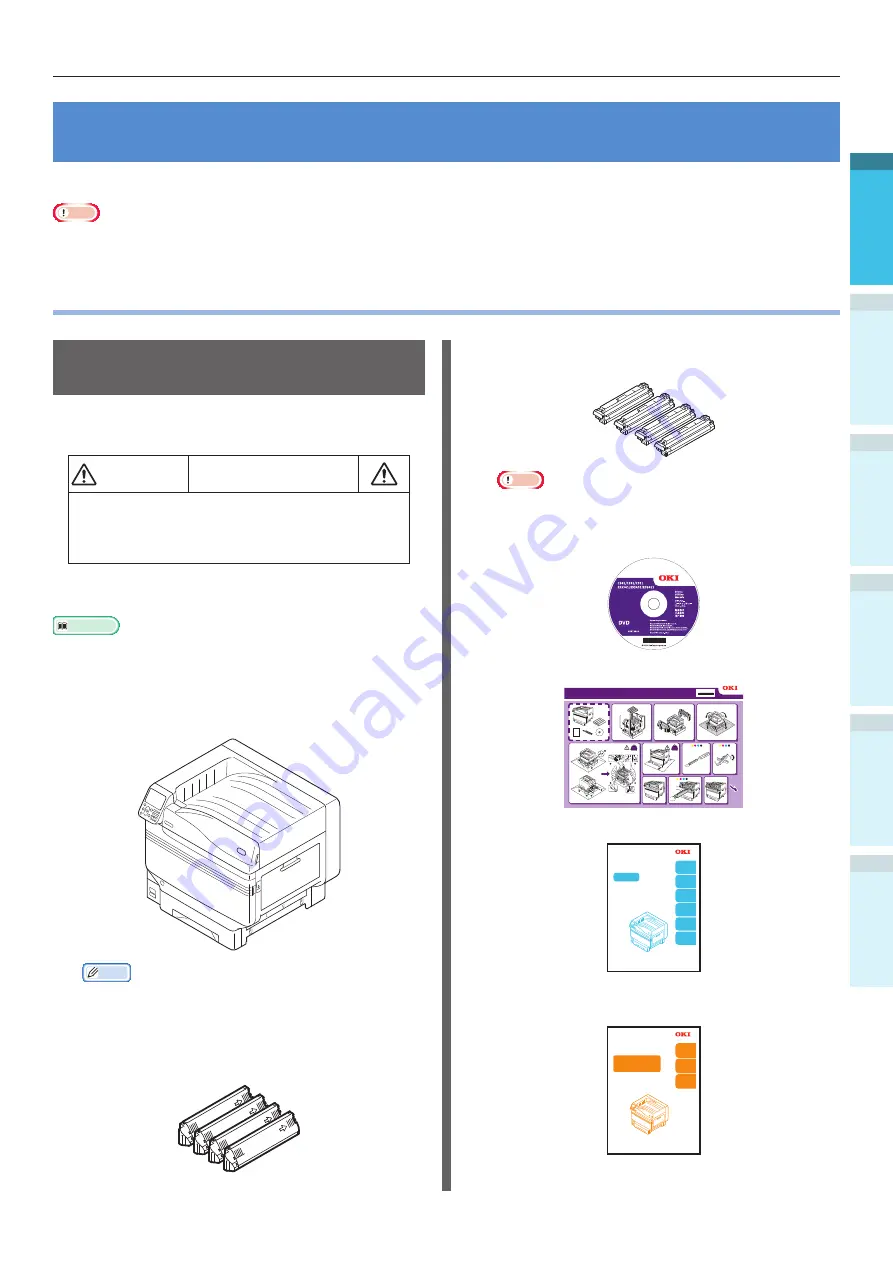
Checking the product

Checking the Package 

Contents

Open the packing case and check the contents of 

the box.

CAUTION

There is a risk of injury.


z

C911/C931/ES9411dn/ES9431dn models 

weigh approx. 97kg*, and C941/ES9541dn 

models weigh approx. 117Kg*, so make sure 

to use at least 4 people minimum when lifting.

*: Includes consumables such as the image drum and 

toner cartridge, etc.

Reference


z

See 

“Opening the Package and Installation” (P.44)

 for 

how to open the package.


z

See 

“Mounting the Expansion Unit (Optional)” (P.50)

 for 

the expansion tray.


z

Printer Unit

Memo


z

A maximum of five optional expansion tray units 

(trays 2 to 5) can be mounted to C911/C931/C941/

ES9411dn/ES9431dn/ES9541dn.


z

Toner cartridge (One each of black, yellow, 

magenta, and cyan)


z

Image drum (One each of black, yellow, 

magenta, and cyan)

Note


z

The image drum is set inside the main unit before 

shipment from the factory.


z

Software DVD-ROM


z

Easy Guide (Set-up Guide)

1040 mm

41 inch

620 mm

24.4 inch

200 mm

7.9 inch

600 mm

23.6 inch

91.6 kg

202 lb

91.6 kg

202 lb

45583101EE Rev1

2

C911dn/C931dn/E9411dn/ES9431dn Set-up Guide

1

3

4

5

6

7

8

9

10


z

User's Manual (Basic).

4

Basic Device 

Operations

Preparing the printer 

to print

2

Setting Up

Before 

use

User's Manual

Basic

C911dn

C931dn

C941dn

ES9411dn

ES9431dn

ES9541dn 

This manual contains cautions on how to use this product safety. 

Before you use this product, please make sure that you read this manual. 

Carefully store this manual close to hand so.

1

Appendix

Index

3

Printing


z

User's Manual (Troubleshooting/Daily 

Maintenance Manual)

Read for any points that
are not understood, or
for maintenance

1

Troubleshooting

2

Maintenance

Index

User’s Manual

Troubleshooting/Daily

Maintenance Manual

C911dn

C931dn

C941dn

ES9411dn

ES9431dn

ES9541dn

Store this manual carefully close to hand so it can be viewed at any time.

Содержание C931dn

Страница 1: ...se User s Manual Basic C911dn C931dn C941dn ES9411dn ES9431dn ES9541dn This manual contains cautions on how to use this product safety Before you use this product please make sure that you read this m...

Страница 2: ...Guide Set up Guide Opening the box and installing the printer 1 Step This guide uses illustrations to explain the methods from opening the box to installation For the advanced setup guide see the Bas...

Страница 3: ...pe Click here to install the standard printer drivers You can add and select printer drivers To learn the easy device functions and various settings see the PDF manual from here 2 You can install and...

Страница 4: ...g this display may cause death or serious injury CAUTION z z Mishandling due to ignoring this display may cause personal injury Keys Buttons and Symbols This chapter described the following keys butto...

Страница 5: ...ons used herein show the C931 model unless otherwise specified Illustrations may differ from the actual product Screens The images of the control panel and PC used herein are examples The images may d...

Страница 6: ...soft Windows 7 64 bit Edition operating system Windows 7 64bit version z z Microsoft Windows 7 operating system Windows 7 z z Mac OS X10 3 9 or later Mac OS X The manuals enclosed with the device use...

Страница 7: ...egistered trademark of Oki Electric Industry Co Ltd Energy Star is a trademark of the United States Environmental Protection Agency Microsoft Windows Windows Server and Windows Vista are registered tr...

Страница 8: ...k medical attention Spillages should be treated with cold water and soap to help reduce risk of staining skin or clothing z z Manufacturer Oki Data Corporation 4 11 22 Shibaura Minato ku Tokyo 108 855...

Страница 9: ...f the machine is dropped or the cover is damaged Failure to do so may cause electric shock and or fire leading to personal injuries Unplug the power cord periodically to clean plug blades and root sec...

Страница 10: ...details Be sure to use a 3 conductor grounded wall outlet In areas except the U S and Canada where a 2 pin plug is used the machine must be grounded for safety Never ground it to a gas pipe a water pi...

Страница 11: ...eep paper clips and staples away from the air vent If not a fire could result or you could get an electric shock z z If the machine becomes excessively hot smoke comes out of it or there is an odd sme...

Страница 12: ...s z z Do not use the pulled out tray as steps This could injure you if you fall z z When changing the angle of the control panel be careful not to catch your hands in the gap between the equipment and...

Страница 13: ...inting During maintenance or inspection WARNING z z Never attempt to repair disassemble or modify the machine by yourself You could cause a fire or get an electric shock z z Do not let liquids such as...

Страница 14: ...ff with cold water If you use warm water your clothes will be permanently stained with toner because it will not come out z z If toner leaks from the toner cartridge be careful not to inhale or touch...

Страница 15: ...9 General cautions 9 When installing or moving 10 When using the machine 11 During maintenance or inspection 13 When handling supplies 14 Viable with C911 C931 C941 ES9411dn ES9431dn ES9541dn 19 1 Bef...

Страница 16: ...urning ON OFF the Power 56 Power Supply Precautions 56 Power Supply Conditions 56 Connecting Power Cables 57 Turning ON the Power Supply 57 Turning OFF the Power Supply 58 Test Printing Using the Prin...

Страница 17: ...p 108 4 Basic Device Operations 111 Setting Power Save Mode 111 Setting Power Save Mode 111 Setting the time before the printer enters power save mode 112 Setting sleep mode 113 Setting the time befor...

Страница 18: ...Basic Windows Functions 133 Displaying the Properties Window 133 Displaying the print setup window 133 Specifications 134 Main specifications 134 Network interface specifications 137 USB interface spe...

Страница 19: ...colors can be adjusted the print results simulated and the colors separated and printed using the color management system from the PC Print Various printings are possible using the convenient function...

Страница 20: ...anel standby screen If an error occurs in the device you can work while checking the control panel messages This manual page 31 Function Functions can be set using the control panel Various device fun...

Страница 21: ...f different paper sizes to be implemented smoothly This manual page 38 Help Use the help function to check if you do not understand something or if trouble occurs when using the device Press the HELP...

Страница 22: ...22 Viable with C911 C931 C941 ES9411dn ES9431dn ES9541dn Memo...

Страница 23: ...911 C931 C941 ES9411dn ES9431dn ES9541dn z z Toner cartridge One each of black yellow magenta and cyan z z Image drum One each of black yellow magenta and cyan Note z z The image drum is set inside th...

Страница 24: ...rinting 3 Basic Device Operations 4 Index Note z z LAN cables USB cables and hubs are not included with the printer Prepare them separately z z The packing case and buffer material are required when s...

Страница 25: ...lear paper jams Front lamp Flashes when receiving data and while in power save Tray side cover Open to clear paper jams from trays 1 to 5 Front cover Open this to remove the image drum waste toner box...

Страница 26: ...sfer roller unit or to clear paper jams Access cover Open this when mounting the optional built in HDD Duplex print unit Implements duplex printing Carrying handles Hold these at the same time as the...

Страница 27: ...This device copies the toner to the paper The belt unit is a replaceable maintenance part Handle Hold this handle when removing the belt unit Lock lever knob Secures the belt unit Image drum Slot z z...

Страница 28: ...hen using as a regular tray Supplementary supporter Maintains the paper when paper has been set in the multi purpose tray Paper guide Stabilizes the paper by adjusting the paper guide to the width of...

Страница 29: ...he toner to the paper The fixing unit is a replaceable maintenance part Fixing unit securing lever Secures the fixing unit Fixing unit jam cancellation lever Pull up this lever when a paper jam occurs...

Страница 30: ...enclature and Functions Appendix Before use 1 Setting Up 2 Printing 3 Basic Device Operations 4 Index Interface LAN network interface connector Connects the LAN cable USB interface connector Connects...

Страница 31: ...cancellation procedure Scroll button MENU button z z Displays the menu screen to select an item and then scrolls up or down one page z z Can be used to enter numbers in the numerical input screen BAC...

Страница 32: ...ypes of standby screen Remaining toner quantity display and Tray information display Press the scroll button or the to display the Functions setup menu screen as shown on the right The color display o...

Страница 33: ...ss the OK button 3 Use the 10 key pad to enter the administrator password The default factory set password is aaaaaa Press the OK button after entering each individual character 4 Press the OK button...

Страница 34: ...y screen ON LINE button In the case of errors for which the error message vanishes when the ON LINE button is pressed the printer will return to the standby screen CANCEL button The following errors c...

Страница 35: ...to display the Functions screen 2 Press the scroll button several times to select the Admin Setup and then press the OK button 3 Use the 10 key pad to enter the administrator password The default fact...

Страница 36: ...ey Use to display the function number shortcut Enabled when the standby screen is displayed CLEAR key Conceals each character individually when entering a password Memo z z If entering abc press the b...

Страница 37: ...14 Paper Tray 4 47 A5LEF A6 Hagaki Paper Tray 4 48 A5SEF Oufuku Hagaki Paper Tray 4 49 Other Size Tray 4 50 Paper Size Tray 5 51 X Dimension Tray 5 52 Y Dimension Tray 5 53 Media Type Tray 5 Function...

Страница 38: ...ollowing options are supplied for the device Expansion tray units trays 2 3 4 5 Expansion tray unit Expandable up to 2 levels Model TRY C3G1 Expansion tray unit with casters Model TRY C3G2 Large capac...

Страница 39: ...Before use 1 Setting Up 2 Printing 3 Basic Device Operations 4 Index Color management server Recommended for users who want greater color management response and advanced Spot Color adjustment Fiery X...

Страница 40: ...40 Using the Device to its Fullest Extent Appendix Before use 1 Setting Up 2 Printing 3 Basic Device Operations 4 Index Memo...

Страница 41: ...recautions Make sure to read them before use Installation Conditions Consider the following environmental conditions before selecting the device installation location Installation Environment Use in a...

Страница 42: ...all close to combustible solutions such as alcohol or thinners etc Do not install within reach of small children Do not install in an unstable location e g unsteady tables or sloping locations etc Do...

Страница 43: ...room Install away from strong magnetic fields and sources of noise Install away from monitors and TVs When moving the device hold the carrying lever and carrying handles The main device weight is appr...

Страница 44: ...ackage and Installation This section explains the procedure from opening the package to removing and installing the product Opening the Package and Moving the Device Make sure to install in a sufficie...

Страница 45: ...ment are used when shipping the device so store them carefully 2 Remove the cover bag enclosing the main printer unit Note Do not remove the tape securing the protective equipment paper feed trays and...

Страница 46: ...for lifting and carrying so there is no back pain etc 5 Gently lower the device into its installation location Note Gently and carefully lower the device There is a risk of crush injuries to hands et...

Страница 47: ...s of replacing the image drum see Troubleshooting Daily Maintenance Manual or the device help The stopper is mounted to the image drum in the device at the factory Make sure to use the following proce...

Страница 48: ...the arrows to remove 4 Align the red arrow labels on the image drum with the arrows on the device and gently insert into the slot and push in firmly all the way while being careful not to touch the g...

Страница 49: ...1 Pull out the tray 1 paper cassette 2 Slide the paper guide and paper stopper to align to the size of the paper that has been set 3 Thoroughly sort the paper Carefully align the edges of the paper ho...

Страница 50: ...t and 3rd trays The device can expand to a maximum of 4 trays 5 including the standard tray The expansion trays can be mounted to either the main printer unit or the expansion tray unit Note If placed...

Страница 51: ...ft the main unit using 4 people min and align the holes on the base to the 2 protrusions on the expansion tray unit Gently place on the other while matching the main unit to the position of the vertic...

Страница 52: ...large capacity expansion tray unit and then mount the main printer unit to the expansion tray unit Printer base hole Protrusion Protrusion For the expansion tray unit and large capacity expansion tra...

Страница 53: ...unit and move while remote from the ground Memo If mounting the expansion tray unit it is necessary to implement Connecting Cables P 63 and Connecting Power Cables P 57 before making the settings for...

Страница 54: ...ply and remove the cables Note When turning OFF the power supply make sure to press the power switch and wait for shutdown before turning OFF O the main power switch Reference Connecting Power Cables...

Страница 55: ...11 Print the Configuration Press either the scroll button or on the control panel to display the Functions screen Memo Print the Configuration on A4 size paper Set A4 size paper in the paper feed tray...

Страница 56: ...ther electric products to the same wall socket If connected simultaneously with an air conditioner a copy machine shredder etc electric noise may interfere with operation When the connection with the...

Страница 57: ...41dn model do not turn ON the power supply before the Spot Color kit has been set 1 Turn ON I the main power switch ON 2 Press and hold the power switch for approx 1s When the power supply is ON the L...

Страница 58: ...the power switch will turn OFF Note Press and hold the power switch for 5s min to force turn OFF the power supply Use only if a problem has occurred For device problems see Troubleshooting Daily Main...

Страница 59: ...ked Printer information Memo Print the printer information on A4 size paper Set A4 size paper in the paper feed tray Reference See Turning ON the Power Supply P 57 for how to turn ON the power supply...

Страница 60: ...r information to check the functions that are currently usable the settings table the software and hardware versions built into the device and the print quantity etc Note The printer information descr...

Страница 61: ...ia a network Connecting via USB Connecting via a network Connecting via USB Connecting via EtherTalk Connecting via Bonjour Rendezvous Connecting the cables Turning ON the device power supply Turning...

Страница 62: ...mode is compatible 2 Download and use the Mac OS 9 printer drivers from the OKI homepage http www okidata co jp Printer Driver Types The following types of printer driver can be installed z z Windows...

Страница 63: ...tc The device is equipped with network interfaces compatible with 10BASE T 100BASE TX 1000BASE T as standard Windows Windows Macintosh Macintosh Hub Preparations LAN cable Hub Note LAN cables and hubs...

Страница 64: ...ed on the PC remove the USB cable fromthe PC and first install the printer drivers page 72 1 Pay attention to the connector orientation and connect the square end of the USB cable to the Printer Conne...

Страница 65: ...e provider The server on the network DHCP etc depends on the network environment in use Check with your in house network administrator internet service provider or router manufacturer Setup requires c...

Страница 66: ...Online button to return to standby scr Network Setup Use Online button to return 2 Manual Auto 1 1 1 Page IP Address Set If acquiring the IP address automatically check that Auto has been selected an...

Страница 67: ...mplete press the BACK button 6 Subnet Mask UseOnlinebuttontoreturntostandbyscreen Network Setup UseOnlinebuttontoreturn xxx xxx xxx xxx Subnet Mask 12Press the scroll button to select Gateway Address...

Страница 68: ...el 3 Click View network status and tasks 4 Click Local Area Connection and then click Properties in the Local Area Connection Status window 5 Select Internet Protocol Version 4 TCP IPv4 and click Prop...

Страница 69: ...n the User Account Control window is displayed click Yes 4 Read the Software License Agreement thoroughly and click Agree 5 Read the Environmental advice for Users and click Next 6 Set the printer mod...

Страница 70: ...heck that the device and PC are connected and that the power supply is turned ON Reference Connecting Using LAN Cables P 63 2 Insert the Software DVD ROM into the PC 3 When the AutoPlay window is disp...

Страница 71: ...e table Click Next to start the installation 11 When the installation is complete click Exit 12Click Exit in the menu screen to finish 13Select Start Devices and Printers 14Check that the OKI C931 ico...

Страница 72: ...Turning ON the device power supply 1 Turn ON the PC power supply to start Windows Memo When the device power supply is turned ON the Add new software wizard may be displayed in the screen If this happ...

Страница 73: ...en is displayed during the installation connect the device and PC using a USB cable and then turn ON the device power supply Memo If the display does not change even when the device is connected click...

Страница 74: ...USB connection see the enclosed Troubleshooting Daily Maintenance Manual This manual explains the possible causes of the setup trouble and the countermeasures Installing Printer Drivers Macintosh Netw...

Страница 75: ...r driver version may result in differences from the description in the manual Disable all anti virus software before starting the setup Using EtherTalk Enable EtherTalk using the control panel and dis...

Страница 76: ...TCP IP NetBIOS over TCP EtherTalk IP Address Set IPv4 Address Subnet Mask UseOnlinebuttontoreturntostandbyscreen Network Setup UseOnlinebuttontoreturn 2 Disable Enable 1 1 1 Page EtherTalk 8 Press the...

Страница 77: ...nd that the power supply is turned ON Reference Connecting Using LAN Cables P 63 2 Insert the Software DVD ROM into the PC 3 Double click the OKI icon on the desktop 4 Double click Driver Installer fo...

Страница 78: ...tware DVD ROM from the computer Using Bonjour Rendezvous Installing the printer drivers on the computer 1 Check that the device and PC are connected and that the power supply is turned ON Reference Co...

Страница 79: ...Kind and check that OKI C931 PS is displayed in Use The name of the printer will be displayed in the format OKI C931 last 6 digits of MAC address 11 Click Configure in the next screen If the optional...

Страница 80: ...ia USB install the printer drivers on the computer and then set the device as a USB printer Setup Flow Turning ON the power supply Turning ON the PC power supply Installing the printer drivers Adding...

Страница 81: ...he Apple menu 7 Click Print Scan 8 Click 9 Select the printer displayed as USB in Kind Check that OKI DATA CORP C931 is displayed in the Add screen and click Add 10Click Configure in the next screen I...

Страница 82: ...procedure to set the printer drivers if an optional expansion unit or built in HDD have been mounted to the device Windows PS Printer Drivers 1 Click Start and select Devices and Printers 2 Right cli...

Страница 83: ...Printer Drivers 1 Click Start and select Devices and Printers 2 Right click the OKI C931 icon and select Printer properties OKI C931 PCL6 if installing multiple printer drivers 3 Select the Device Op...

Страница 84: ...ivers 1 Click Start and select Devices and Printers 2 Right click the OKI C931 icon and select Printer properties OKI C931 XPS if installing multiple printers 3 Select the Device Options tab Adding an...

Страница 85: ...s Note This section describes the operations procedures for Mac OS X 10 8 unless otherwise specified Screens and operations procedures may differ depending on the version 1 Select System Preferences f...

Страница 86: ...86 Connecting the PC Appendix Printing 3 Setting Up 2 Before use 1 Basic Device Operations 4 Index Memo...

Страница 87: ...r high quality printing it is necessary to use paper that satisfies conditions regarding quality thickness paper finish etc If printing on paper not recommended by OKI thoroughly test the print qualit...

Страница 88: ...64 B5 182 257 B6 128 182 B6 Half 1 64 182 Letter 215 9 279 4 8 5 11 Legal 13 inch 215 9 330 2 8 5 13 Legal 13 5 inch 215 9 342 9 8 5 13 5 Legal 14 inch 215 9 355 6 8 5 14 Executive 184 2 266 7 7 25 10...

Страница 89: ...8 119 197 Com 9 98 4 226 1 3 875 8 875 24LB paper is used with flaps firmly creased Com 10 104 8 241 3 4 125 9 5 Monarch 98 4 190 5 3 875 7 5 DL 110 220 4 33 8 66 C5 162 229 6 4 9 C4 229 324 9 12 8 L...

Страница 90: ...h 90 to 330mm length 147 to 457mm GSM 64 to 320 g m2 O O O O O Custom Width 64mm min less than 90mm length greater than 457mm to 483mm max GSM 64 to 320 g m2 O X X O X Plain paper With 1 sided printin...

Страница 91: ...2 A4 Letter O O X O X Index cards 76 2mm 127mm 3 5 O X X O X 1 Use the printer control panel to set the paper size of the tray used to Custom and set Paper width and paper length to the values shown...

Страница 92: ...Paper is fed horizontally Trays Multi Purpose Tray Paper Feed Orientation Paper Feed Orientation icon describes placing the paper horizontally as viewed from the front of the printer Paper is fed vert...

Страница 93: ...postcards Japanese double postcards legal13 5 legal14 custom If the printer does not detect automatically use the control panel to set the paper size For details see Setting Paper Using the Control Pa...

Страница 94: ...from the following printer drivers z z Windows PS printer driver z z Windows PCL printer driver P 95 z z Windows XPS printer driver P 96 z z Mac OS X printer driver P 97 Further this explanation uses...

Страница 95: ...ker open the printer face up stacker and select Stacker Face Up in Output Bin 8 Click OK in the Printing preferences screen 9 Click Print in the Print screen to print Using Windows PCL Printer Drivers...

Страница 96: ...ordPad 2 Click Page setup in the File menu 3 Select the paper size and print orientation and click OK 4 Click Print in the File menu 5 Click Preferences 6 Select Type in the Setup tab 7 Select Weight...

Страница 97: ...entation using the page setup dialog box and click OK 4 Select Print in the File menu 5 Select Paper Feed in the print dialog box 6 Check that Auto Select has been selected 7 Select Print Options usin...

Страница 98: ...paper size 1 Press the Fn key The numerical value input screen will be displayed 2 Press 9 0 and click the OK button 3 Select Paper Size and click the OK button 4 Press the scroll buttons to select th...

Страница 99: ...he standby screen Memo z z Press the CANCEL button to return to the standby screen Setting Paper The multi purpose tray prints to the face up side of the paper that has been set Note z z Do not collat...

Страница 100: ...oroughly sort the paper Carefully align the ends of the paper horizontally 7 Place the print side face up and set the paper Note z z Do not set the paper beyond the MP paper guide z z When adding pape...

Страница 101: ...the multi purpose tray from the printer drivers z z Windows PS printer driver z z Windows PCL printer driver P 103 z z Windows XPS printer driver P 104 z z Mac OS X printer driver P 105 Further this e...

Страница 102: ...per Source in the Paper Quality tab and click Advanced 9 Select a suitable value from Media Weight in the Advanced Options screen and then click OK Memo z z Normally select Auto Select Auto to use the...

Страница 103: ...d click OK 4 Click Print in the File menu 5 Click Preferences 6 Select Size in the Setup tab 7 Select Multipurpose Tray in Source 8 Click Paper Feed Options Memo z z To print pages individually enable...

Страница 104: ...ation and click OK 4 Click Print in the File menu 5 Click Preferences 6 Select Multipurpose Tray in Source in the Setup tab 7 Click Paper Feed Options Memo z z To print pages individually enable Use M...

Страница 105: ...size and print orientation using the page setup dialog box and click OK 4 Select Print in the File menu 5 Select Paper Feed in the print dialog box 6 Select Multi Purpose Tray in All Pages From Memo...

Страница 106: ...aper is output with the print side face down Papers are stacked in the order in which they are printed To output from the face down stacker specify the face down stacker in Output Bin using the printe...

Страница 107: ...e Down in Output Bin in the Job Options tab and click OK 4 Implement printing Using Mac OS X Printer Drivers Memo z z This section uses TextEdit as an example 1 Open the file to be printed 2 Select Pr...

Страница 108: ...ce up stacker on the left of the printer 2 Open the paper supporter as shown in the diagram 3 Rotate the auxiliary supporter in the direction of the arrow until its lock position 4 Open the file to be...

Страница 109: ...Up in Output Bin in Job Options and click OK 7 Implement printing Using Mac OS X Printer Drivers Memo z z This section uses TextEdit as an example 5 Select Print in the File menu 6 Select Print Optio...

Страница 110: ...110 Outputting Paper Appendix Setting Up 2 Before Use 1 Printing 3 Basic Device Operations 4 Index Memo...

Страница 111: ...n also set the printer to enter sleep mode from power save mode z z Setting Power Save Mode Setting Power Save Mode The device can be set to enter power save mode from standby mode when no printing or...

Страница 112: ...e set before pressing the ON LINE button Setting the time before the printer enters power save mode You can set the time until power save mode is entered The default factory setting is 1 min Lengtheni...

Страница 113: ...ep mode The device can be set to enter sleep mode from power save mode when no printing or data has been received after a fixed period of time The default factory setting is to enable sleep so impleme...

Страница 114: ...tems can also continue to be set before pressing the ON LINE button Setting the time before the printer enters sleep mode You can set the time until sleep mode is entered The default factory setting i...

Страница 115: ...nting 3 Before use 1 Basic Device Operations 4 Index 4 Press the ON LINE button to return to the standby screen Memo z z The settable times until sleep mode is entered are described below 1 min 2 mins...

Страница 116: ...d Network Extension Cannot connect to device Driver installer When connected to a network the device options information cannot be acquired while installing the printer drivers Mac OS X NIC Setup Tool...

Страница 117: ...ezvous P 78 or Setting Power Save Mode P 111 Unable to search setup While in sleep mode searches and settings using the following functions and protocols are disabled z z PnP X z z UPnP z z LLTD z z M...

Страница 118: ...tering OFF mode Enable Enters OFF mode automatically Auto Config Enters OFF mode when the set time has elapsed If using a network connection however OFF mode is not entered even when the set time has...

Страница 119: ...ing the time before the printer enters auto power OFF mode You can set the time until OFF mode is entered The default factory setting is 4 hours 1 Press the Fn key The numerical values input screen wi...

Страница 120: ...aper to date You can also check the quantities printed fed from each tray 1 Press the scroll button or 2 Select Configuration and press the OK button 3 Select Tray Count and press the OK button 4 Sele...

Страница 121: ...OK button 3 Select Supplies Life and press the OK button 4 Select the consumable or maintenance unit image drum belt unit fixer unit or waste toner box to be checked 5 Press the OK button To continue...

Страница 122: ...reparation press the CANCEL button on the control panel When the CANCEL button is pressed the following screens will be displayed To cancel printing select Yes and press the OK button To continue prin...

Страница 123: ...tly for the desired Mac OS and that you are connected to the network using LPD protocols TCP IP 2 Download the PPD installer for Mac OS X for the printer to be connected from the OKI Data homepage htt...

Страница 124: ...C931 LPD as an example 4 The printer to be used PS will be displayed automatically as the driver If you cannot communicate properly with the printer auto selection will not be implemented Note z z Whe...

Страница 125: ...nK 3 4 Cyan Drum Magenta Drum Yellow Drum Black Drum White Drum 2 4 Clear Drum 3 4 Waste Toner Box Belt Fuser Network Printer Name Short Printer Name IPv4 Address Subnet Mask Gateway Address MAC Addre...

Страница 126: ...sage Report Error Log Color Profile List User Media List Test Print 1 Test Print 2 Test Print 3 1 Print Print DEMO1 Print Print Print Print Print Print Print Print Print Print Print F100 F101 F102 F10...

Страница 127: ...obi Paper Legal14 Paper Legal14 A5LEF A6 Hagaki Paper A5 A5SEF Oufuku Hagaki Paper A5 Other Size B6 Paper Size Cassette Size X Dimension 3 210mm 8 3 Y Dimension 3 297mm 11 7 Media Type Medium Light Me...

Страница 128: ...Adjust 1 0 00mm Overprint Y Adjust 1 0 00mm X Adjust 0 00mm Y Adjust 0 00mm Duplex X Adjust 1 0 00mm Duplex Y Adjust 1 0 00mm Overprint X Adjust 1 0 00mm Overprint Y Adjust 1 0 00mm X Adjust 0 00mm Y...

Страница 129: ...k Scale Normal Gigabit Network Disable Hub Link Setting Auto Network Factory Defaults Execute USB Setup USB Enable Speed 480Mbps Soft Reset Disable Serial Number Enable Offline Receive Disable Print S...

Страница 130: ...2 2 5 Tray3 2 20 Tray4 2 21 Tray5 2 22 XPS Setup DigitalSignature Off DiscardControl Auto MC Mode On Unzip Mode Speed White Page Skip Off Color Setup Ink Simulation Off UCR Low CMY 100 Density Disable...

Страница 131: ...ff Make Secure HDD Make Normal HDD Reset Cipher Key Language Setup Language Initialize Font Setup Font Output Mode JIS2004 Job Cancel Setup Cancel Key Behavior Shortt Inquiry Display Long Focus Positi...

Страница 132: ...light 0 Mid Tone 0 Dark 0 Highlight 0 Mid Tone 0 Dark 0 Highlight 0 Mid Tone 0 Dark 0 Highlight 0 Mid Tone 0 Dark 0 Fine Color Tuning Cyan Tuning Magenta Tuning Yellow Tuning Black Tuning Reset Color...

Страница 133: ...Control panel Show devices and printers 2 Right click the OKI C931 icon and select Printer properties Windows Vista Windows Server 2008 1 Click the Start button and select Control panel Printers 2 Rig...

Страница 134: ...er plug is inserted into the outlet Use environment conditions Temperature 10 C to 32 C humidity 20 to 80 RH Max wet bulb temperature 25 C Environments where high quality and full color are assured Te...

Страница 135: ...pot Color overprint CMYK Spot Color white Type of paper 7 Paper quality 8 Plain thick paper glossy 9 transparent film 10 transparencies 11 postcards labels 12 envelopes 13 Paper size A3NOBI 13 18 A3WI...

Страница 136: ...stcards envelopes and card stock 5 The mode that prints white before CMYK If the paper size exceeds B4 the print speed is slower 6 Compatible with plain and glossy paper only 7 Print quality and paper...

Страница 137: ...ASE T use the control panel to make the following settings Set to Administrator menu Enter password Network Setup Gigabit Network Enable z z Cables Unshielded twist pair cable with EJ 45 connector cat...

Страница 138: ...ptacle female upstream port z z Cables 5m max USB2 0 specifications cable 2m max recommended Do not use shielded cable wires z z Send mode Full speed 12Mbps 0 25 max High speed 480Mbps 0 05 max z z Po...

Страница 139: ...dix Setting Up 2 Before use 1 Printing 3 Basic Device Operations 4 Index 139 Dimensions Plan view 1369mm 699mm 640mm 665mm Plan view Side view Side view When the optional expansion tray unit is mounte...

Страница 140: ...Specifications Appendix Printing 3 Setting Up 2 Before use 1 Basic Device Operations 4 Index 140 Memo...

Страница 141: ...rying lever 25 26 CLEAR key 25 color management server 25 26 29 Consumables 46 Toner cartridge 46 Consumption power 56 Control panel 28 Customer support 25 Customization 98 99 D Detecting Automaticall...

Страница 142: ...ay unit 33 51 LED lamp 57 58 Liquid crystal panel 25 26 Lock lever knob 27 LPD Protocols TCP IP 123 M Mac OS X printer driver Documents 31 Main power switch 25 57 58 Power conditions 26 Maintenance 2...

Страница 143: ...62 Power cable 57 Power save Power save mode 111 POWER SAVE button Power save key 34 Power save mode 31 34 Power save mode 31 32 Setup 111 Power supply 56 OFF 58 ON 57 Power supply conditions 56 Power...

Страница 144: ...up screen 39 Subnet mask 65 67 Support Customer support 23 T Test prints Test printing using the printer alone 59 Toner cartridge 46 Toner replacement cover 23 27 Transfer roller unit securing lever 2...

Страница 145: ...ems Italia S p A via Milano 11 20084 Lacchiarella MI Tel 39 0 2 900261 Fax 39 0 2 90026344 Website www oki it OKI Printing Solutions Platinium Business Park II 3rd Floor ul Domaniewska 42 02 672 Warsa...

Страница 146: ...COM http my okidata com Oki Data Americas Inc Canada Canad 4140B Sladeview Crescent Unit 7 8 Mississauga Ontario Canada L5L 6A1 T l 1 905 608 5000 T l c 1 905 608 5040 http WWW OKIPRINTINGSOLUTIONS C...

Страница 147: ...www okiprintingsolutions com Oki Data Corporation 4 11 22 Shibaura Minato ku Tokyo 108 8551 Japan 45582402EE Rev1...

Отзывы: