background image

GPA-680

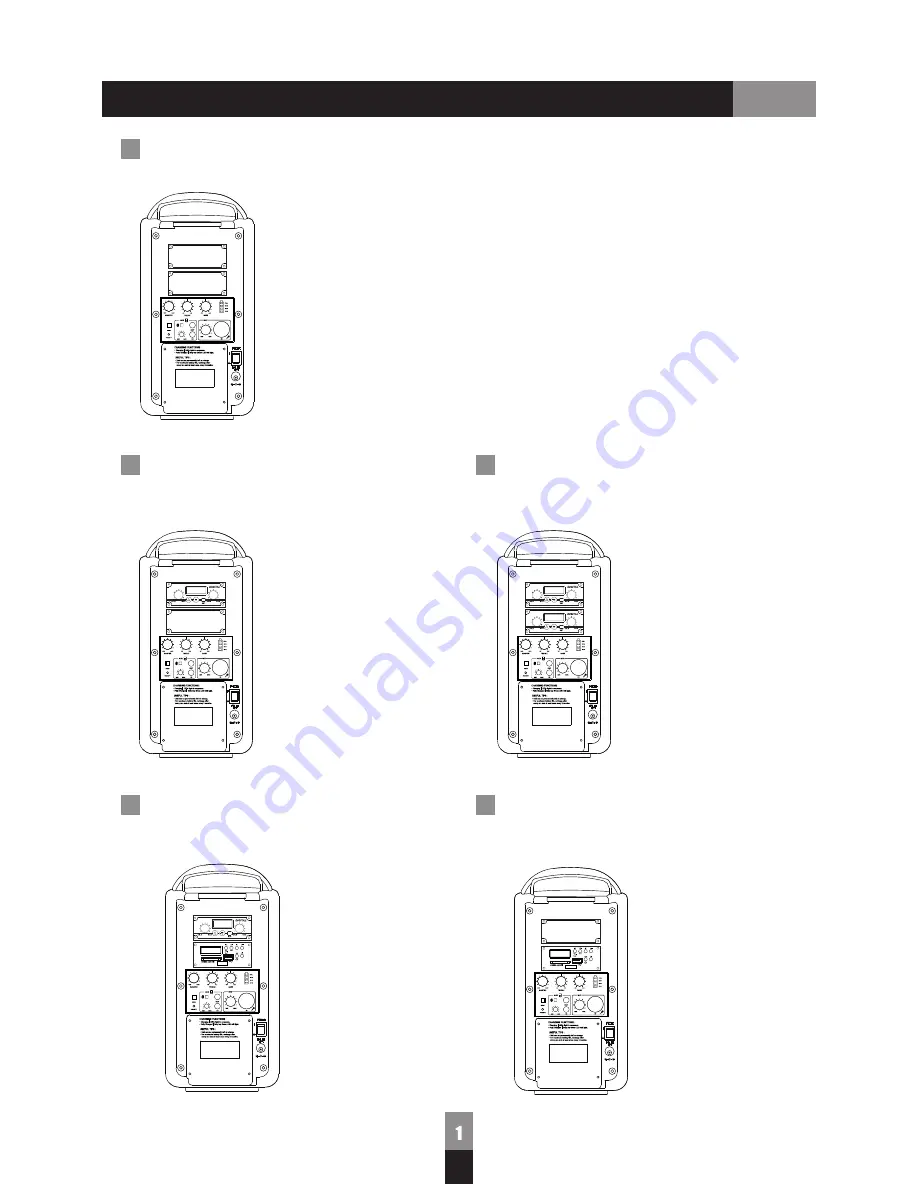
Product Mix 

Portable Powered Speaker

GPA-680D1

Wireless Portable Sound Systems
1 receiver  built-in

,

GPA-680D2

Wireless Portable Sound Systems
2 receivers  built-in

,

GPA-680DU

GPA-680U

Wireless Portable Sound Systems
1 receiver  and 1 audio player built-in

,

Portable  Powered Speaker
1 audio player built-in

,

Содержание GPA-680

Страница 1: ...Digital GPA 680 Series 50W Wireless Portable Bluetooth Sound System User Manual ...

Страница 2: ...Bodypack transmitter EJ 6T 12 14 Troubleshooting 15 Maintenance 16 17 Specifications 18 19 Memo 20 21 1 2 Thank you for the purchase of Digital Wireless Portable Bluetooth Sound System GPA 680 This manual provides comprehensive instructions and operations Please read it over before your operation on the unit All peripheral and accessories are subject to order Components in the package might be dif...

Страница 3: ...1 Wireless Portable Sound Systems 1 receiver built in GPA 680D2 Wireless Portable Sound Systems 2 receivers built in GPA 680DU GPA 680U Wireless Portable Sound Systems 1 receiver and 1 audio player built in Portable Powered Speaker 1 audio player built in ...

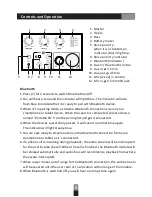
Страница 4: ...r switch 7 DC input 8 Battery door 1 Tweeter 1 2 Neodymium driver 5 3 Receiver DR 600 4 Digital audio player UM 502 Battery replacement 3 4 8 5 6 7 2 1 Get screws off Take battery out Get connection right RED for Anode BLACK for Cathode Lithium battery ...

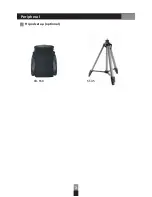
Страница 5: ...固定方式與搭配說明 CB 650 ST 35 Peripheral Tripod set up optional ...

Страница 6: ...device When the search is completed select a device named Portable PA from the pairing list and get it connected 4 When the devices successfully paired it will sound a prompt tone again The indicator will light steady blue 5 You are now ready to stream audio via the Bluetooth connection from your smartphone or tablet as it s connected 6 If a phone call is incoming during playback the audio stream ...

Страница 7: ...ff after 2 to 3 seconds the display shuts off Channel changing 1 Hold on to SET key to enter channel changing mode once the channel number on the display starts to flash you may use the up and down key to select channel 2 After confirming the channel press SET key again or it also auto confirms without pressing any keys within 10 seconds Operating range Hi Low setting 1 In off mode press SET key a...

Страница 8: ...signal for more than 5 seconds B channel microphone auto switches to channel A 3 Both channels A and B need to be within the range of meters when power on 15 1 Preset Master microphone will be identifying as channel A and the slave will be channel B 2 When channel A microphone shuts off or out of signal for more than 5 seconds B channel microphone auto shuts off 3 Only when microphone is set to sa...

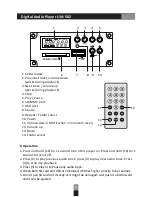
Страница 9: ...2 to play previous audio track press 3 to play next audio track Press 4 to stop any playback 1 Press and hold 10 for 1 second to turn this player on Press and hold 10 for 1 second to turn it off Operation 1 LCD window 2 Previous track volume down works during playback 3 Next track volume up works during playback 4 Stop 5 Play Pause 6 SD MMC port 7 USB port 8 Sensor 9 Repeat Folder select 10 Power ...

Страница 10: ...repeat all tracks in all album To repeat all tracks in a single album b When not in playback press 9 to select a desired folder album with NEXT PREV buttons Finally press PLAY to end the setting 7 During playback press VOL to increase volume press VOL to decrease volume Digital Audio Player UM 502 ...

Страница 11: ...t scroll up and down to adjust 7 Talk Mute button 8 Battery holder 9 Battery door 10 Master Slave mode switch 11 Charging contacts Insert battery Open battery door and insert 2 AA 1 2 V Ni MH 1600mAh or 2 AA 1 5 V Alkaline batteries Make sure the batteries are allocated in correct direction Digital handheld microphone EJ 601TM ...

Страница 12: ... adjust volume Green microphone icon Talk Red microphone icon Mute Green microphone icon Talk Flashing red microphone icon Mute Volume adjustment Master Slave mode setup When set to Slave mode the default channel will be B CH and it will always stay in B CH After battery is taken off you can see master slave mode switch 10 When set to Master mode the default channel will be A CH when A CH is occup...

Страница 13: ...shows If syncing failed then mute key lights in red and no channel number display When microphone is set to slave mode Requires within 15 meters If idle more than 30mins then microphones shuts off 1 B CH only functions when A CH exists 2 When A CH is in use you will not be able to talk 3 When A CH gets shut down B CH also automatically shuts down CAUTION Take out batteries when the devices won t b...

Страница 14: ...trol 3 LCD window 4 Mesh Head Operation and Setup Power ON 1 Press power key 1 to power on 2 Once powered on the channel selection blinks and standby for pairing Once paired successfully battery meter channel number and Ch A or Ch B display on the screen 3 shuts off When the device idle more than 30 minutes without paring the device Digital pendant bodypack Transmitter EJ 6T ...

Страница 15: ...talk mode 2 Talk mode lights in blue and mute mode lights in red The pendant microphone will automatically sync when powered on When syncing successfully mute key lights in blue and channel number shows If syncing failed then mute key lights in red and no channel number display When microphone is set to slave mode 1 B CH only functions when A CH exists 2 When A CH is in use you will not be able to...

Страница 16: ...ter Slave does not affect by RESET mode Volume switch Reset Method to install neck strap The best distance is 10 CM between pendant microphone and user s chin Digital pendant bodypack Transmitter EJ 6T CAUTION To maintain battery life please charge fully after use every time or every 3 months If battery require replacement please pass to to do so professional technician ...

Страница 17: ...Troubleshooting Failed to Power On Be sure batteries are allocated and put in correct direction Be sure power adapter is plugged well No Sound Output Be sure transmitter and receiver stay at same channel Be sure volume control on transmitter and receiver are turned properly Be sure Master is turned properly Be sure Mute button is not on Check if transmitter and receiver stay at same frequency band...

Страница 18: ...fe and better performance make sure you charge the battery regularly every month When you need to use the unit again after a long period of stogare make sure you charge if fully for at least 8 hours BEFORE any operation Please also charge this unit every time right after operation to secure a longer battery life This unit has DOD depth of discharge protection design When Power Switch LED flashes r...

Страница 19: ...its are designed to provide reasonable protection against harmful interference in a residential installation This equipment generates uses and can radiate radio frequency energy and if not installed and used in accordance with the instruction may cause harmful interference to radio communication However there is no grantee that interference will not occur in a particular installation If this equip...

Страница 20: ... jack aux in stereo mixed 3 5 mm aux out stereo mixed 3 5 mm Master Tone Mic Aux in AC switching power adapter 100 240 V 20V 3 25A Lithium rechargeable battery 8 12 hours battery dependant 4 6 hours battery dependant 50 W Max 4 Ω Dimensions DxWxH Weight 200 x 170 x 276 mm 3 3 kg Lithium battery included FULL 80 50 20 Carrier frequency Channels LCD window Channel adjustment 2 4 2 5 GHz 16 channel f...

Страница 21: ...se Power requirement Display Output level Format supported S N ratio T H D Remote range Controls External audio supported 20 Hz 20 kHz DC 12 V backlit LCD 600 mV MPEG Layer 3 60 dB 1 3 m Play Stop Repeat Next Prev USB disk SD card Digital Handheld Microphone EJ 601TM Microphone capsule Antenna RF output power Audio control Battery Running time Weight condenser Max 10 dBm Talk Mute button 2 AA 1 2 ...

Страница 22: ...Memo ...

Страница 23: ...Memo ...

Страница 24: ...10 14 ...

Отзывы: