112
Chapter 7 The copy jobs
Improve the copy quality when the original is a photo
Improve the copy quality when the original is a photo
Introduction
The Océ VarioPrint
®
1055/65/75 can detect photos, rasters and fine lines on your
originals. The best quality for your copies is selected. Therefore, you are advised not
to change the image quality after that you have made a test copy.
Before you begin
First make a test copy to check your quality settings, especially for a large job.
How improve the copy quality when the original is a photo
1.
Place and align the photo face down on the platen (
see ‘Place an original on the
platen’ on page 45
).
2.
Press the 'Copy' key.
3.
Select '1-sided' in the 'Original' and 'Copy' boxes.
4.
Select 'No' in the 'Staple' box.
5.
Press the 'Paper' key.
6.
Select the required copy size in the 'Tray' box.
7.
Press the 'Extra' key.
Select the 'Quality' tab.
8.
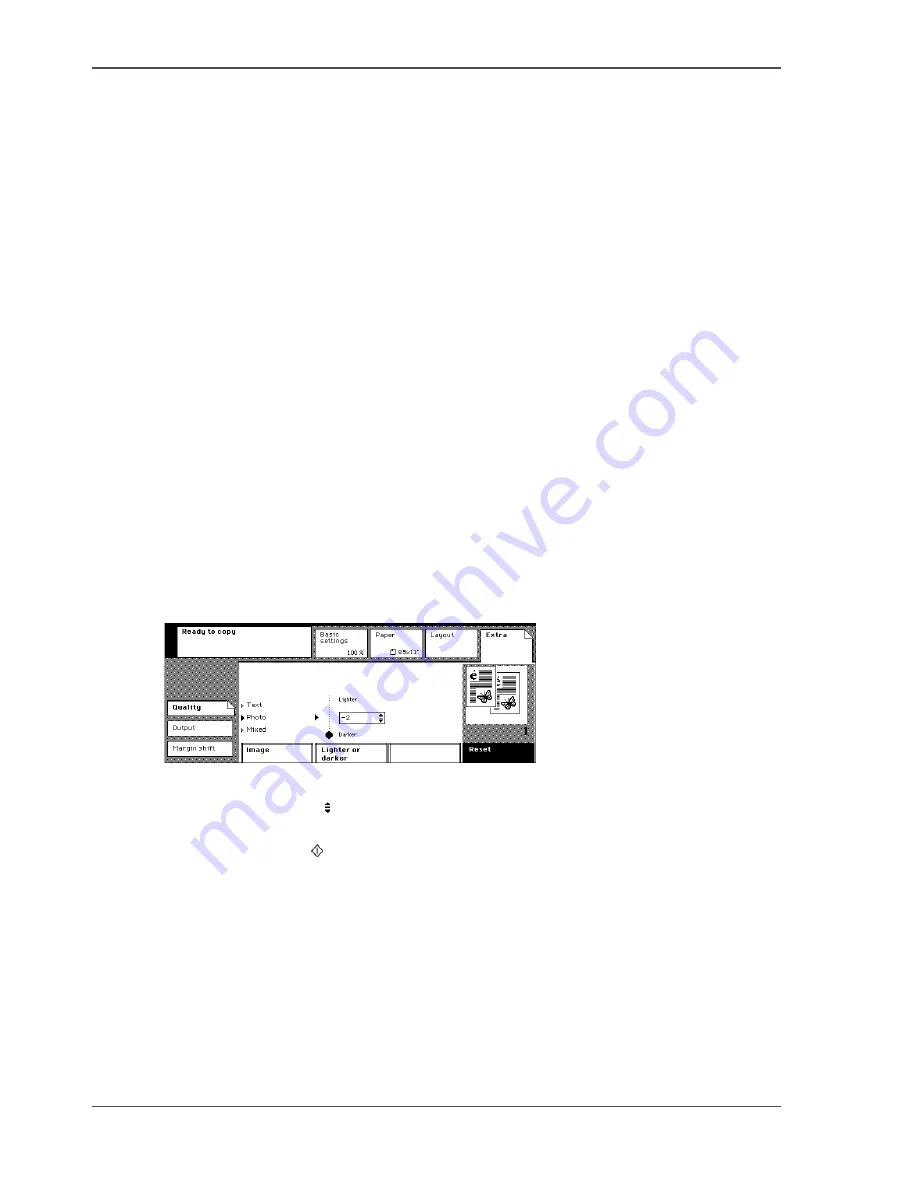
Select 'Photo' in the 'Image' box.
[94]
[94] Improve the image quality of a photo
9.
Use the scroll wheel to select a 'Lighter or darker' value from 2 down to -2.
10.
Use the numeric keys to enter the number of copies.
11.
Press the Start key .
12.
Do not forget to remove the photo from the platen.
Содержание VarioPrint 1055
Страница 1: ...Oc VarioPrint 1055 65 75 Oc User manual Job Manual...
Страница 9: ...9 Chapter 1 Introduction...
Страница 14: ...14 Chapter 1 Introduction More information on the Oc VarioPrint 1055 65 75...
Страница 15: ...15 Chapter 2 Getting to know the Network Printer...
Страница 26: ...26 Chapter 2 Getting to know the Network Printer What can the messages of the Network Printer tell you...
Страница 27: ...27 Chapter 3 Getting to know the Digital Copier...
Страница 34: ...34 Chapter 3 Getting to know the Digital Copier What can the messages of the Digital Copier tell you...
Страница 35: ...35 Chapter 4 Getting Started...
Страница 39: ...39 Chapter 5 Place the originals...
Страница 48: ...48 Chapter 5 Place the originals Place an original on the platen...
Страница 49: ...49 Chapter 6 The print jobs...
Страница 65: ...65 Print a secured document 50 50 Entering the Security Code 6 Press the Close key to quit your mailbox...
Страница 91: ...91 Chapter 7 The copy jobs...
Страница 106: ...106 Chapter 7 The copy jobs Copy on special material placed in a paper tray 9 Press the Start key...
Страница 116: ...116 Chapter 7 The copy jobs Stop a copy job...
Страница 117: ...117 Chapter 8 The scan jobs...
Страница 133: ...133 Scan to your USB stick 116 116 The scan job has started 8 Remove the USB stick when indicated...
Страница 142: ...142 Chapter 8 The scan jobs Stop a scan job...
Страница 143: ...143 Chapter 9 Paper toner and staples...
Страница 153: ...153 Chapter 10 Errors...
Страница 157: ...157 Appendix A All settings...
Страница 172: ...172 Appendix A All settings The scan settings...
Страница 173: ...173 Appendix B Specifications...
Страница 181: ...181 Appendix C Addresses...
Страница 194: ...194 Index...


