Suggestions for Core Drilling
With the CP65
Setting Up
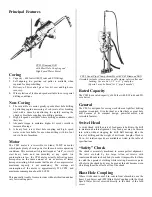
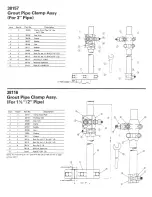
When installing drill on column, column are, or cross bar, be
sure setup is rigid. Misalignment resulting from loose column or
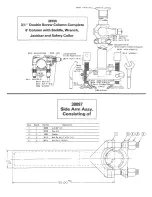
arm may break rods or feed screw. The use of a double screw
column instead of the single screw type is recommended for this
reason. Column should be set up about 42 inches back from
where the hole is to be collared to allow for the full run of the
feed screw and the stroke of the rod puller.
If sludge samples are to be taken, as is done where core
recovery is poor, it is advisable to use a piece of casing in the
collar of the hole. In this case, the column should be set back
sufficiently so that there is still approximately 42 inches
between the column and the end of the casing.
When drilling down holes, where there is danger of muck or
other foreign material falling into the hole, it is advisable to use
casing in the collar of the hole as a safety precaution. In drilling
up holes more than 30 degrees above horizontal, the hole should
be started with a casing bit so that a stuffing box may be used to
prevent water and muck from pouring out of the hole and onto
the drill and operator.
When starting holes in fractured or faulty ground where there is
danger of small pieces of rock caving into the hole, case
sufficiently long to bottom in solid ground should be inserted.
If this is not done, the small pieces of rock, especially if hard,
may materially increase the diamond bit cost per foot of hole
drilled by becoming wedged between the diamonds in the bit
and breaking them when pulling out of the hole. The same holds
true when going to the bottom of the hole, as the pieces may be
forced to the bottom and it will be necessary to run over them
with the probability that some of the diamonds will be broken.
Even if the sharpness of the bit is not materially impaired, each
of the diamonds in the bit represents a portion of its value, and a
correspondingly lower footage and salvage may be had.
Drilling
Diamond bits required for core drilling are the casing bit, double
tube reaming shell and bevel wall coring bit.
In starting to drill (where casing will be used) a five foot rod is
put through the chuck and feed screw, the starting barrel is
tightened to the rod in front of the chuck and the water swivel is
screwed on the back end of the five foot rod. Next, tighten the
casing bit in place, using care not to contact the diamonds with
the wrench.
Move up to rock face and inspect to make sure it is square with
the bit. If it is not, pick or moil the surface until it is square. The
chick screws may now be tightened and adjusted to center the
rod in the chuck. If the ground is soft, the hole mat be started
immediately by holding the starting barrel against the face by
hand. If the ground is hard, a ‘vee’ should be cut in the edge of a
plank or lagging and the plank secured under the starting barrel.
Then, holding the starting barrel down into the ‘vee’ with
another plank or lagging, turn on the water, place drill in lowest
feed gear and open the throttle slowly.
Always start the drill slowly and collar the hole carefully. More
damage may be done to the bit in collaring the hole than in the
next 20 feet of drilling. When a portion of the bit is in the rock,
remove the plank and open the throttle.
Casing should be run into the solid rock far enough so that when
the diamond casing bit is removed and the hole cased,
approximately four inches of casing is outside the collar. The
starting barrel is simply a short piece of casing with a rod-to-
casing bushing and on which a diamond set casing bit may be
used.
If casing is to be fun deeper, longer pieces may be added as
required. After hold is cased to solid bottom, hole should be
washed out, using cross chipping bit on the end of rods to chop
out any small pieces of core that may be left in the hole. This
will ensure a clean hole for the start.
If the casing is only into the rock a couple feet, it will be
necessary to put the double tube core barrel through the feed
screw after removing the Feed Screw Bushing. LEFT HAND
THREAD!
The inner tube of the core barrel is quite thin in section and is
designed to receive the core cut by the bit. Water coming from
the rod into the back end connection of the core barrel flows
between the inner and outer tubes toward the bit. Most of this
water passes out around the bit to keep it cool and carry away
the sludge. A small amount of the water passes back up the
inner tube to float pieces of core back away from the bit and to
keep them from wedging in the tube or bit and causing the bit to
choke or block prematurely and grind up the core; this feature is
the reason that double tube core barrels are usually
recommended instead of single tube barrels. After passing
through the inner tube, the water runs out two small holes in the
side of the back end connection of the core barrel. When starting
a hole with part of the core barrel outside the collar of the hole,
remove bit and push cork, rubber plug or wad of paper to the
back of the core barrel to keep water from spraying on the drill
and operator while drilling. After core barrel is well into hole,
remove the plug the next time the core barrel is emptied.
When the hole has been drilling to approximately five feet, the
core barrel and rods should be kept greased. Different ground
conditions call for different greases, but usually a cup or fibre
grease of No. 3 government specification is suitable. After
greasing, it will be necessary to cut burlap into six or eight inch
squares and use it to grip the rods when pulling them.
The practice of greasing is necessary to cut friction and
vibration to a minimum. Vibration is very hard on diamond bits,
at times shattering the diamonds if allowed to continue for any
length of time. When vibration occurs it may not show on the
surface, but it slows down the drill at once; the best practice is
to shut off the motor completely, and then reopen the throttle
valve slowly, changing speeds until a spot is found where
vibration is not so intense.


