20
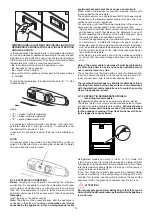
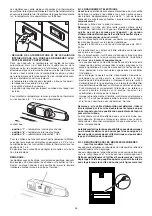
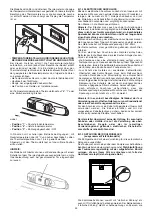
C.2.1 TEMPERATURE CONTROLLER DISPLAY
The temperature controller has a 3-digit electronic display for
showing the temperature measured by the probe, and several
ICONS
(see fig.2 and par. C.2.4).
C.2.2 BUTTONS
The temperature controller has 4 buttons for control and pro-
gramming the instrument.
- Multifunction
“ON/OFF”
and
“UP”
button
for switching
the appliance on and off and increasing the values.
-
“DOWN”
button
for decreasing the values.
-
“Prg/mute”
button
for silencing the alarm buzzer.
-
“SET”
button
for accessing the Setpoint.
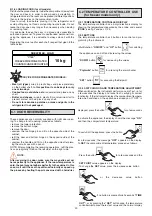
C.2.3 SWITCHING ON AND TEMPERATURE ADJUSTMENT
When switched on, the instrument performs a Lamp Test, i.e. for
a few seconds the display and Icons flash, verifying its correct
functioning. If the instrument displays the compartment tempera-
ture when switched on, the appliance is already on. If “OFF” is
displayed, press the button
for a few seconds
to activate the appliance; the display shows the message
“ON”
and then the compartment temperature.
To switch off the appliance, press the button
for a few seconds; the message
“OFF”
appears on the display.
To
SET
the compartment temperature, proceed as follows:
- Press the button
for a few seconds and the
SET POINT
value appears on the display.
- To change the
SET
value, press the increase value button
or the decrease value button
. If no button is pressed for 60 seconds (
“TIME
OUT”
), or by pressing the
“SET”
button once, the temperature
controller memorises the last set value and the normal display
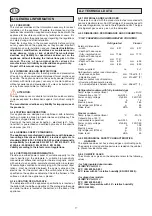
B.1.6 LOADING FOOD (for all models)
Distribute the product evenly inside the compartment (away from
the door and back) in order to allow good air circulation. In
refrigerated models the racks can be placed in different positions
thanks to the guides on the compartment walls.
Cover or wrap food before placing it in the refrigerator and
avoid putting very hot foods or steaming liquids inside. Do not
leave the door open any longer than necessary when loading
or removing food.
It is advisable to keep the keys in a place only accessible to
authorised personnel. To prevent unauthorised personnel from
using the appliance, it is advisable to always close it with the
key.
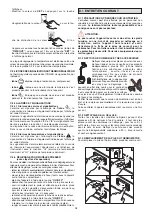
Regarding the max. load for each shelf, respect that given in the
table below:
SHELF MAX. LOAD
"V160"
FREEZER/REFRIGERATED
COUNTER/UNDERCOUNTER
10 kg
ADVICE FOR REFRIGERATED MODELS:
•
Meat (all types):
wrap in plastic bags and place preferably
on the bottom shelf.
In this position it can be kept for only
one or two days.
•
Cooked food, cold dishes, etc.:
cover well and place on any
shelf.
•
Butter and cheese:
wrap in plastic film or aluminium foil to
prevent contact with air; place on any shelf.
• Do not store bananas, potatoes, onions and garlic in the
refrigerator if not packaged.
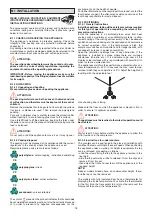
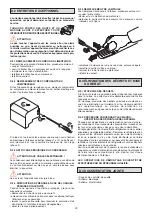
These appliances are normally supplied with right door open-
ing. To change to left opening, proceed as follows:
• remove the lower protection;
• remove the bottom hinge;
• remove the door;
• unscrew the top hinge pin and fit on the opposite side of the
cabinet;
• refit the door and bottom hinge on the opposite side of the
cabinet;
• unscrew the handle and fit it on the opposite side after pierc-
ing the small caps with a punch.
NOTE: After completing the reversing operations, refit the plas-
tic caps (originally fitted on the left side) on the right side.
NOTE:
After reversing the door, make sure the magnetic seal ad-
heres perfectly to the appliance. If the room temperature is
cold, the seal may not adhere perfectly to the cabinet. In this
case, wait until the seal has softened naturally or speed up
the process by heating the part concerned with a hair-drier.
C.2 TEMPERATURE CONTROLLER USE
(for freezer models only)
C.1 DOOR REVERSIBILITY


