


18
WEAR SUITABLE PROTECTION EQUIPMENT
(PROTECTIVE GLOVES) WHEN CARRYING OUT
INSTALLATION OPERATIONS.
To ensure correct operation of the product and to maintain safe
conditions during use, carefully follow the instructions given
below in this section.
B.1.1 CHECKS ON RECEIVING THE APPLIANCE
The appliance is delivered in protective packing. Check the
integrity of the packing and any protection materials before
unpacking it.
Any damage must be promptly reported to the carrier. Under no
circumstances should a damaged appliance be returned to the
manufacturer without prior notice and written permission.
ATTENTION:
The operations described below must be carried out in com-
pliance with the current safety regulations, regarding the
equipment used and the operating procedures.
IMPORTANT: Before moving the appliance make sure the
load-bearing capacity of the lifting equipment used is suitable
for its weight.
B.1.2 UNPACKING
B.1.2.1 Unpacking and handling
Wear protective gloves when unpacking the appliance.
ATTENTION:
The packing materials can be the cause of hazards and risk
of suffocation, and therefore must be kept out of the reach of
children!
Remove the protective film, taking care not to scratch the surface
if scissors or blades are used. Then remove the polystyrene
padding.
For parts in stainless steel, carefully remove the protective film
without tearing it, to avoid leaving glue stuck to the surface.
Use a forklift truck to lift the appliance, inserting the forks under
the pallet, and carry it to the place of installation, making sure the
load is balanced.
ATTENTION:
Do not push or pull the appliance to move it, as it may tip over.
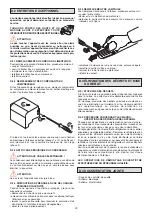
B.1.2.2 Packing disposal
The packing must be disposed of in compliance with the current
regulations in the country where the appliance is used.
Recyclable plastic parts are marked as follows:
polyethylene:
outer wrapping, instruction booklet bag
PE
polypropylene:
straps
PP
polystyrene foam:
corner protectors
PS
pressboard:
corner protectors
The symbol
placed on the product indicates that it should
not
be considered as domestic waste, but must be correctly disposed
of in order to prevent any negative consequences for the
environment and the health of people.
For further information on the recycling of this product, contact the
local dealer or agent, the after-sales assistance service or the
local body responsible for waste disposal.
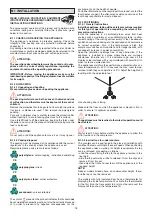
B.1.3 POSITIONING
B.1.3.1 General instructions
Install the appliance, taking all the safety precautions required
for this type of operation, also respecting the relevant fire-
prevention instructions.
Install the appliance in a ventilated place, away from heat
sources such as radiators or air conditioning systems, to allow
correct cooling of the cooling unit assembly. In fact, inadequate
ventilation can cause damage to the appliance and compromise
its correct operation. Also, if the temperature is high, the
compressor switches on more often and for longer periods, with
consequent increase in power consumption.
Keep the ventilation openings free of any obstruction. If the
appliance is installed in a place where there are corrosive
substances (chlorine, etc.), it is advisable to go over all the
stainless steel surfaces with a rag moistened with paraffin oil in
order to create a protective film.
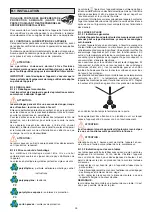
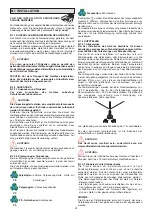
The appliances maintain their performance characteristics at a
room temperature of +43°C; in any case the max. room tempe-
rature at which they can operate is +43°C. Adjust the height and
levelling with the adjustable feet
also checking door closing.
Make sure the floor on which the appliance is placed is flat, in
order to ensure its optimum operation.
ATTENTION:
The appliance must be levelled; otherwise its operation could
be affected.
ATTENTION:
Wait at least 2 hours before starting the appliance, to allow the
oil to flow back in the compressor.
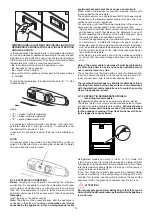
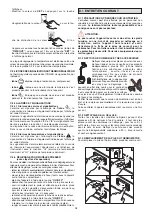
B.1.3.2 Instructions for undercounters
The counters can be positioned in the place of installation with
or without the top, according to the user’s needs. When positioning
the appliance under a worktop, for height requirements the top
can be removed, proceeding as follows:
• undo the screws fixing the top to the appliance, located in the
rear part;
• slide the top outwards a little to release it from the clips and
remove it from its seat;
• then adjust the front and rear feet until the appliance is at the
required height.
NOTE:
Freezer models already have an undercounter height, there-
fore the top cannot be removed.
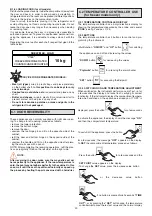
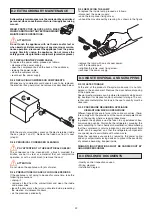
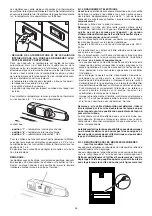
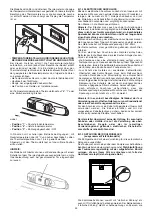
The models with fully insulated door have a thermometer for
displaying the inside temperature. To activate the thermometer
for the first time, the transparent tab (a) must be removed; the
display will then show the temperature (b)
B.1 INSTALLATION


