Noraxon U.S.A., Inc.
TeleMyo 2400T V2
2.
Radio Channel
The TeleMyo 2400T System can operate on any one of 11 different radio channels between 2.412 GHz
(radio channel 1) to 2.462 GHz (radio channel 11). These frequencies and channels are defined by the
IEEE802.1lb wireless network standard. Not all radio channels are available for use in each country.
Based on the destination country, Noraxon presets the radio channel to ‘channel 1’ prior to shipping the
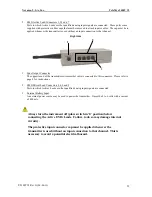
TeleMyo 2400T. However, the channel can be changed by the user using the “RF Chan” control located on
the right side, as shown in the picture on the preceding page. The transmitter must be turned off before the
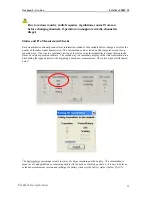
RF channels are changed using a screwdriver. To set the RF Channel to “1”, the “slot” in the “set screw”
would be in a horizontal or ‘9 o’clock’ position, as shown in the picture. To change or “set” the RF
channel, gently turn the screw clockwise. As the screw is turned, it will click in place at each channel,
making it easy to count which channel the transmitter is set on. The RF Channels are “set” in the same way
the Unit Number is “set”.
Radio channels 1, 6 and 11 are the most commonly set channels. All transmitters in a group must be set to
the same radio channel. The transmitter channels must also agree with the radio channel of the PC radio
card or TeleMyo 2400R receiver option. The user must use the supplied accessory software to configure
the PC radio card to operate at the same radio channel as the transmitters. The TeleMyo 2400R receiver
option comes preset to match the transmitter radio channel, but it may be changed using the external switch
on the receiver to match the transmitter setting. The receiver’s channel is changed the same way as the
transmitter. Turn off the receiver before changing the RF channel.
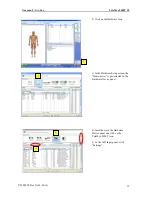
If you are using Windows XP, it will automatically check which channel the TeleMyo is set to so you only
have to change the settings in MyoResearch XP. However, if you are using an earlier version of Windows,
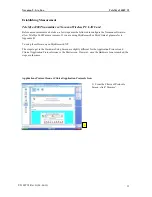
to change the radio settings in the accessory software, open the ‘Aironet Client Utilities’ from the ‘Start’
menu and select the ‘Profile Manager’. Locate the ‘Profile Management’ pull-down box, select ‘Noraxon’
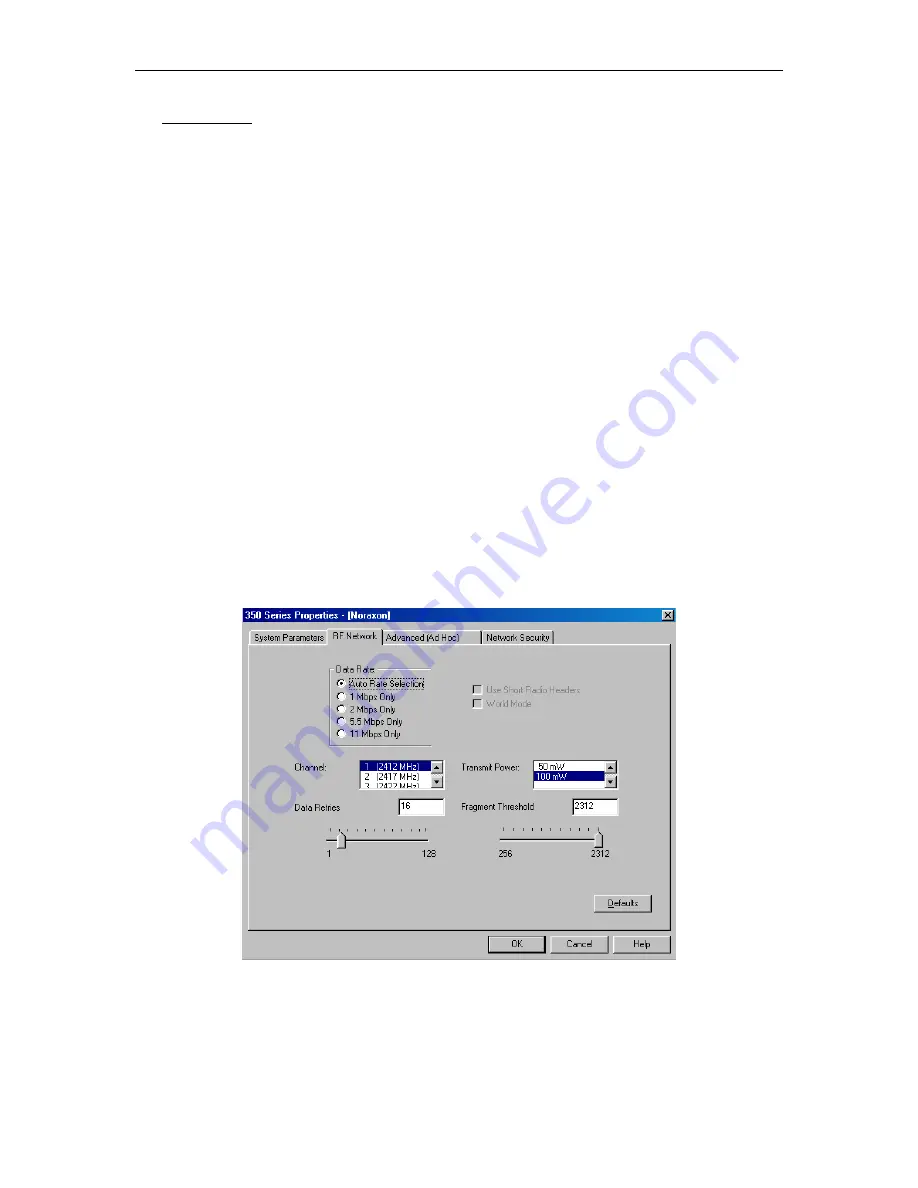
and press the ‘Edit’ button. In the new window, select the ‘RF Network’ tab. The following screen will
appear.
Select Channel 1 in the Channel scroll box unless directed by a Noraxon representative to do otherwise.
When complete, select the ‘OK’ button to close the Properties window, then select ‘Apply’ in the ‘Profile
Manager’ window to keep the new setting. Press ‘OK’ to leave the ‘Aironet Client Utility’.
P-2308TV2 Rev G (06-06-11)
31


