background image


16

b. 

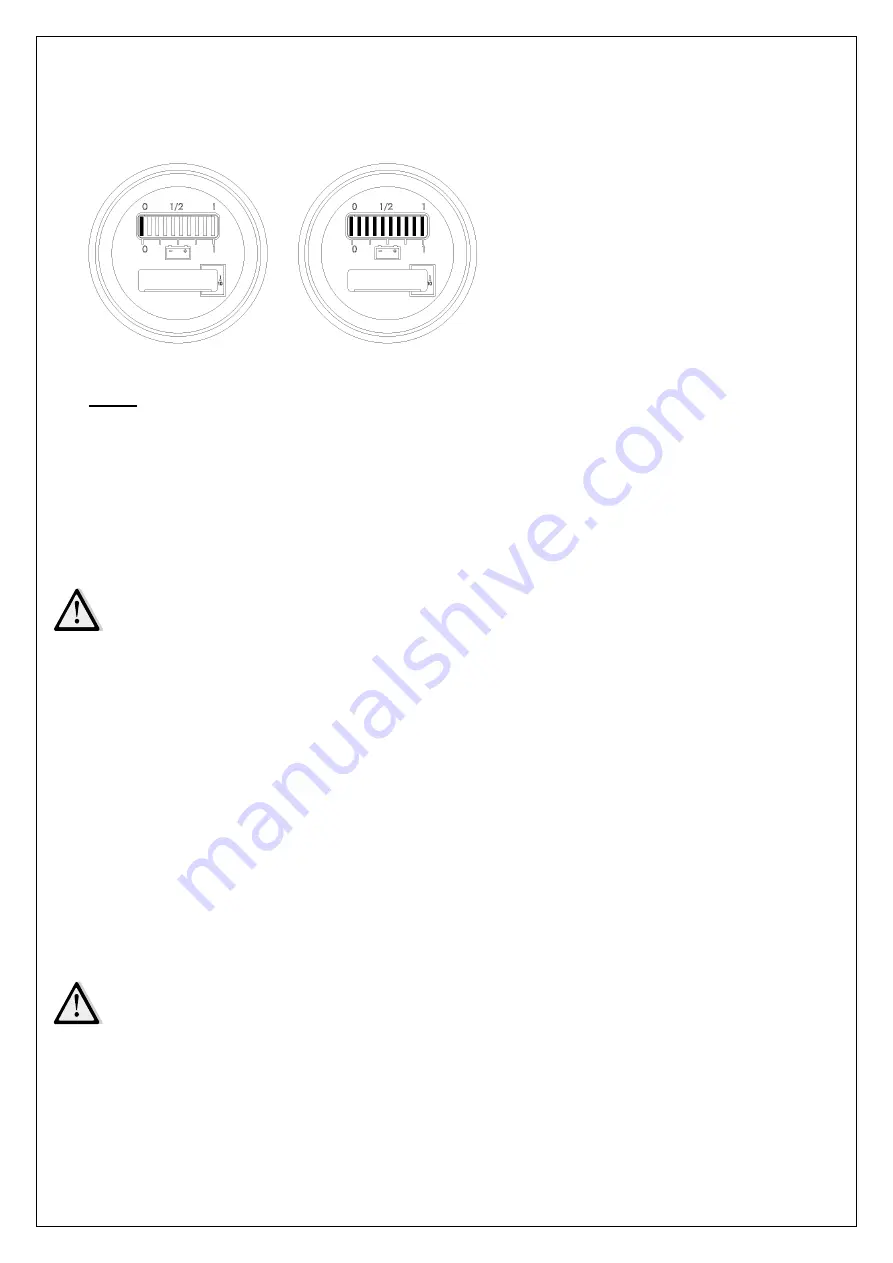
 Battery indicator


Discharge status is indicated by ten red LED segments. 


Only when the battery is properly charged, the most right LED lit. As the battery’s state-of-charge 

decreases, successive LEDs light up, only one on at a time. 


The 2nd from left LED flashes, indicating “energy reserve” (70% depth of discharge). 


The 2 most left LEDs alternately flash, indicating “empty” (80% depth of discharge). 


c. 

 Charging 

  The attached automatic charger is only available for the optional voltage of 110V or   

220V as referred.   

  The room, where you are charging must be ventilated. 

  The exactly charge status can be only checked from the dischrge indicator. To 

control the status, the charging must be interrupted and the truck must be started. 


Park the truck at a dedicated secured area with a deidcated power supply.   

Lower the forks and remove the load; if supplied remove the battery cover. 

Switch the truck off and connect the battery plug to the charging plug of the charger.


The charger starts charging the battery if the charger is connected to the main power supply.   

Disconnect the battery plug after the charger finished charging.   

If supplied, connect the battery plug with the plug at the truck. 

When charging is finished, disconnect the connector from the socket and place it in the designated 

pocket. 


8. REGULAR MAINTENANCE  


Only qualified and trained personnel are allowed to do maintenance on this truck. 

  Before maintaining, remove the load from the forks and lower the forks to the 

lowest position.   


If you need to lift the truck, follow chapter 4b by using designated lashing or jacking 
equipment. Before working, put safety devices (for instance designated lift jacks, 
wedges or wooden blocks) under the truck to protect against accidental lowering, 
movement or slipping. 

Battery discharged 

Battery discharged 

Fig.16: Battery discharge indicator 

Содержание PT 27R

Страница 1: ...lectric Pallet Truck WARNING Do not use the pallet truck before reading and understanding these operating instructions NOTE Please check the designation of your present type at the last page of this d...

Страница 2: ...waste such as batteries oil and electronics will have a negative effect on the environment or health if handled incorrectly The waste packages should be sorted and put into solid dustbins according to...

Страница 3: ...ioning 11 5 DAILY INSPECTION 11 6 OPERATING INSTRUCTIONS 12 a Parking 12 b Lifting 12 c Lowering 12 d Travelling 12 e Steering 13 f Braking 13 g Malfunctions 14 h Emergency 14 7 BATTERY CHARGING AND R...

Страница 4: ...rating the load must be placed approximately on the longitudinal centre plane of the truck Lifting or transporting people is forbidden If used on tail lifts or loading ramps please ensure that these a...

Страница 5: ...4 2 DESCRIPTION OF THE PALLET TRUCK a Overview of the main components Fig 1 Overview main components PT 27R Fig 2 Overview main components PT 36R...

Страница 6: ...celerator 9 Rocker switch 10 Rail cover 11 Storage cover 12 Load backrest 13 Fork chassis 14 Load wheels 15 Battery 16 Battery plug 17 Switch base 18 Indicator cover 19 Right knee pad 20 Cylinder 21 S...

Страница 7: ...unladen front rear lbs 1870 550 2024 440 Tires chassis 3 1 Tires Polyurethane PU Polyurethane PU 3 2 Tire size front x w in 12 2 x 4 13 12 2 x 4 13 3 3 Tire size rear x w in 3 2 x 3 2 3 2 x 2 76 3 4...

Страница 8: ...c to VDI cycle kWh h Addition al data 8 1 Type of drive control AC speed control AC speed control 8 4 Sound level at driver s ear acc to EN 12053 dB A 68 68 8 6 Steering Manual Manual c Description of...

Страница 9: ...operator if the truck travels towards the operator and the tiller is activated in the tillers operating zone Follow also the instructions given on the decals Replace the decals if they are damaged or...

Страница 10: ...ng the truck if load becomes unstable Brake the truck and push down the tiller to the lowest point when sliding load on or off the truck If the truck has any malfunctions follow chapter 6 Practice mai...

Страница 11: ...sporting remove the load lower the forks to the lowest position and fix the truck safe with dedicated lifting gear according to the following figures Lifting USE DEDICATED CRANE AND LIFTING EQUIPMENT...

Страница 12: ...es and jack the truck safely so that there will be no flattening after storage For final decommissioning hand the truck to a designated recycling company Oil batteries and electric components must be...

Страница 13: ...tton 25 to activate the audible warning signal a Parking DO NOT PARK THE TRUCK ON INCLINED SURFACES The truck is equipped with an electromagnetic failsafe stopping and parking brake Always lower the f...

Страница 14: ...e conditions and adjust the travelling speed with the accelerator button e Steering THE TRUCK IS EQUIPPED WITH AN ELECTRIC STEERING SYSTEM TAKE CARE BY OPERATING THE TRUCK THE BEHAVIOR OF THE TRUCK MI...

Страница 15: ...distance immediately push down the tiller to the lowest point All electrical functions will be stopped 7 BATTERY CHARGING AND REPLACEMENT Only qualified personnel are allowed to service or charge the...

Страница 16: ...key switch 7 and disconnect the battery plug 16 Pull down the load backrest with one screw 27 Pull up the battery block 28 then pull out the battery 15 according to fig 16 to the securely parked and...

Страница 17: ...d remove the load if supplied remove the battery cover Switch the truck off and connect the battery plug to the charging plug of the charger The charger starts charging the battery if the charger is c...

Страница 18: ...or 1500 working hours 5 Check and adjust function of the pressure valve 2500kg 0 10 Mechanical system 6 Inspect the forks for deformation and cracks 7 Check the chassis for deformation and cracks 8 C...

Страница 19: ...e reverse and regenerative braking 37 Test the safety belly button function 38 Check the steering function 39 Check the lifting and lowering function 40 Check the tiller arm switch function General 41...

Страница 20: ...be probably disposed and recycled according to the national regulations and if necessary brought to a recycling company The oil level height shall be in the not lifted position min 1 4L to 1 6L If ne...

Страница 21: ...er Oil leakage from air breathing Excessive quantity of oil Reduce oil quantity Truck not starts operating Battery is charging Charge the battery completely and then remove the main power plug form th...

Страница 22: ...21 10 WIRING CIRCUIT DIAGRAM a Electrical circuit diagram Fig 21 Electrical diagram PT 27R FU1 10A FU01 300A FU02 150A...

Страница 23: ...contactor FU02 Fuse 150A FU01 Fuse 300A FU1 Fuse 10A KM Contactor Et Controller SY Key switch FU2 Fuse 0 5A P Indicator SU Limit switch Mt Traction motor SA SH1 SH2 Proximity switch YB Electromagneti...

Страница 24: ...23 Fig 21 Electric diagram PT 36R FU1 10A FU01 350A FU02 150A...

Страница 25: ...contactor FU02 Fuse 150A FU01 Fuse 350A FU1 Fuse 10A KM Contactor Et Controller SY Key switch FU2 Fuse 0 5A P Indicator SU Limit switch Mt Traction motor SA SH1 SH2 Proximity switch YB Electromagneti...

Страница 26: ...25 b Hydraulic circuit Pressure valve Lift cylinder Lowering valve Hydraulic power pack Throttle valve Fig 22 Hydraulic circuit Oil tank...

Страница 27: ...creazione della documentazione tecnica BG E 2006 42 EG 2014 30 EU CZ EG PROHL EN O SHOD N e podepsan t mto potvrzuje e podrobn popis uveden stroje odpov d Evropsk m sm rnic m 2006 42 EC sm rnice pro s...

Страница 28: ...nje tehni ne dokumentacije TR AB Uygunluk A klamas mza sahibi ah slar ayr nt lar belirtilen makine arac n n 2006 42 EC Makine Y nergesi ve 2014 30 EU Elektromanyetik Uyumluluk EMC no lu Avrupa Y nerge...

Отзывы: