eNCard-i User guide
41
NITGEN Co., Ltd. /
(Bangi-dong) 6 Wiryeseong-daero, Songpa-gu, Seoul, 138-827, Korea
Tel: 02-6488-3052, Fax: 02-6488-3098, E-Mail:[email protected]
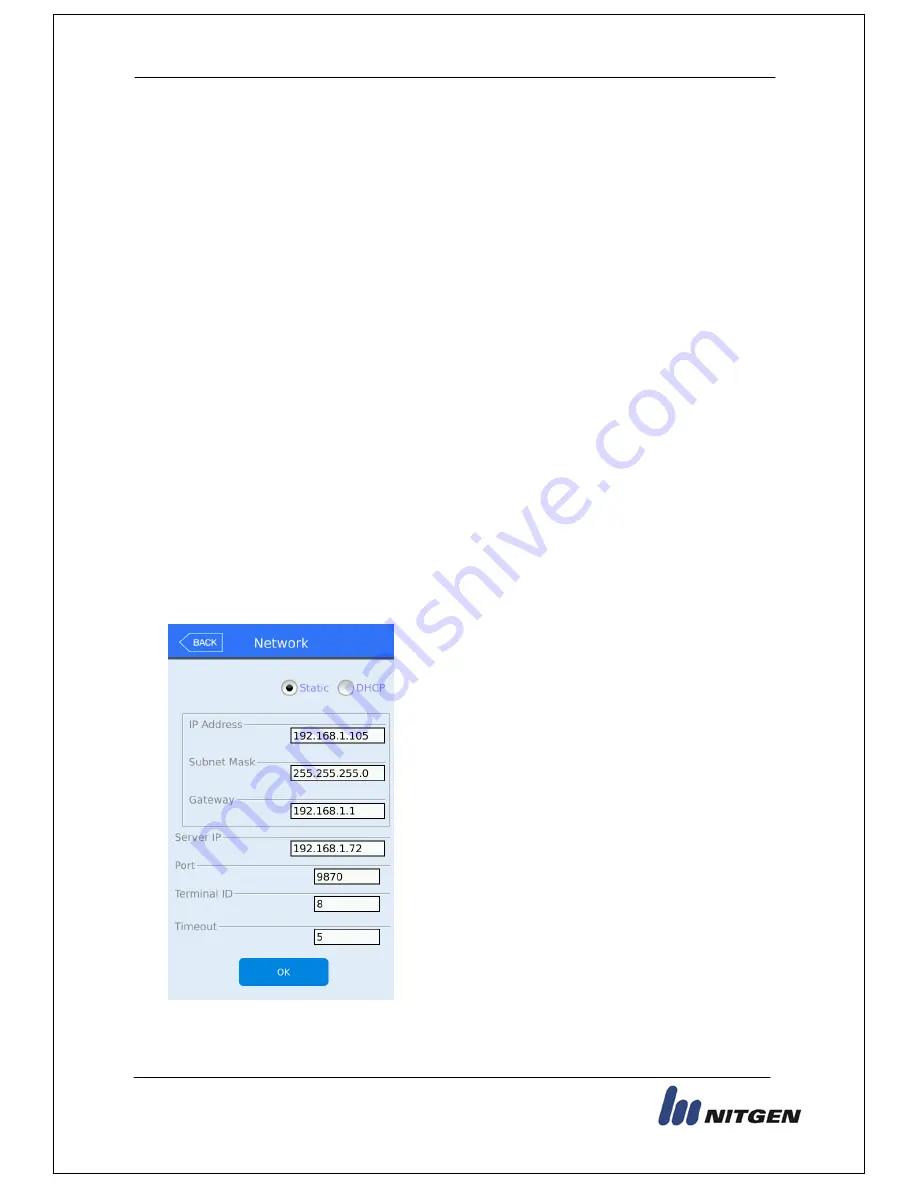
3.4. Network Settings
The networks settings area allows you to setup IP addresses, gateways, subnet mask,
DHCP or static settings, Terminal ID Number or wireless settings. When selecting
DHCP ensure that your network has a properly enabled DHCP server available. Also
you should give time for the terminal to acquire the DHCP address; usually this can
take from 1-60 seconds. While in this menu if you press the DONE button the server
will be disconnected and the link will be reconnected to the server. You can re-initiate
the network connection by entering this menu and pressing done.
Ethernet Setup Procedure:
1)
Setup Static OR DHCP
2)
If Static then set the terminal IP/Subnet Mask and Default Gateway.
3)
Set the Server IP Address, PORT and Terminal ID
4)
If using Wireless go to Wireless Options and Press “Available Networks” until your
router appears in the available network window.
5)
Press/Select the station you wish to connect to, it should be highlighted.
6)
Go to wireless advance settings to set the Security Level/Rate or Channel.
7)
Press OK.
Pressing OK will disconnect the current connection and then try to re-establish a new
link from the setup parameters that were just entered. At anytime select the Back
button to cancel and not save any changes.
▶
Basic setting: Same with the window at the left
side.
Select the method [Static IP] if the static IP is
allocated from the connected network, and select
[DHCP] if the IP is allocated from the DHCP server
in the connected network.
If you selected [Static IP], set the IP address,
subnet mask, and gateway. And if you selected
[DHCP], you will not have to set the IP, Gateway or
Subnet.
▶
[Port]: The port value of the authorization server (server) is ‘9870’, and if you change
the value, you should change the server program with the same value, so be cautious.


