2.
Hold the WS100R as shown in (Figure 3). Locate the two
plastic mounting tabs at the top rear of the Decora-style
insert. Using two fingers, simultaneously press both tabs
down (towards the center of the insert) and forward (away
from you) until the insert pops free from its mounting slots.
3. Locate the new Decora-style insert. Hold the WS100R so that
it is facing you. Insert the two bottom tabs into the bottom
slots first, followed by the two tabs on the top. Snap the insert
into place by carefully pressing on the front of the insert.
Using the WS100R with the Intellipad Ci system.
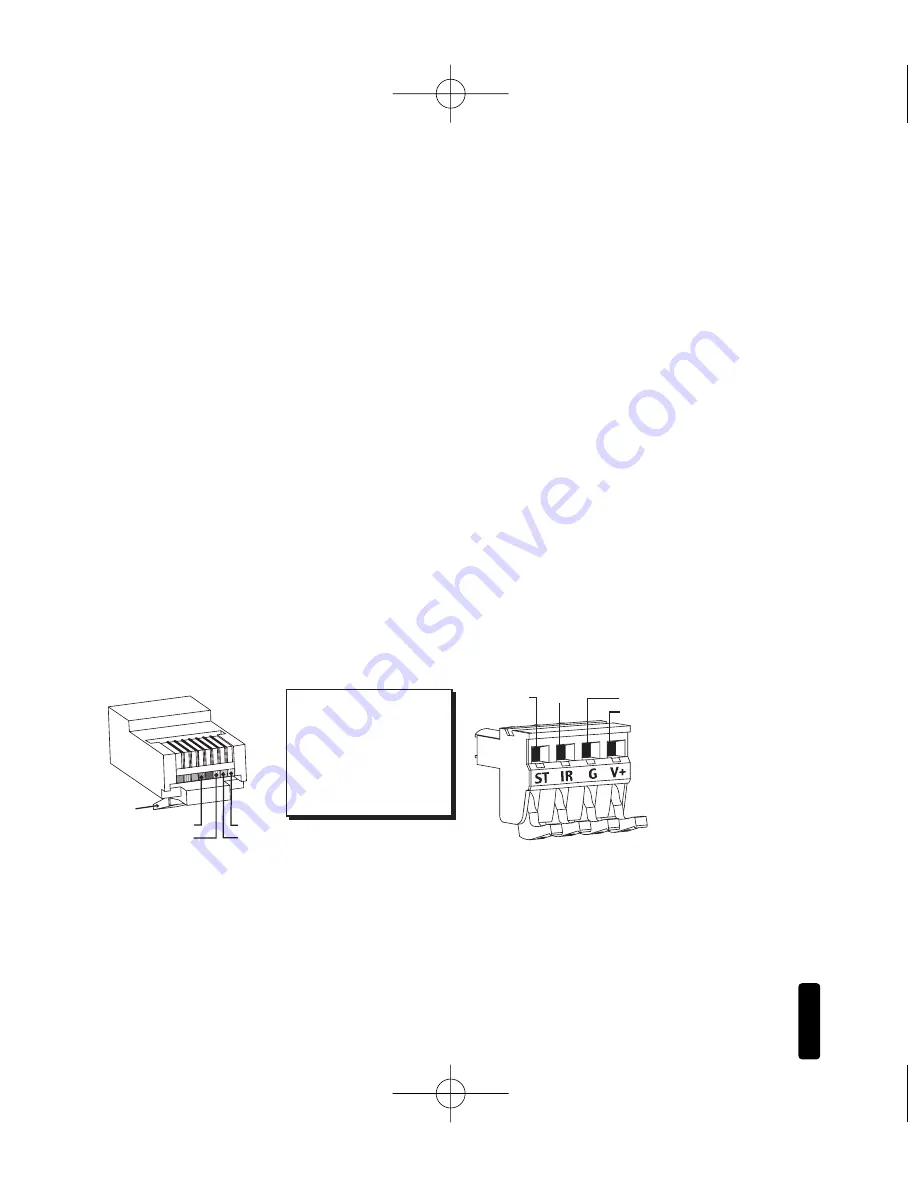
The WS100R is fully compatible with the Niles Intellipad Ci line,
follow the wiring instructions in Figure 4. For specific informa-
tion see your Intellipad Ci manual.
8
W
A L L
- M
O U N T
I
N F R A R E D
S
E N S O R
1 = Green/White - 12V
2 = Green - DATA
3 = Orange/White - GROUND
4 = Blue - EMPTY
5 = Blue/White - STATUS
6 = Orange - EMPTY
7 = Brown/White - EMPTY
8 = Brown - EMPTY
1 = STATUS
4 = 12V DC
1 = 12V
2 = DATA
5 = STATUS
3 = GROUND
2 = DATA
3 = GROUND
Tab
Down
Figure 4
This color code is based on the industr
y standard T568A coding
for the RJ45 connector. When connecting the WS100R to the
Niles Ci system observe this Pin configuration.
DS00331ACN/WS100R 1/8/04 9:47 AM Page 10


