background image

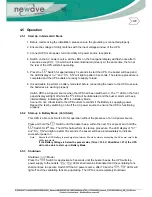
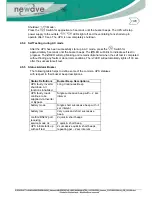
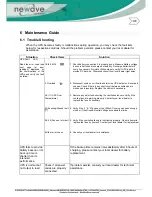
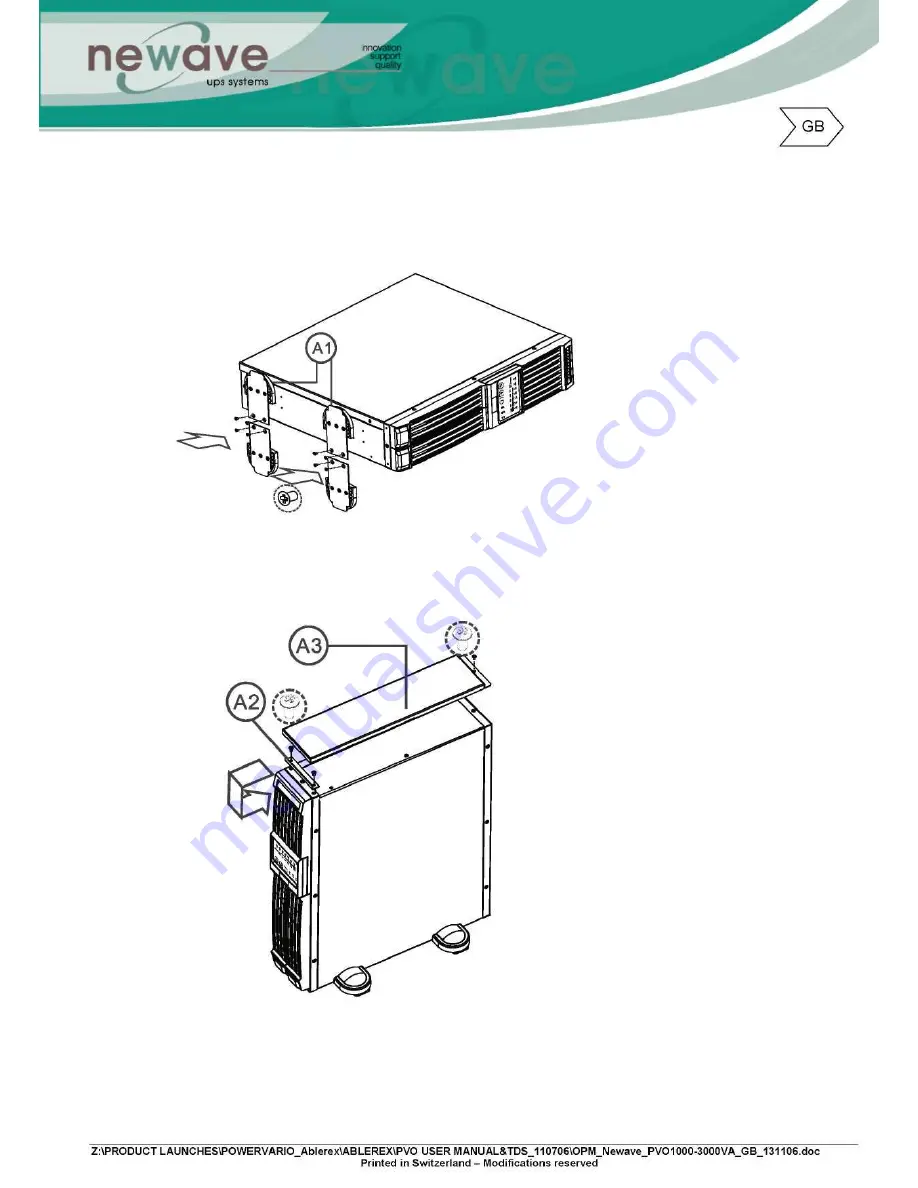
4.3 Tower Configuration Setup 

Step 1 

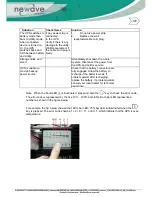
Step 2 

Содержание 1000-3000VA

Страница 1: ...User Manual 1000 3000VA single phase In Output Intelligent True On Line Uninterruptible Power Supply UPS For Corporate IT User Installation Guide...

Страница 2: ...Intelligent True On Line Uninterruptible Power Supply UPS For Corporate IT User Installation Guide...

Страница 3: ...1 UPS System Block Diagram 20 5 2 When Utility is Normal 21 5 3 When Utility is Abnormal Absent 21 5 4 Overload Condition 22 5 5 Inverter Failure 23 5 6 Inverter Internal Over temperature 23 5 7 Inver...

Страница 4: ...0 3 2 Selecting Installation Position 36 10 3 3 Installation Instructions 37 10 3 4 Rack Mount installation 39 10 3 5 Storage Instruction 42 10 3 6 Replacing the Battery 42 10 3 7 Specifications 43 10...

Страница 5: ...hould be recharged every 2 3 months if not in use to prevent battery self discharge The battery can be recharged when the UPS is connected to the utility suppl 6 Always switch off the UPS and disconne...

Страница 6: ...re enables the UPS for integration even in the most difficult of environment with space constraints 2 This UPS is equipped with fully digitalized control logic for greater functionality and enhanced h...

Страница 7: ...9 Site wiring fault LED Red LED illuminated indicates Live Neutral lines are connected wrongly or High Neutral Ground voltage 10 Battery Bad Weak LED Red LED illuminated indicates low battery power o...

Страница 8: ...Dry Contact Signal inputs 4 Communication Card Options Slot 5 External Battery Connector 6 AC power connection socket 7 AC Outlets 8 Two programmable outlets 9 Utility Input fuse holder 10 Cooling Fa...

Страница 9: ...ct Normal CF50 CF60 Mode 4 Fine turning of Output Voltage Regulation from 0 3 5 Bypass Sensitivity Select Sensitivity Low Sensitivity High 6 Synchronizing Select 3Hz 1Hz Inverter Freq synchronizing ra...

Страница 10: ...al loads connected to the UPS 3 Outlet Turn On After AC Recovered select this option to automatically enable the outlet within the specified time after the utility is restored 4 Outlet Turn Off When B...

Страница 11: ...hipment Notify the forwarder and dealer if there is damage The packaging is recyclable save it for reuse or dispose of it properly Remove the UPS from the carton box Check the package contents Standar...

Страница 12: ...istance clearance from the rear panel of the UPS to avoid any obstructions 2 Do not block the air flow to the ventilation louvers of the unit 3 Please ensure the installation site is free from excessi...

Страница 13: ...4 3 Tower Configuration Setup Step 1 Step 2...

Страница 14: ...Step 3 Step 4...

Страница 15: ...4 4 Rack Mount Configuration Setup Step 3 Step 4 Step 5...

Страница 16: ...Step 6 Step 7...

Страница 17: ...ndicating the UPS is in Battery Mode Connect a non critical load to the UPS outlets to confirm if the Battery is supplying power Repeat the test by switching on off the AC power source to ensure the U...

Страница 18: ...ts or abnormal conditions The LED will automatically lights off 30 sec after the successful self test 4 5 5 Status Alarm Buzzer The following table helps to define some of the common UPS statuses with...

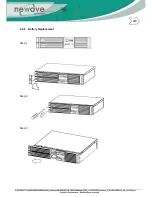
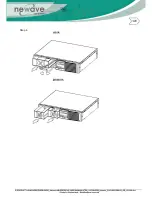
Страница 19: ...4 5 6 Battery Replacement Step 1 Step 2 Step 3...

Страница 20: ...Step 4...

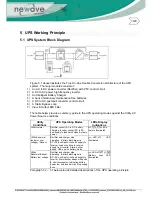
Страница 21: ...onditions indications Utility Normal Rectifier convert AC to DC battery LEDs charging Inverter convert DC to AC and supply to loads with clean stable power remain illuminated Utility Abnormal Rectifie...

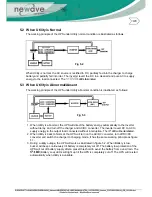
Страница 22: ...delay and turn off the charger and AC DC converter The inverter revert DC to AC to supply energy to the output load connected without interruption The LED will be illuminated 2 When Utility is back to...

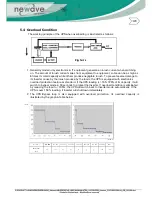
Страница 23: ...is equipped with electronics overload protection feature as standard If the UPS loading is 105 120 of its capacity it will switch to bypass mode in 30 seconds to protect the Inverter If overload cond...

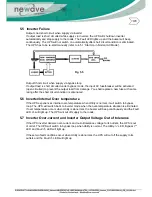
Страница 24: ...ting after the short circuit condition is eliminated 5 6 Inverter Internal Over temperature If the UPS experiences internal over temperature when Utility is normal it will switch to bypass loop The UP...

Страница 25: ...n cables due to broken cable insulator Replace the cables in necessary 3 Er11 UPS Over Temperature 3 Remove any objects obstructing the ventilation louvers Verify if the cooling fans are working prope...

Страница 26: ...UPS and call for service UPS is unable to Check that the battery connectors are provide backup fully engaged Allow the battery to power source recharge if the batter is weak If problem persist after...

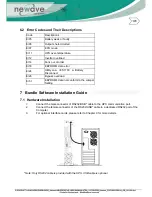
Страница 27: ...onnect Er28 Bypass overload Er31 EEPROM s data not conform to the Jumper Setting 7 Bundle Software Installation Guide 7 1 Hardware Installation 1 Connect the male connector of RS232 USB cable to the U...

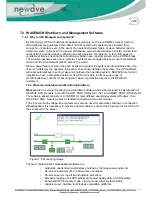
Страница 28: ...system NEWAVE has found it important to have a complete solution for its UPS and is able to offer a wide range of monitoring remote controls for assuring the maximum protection degree to the NEWAVE cu...

Страница 29: ...server shutdown under NT UNIX and other operating systems The service programs are generally delivered as a single licence To use a single CD ROM to shutdown multiple servers you have to purchase addi...

Страница 30: ...residual battery autonomy time downtime or by a countdown timer which is started at the beginning of the alarm A shut down is therefore possible without extra input from the operator and is fully sof...

Страница 31: ...are Unix Linux please contact your local dealer for suitable software All the communication ports including optional cards can be active use simultaneously to monitor the UPS status However only 1 com...

Страница 32: ...ion Cards The UPS rear panel is equipped with a ready plug and play optional communication card slot to accommodate either a AS400 Dry Contact card or SNMP Web card These optional communication cards...

Страница 33: ...wn UPS positive signal Pin 10 Shutdown UPS negative signal To Shutdown the UPS supply a DC voltage of between 5 5V 25V to Pin 9 use as terminal and Pin 10 use as terminal 9 2 SNMP Cards Both SNMP card...

Страница 34: ...ty environment The warranty for this battery bank will be void if water or other liquid is spilt or poured directly onto the battery bank Similarly we do not warrant any damage to the battery bank if...

Страница 35: ...erminal of the 2nd or next battery bank connected 3 UPS BAT To the UPS DC terminal or the next battery bank 4 DC Breaker 1 Battery Over current Protection Breaker 2 To easy swappable battery please pu...

Страница 36: ...installation Retain the packing material for future use 10 3 1 Unpacking 1 Take the battery bank out of the PE foam 2 Remove the packing materials Note The battery bank module is approx 12 5 50 kgs be...

Страница 37: ...the rear panel of the battery bank from the wall or other obstructions 2 Do not block the air flow to the ventilation openings of the unit 3 Please ensure the installation site environmental conditio...

Страница 38: ...10 3 3 Installation Instructions Tower installation Stand alone unit Step 1 Step 2...

Страница 39: ...Use with UPS Step 1 Step 2...

Страница 40: ...10 3 4 Rack Mount installation Step 1 Step 2...

Страница 41: ...Step 3 Step 4...

Страница 42: ...Second Battery First Battery Bank UPS Connect DC Cable...

Страница 43: ...ate 15 to 30 C 5 to 86 F the batteries should be charged for 12 hours every 6 months by plugging the UPS power cord into the wall receptacle Repeat this every 3 months under high temperature 30 to 45...

Страница 44: ...Step 3 Step 4 10 3 7 Specifications...

Страница 45: ...10 3 8 Recycling the Used battery Contact your local recycling or hazardous waste center for information on proper disposal of the used battery...

Страница 46: ...11 Technical Specifications...

Страница 47: ...TECHNICAL SPECIFICATIONS POWERVARIO Intelligent True On Line Uninterruptible Power Supply UPS For Corporate IT User Installation Guide...

Страница 48: ...ons 3 1 1 VA Rating 3 1 2 Input 3 1 3 Output 3 1 4 Battery System 4 1 5 Transfer Time 4 1 6 Front Panel 4 1 7 Protection 4 1 8 Audible Alarm 5 1 9 Physical 5 1 10 Environmental 5 1 11 Interface 5 1 12...

Страница 49: ...60 Hz auto select 5Hz Phase Single phase with ground PF 0 99 at full rated linear load Typical Transfer Time 0 ms AC Leakage current 230V 3 5mA Surge Protection 230V 300 joules Model PVO1000 PVO2000 P...

Страница 50: ...C to DC Zero Inverter to Bypass 2 5ms Typical Zero DC Start Yes Self Diagnostics Upon Power on and Software Control Model PVO1000 PVO2000 PVO3000 LED Load Level Battery Level Battery Mode Normal Mode...

Страница 51: ...VO1000 PVO2000 PVO3000 Battery Mode Sounding once every 1 5 seconds Low Battery Sounding once every 0 2 seconds Overload Sounding once every 3 second Fault Continuously Sounding or Sounding once every...

Страница 52: ...cation Model PVO1000 PVO2000 PVO3000 Safety IEC EN 62040 1 1 IEC 60950 1 Performance IEC EN 62040 3 EMC EN50091 2 IEC 62040 2 class A IEC 61000 4 2 3 4 6 8 11 IEC 61000 3 2 3 Markings CE cUL FCC addit...

Отзывы: