NetGear Print Server Manual
7-2 Advanced Print Server Configuration
From the main menu, click on the Advanced button to use the advanced configuration procedure. The
Advanced Print Server Configuration screen opens.
The Advanced Print Server Configuration screen contains the fields listed on tabs that can be selected
in any order to customize the configuration of the print server. The following field tabs are provided by
the Advanced Print Server Configuration screen:
•
System
•
TCP/IP
•
NetBEUI
•
Logical Port
•
Physical Port
•
Wireless
Each tab is described in the following sections.
There are two control buttons associated with every tab, and there is a "Return to Main Menu" button
at the bottom of the tab. The function of each button is described in the table bellow.
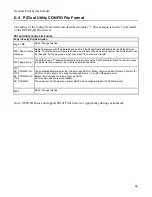
Control Buttons on All Tabs
Field Description
Restore to
Default
This button appears on many screens. Clicking it replaces the onscreen values with the default settings. The
tab settings are not saved until you click on the Save to Device button. The quickest way to set all device
values to the factory default setting is to click on the Configuration selection on the menu bar and select
Restore Factory Default.
Save to
Device
Click this button to write any changed configuration information to the print server.
If you switch to another tab without clicking on the Save to Device button, all new settings are lost.
Return to
Main
Menu
Click this button to return to the print server administration main menu. If you want to configure another print
server, you must click on this button to return to the main menu and select another print server.
Any configuration change is lost unless you click on the Save to Device button at the bottom of the
field window to send the configuration to the print server. When moving into a new field screen, all
settings in the previous screen are lost. It is essential that you make a decision on the present field
screen whether to abandon or save the new parameters into the print server.
The menu bars and their fields are described in the following sections.
System Tab
The System tab contains the fields to change the print server name and activate or disable the various
networking protocols supported by the print server.
68
Содержание PS111W - Print Server - Parallel
Страница 36: ...NetGear Print Server Manual The next screen shows you the progress of the installation Figure 4 6 27 ...
Страница 38: ...NetGear Print Server Manual You can open and access the group from your desktop as well See Figure 4 9 29 ...
Страница 44: ...NetGear Print Server Manual Figure 4 13 Set up TCP IP for Print Server to get an IP address 35 ...
Страница 46: ...NetGear Print Server Manual Figure 4 14 Wireless Configuration 37 ...

