background image

Notification of Compliance

58

NETGEAR DOCSIS 3.0 N450 Wi-Fi Data Gateway

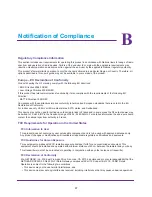
FCC Radio Frequency Interference Warnings & Instructions

This equipment has been tested and found to comply with the limits for a Class B digital device, pursuant to Part 15 
of the FCC Rules. These limits are designed to provide reasonable protection against harmful interference in a 
residential installation. This equipment uses and can radiate radio frequency energy and, if not installed and used in 
accordance with the instructions, may cause harmful interference to radio communications. However, there is no 
guarantee that interference will not occur in a particular installation. If this equipment does cause harmful 
interference to radio or television reception, which can be determined by turning the equipment off and on, the user 
is encouraged to try to correct the interference by one or more of the following methods:

• 

Reorient or relocate the receiving antenna.

• 

Increase the separation between the equipment and the receiver.

• 

Connect the equipment into an electrical outlet on a circuit different from that which the radio receiver is 

connected.

• 

Consult the dealer or an experienced radio/TV technician for help.

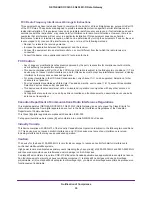
FCC Caution

• 

Any changes or modifications not expressly approved by the party responsible for compliance could void the 

user's authority to operate this equipment. 

• 

This device complies with Part 15 of the FCC Rules. Operation is subject to the following two conditions: (1) This 

device may not cause harmful interference, and (2) this device must accept any interference received, including 
interference that may cause undesired operation. 

• 

For product available in the USA and Canada market, only channel 1~11 can be operated. Selection of other 

channels is not possible.

• 

Pour les produits disponibles aux États-Unis / Canada du marché, seul le canal 1 à 11 peuvent être exploités. 

Sélection d'autres canaux n'est pas possible.

• 

This device and its antenna(s) must not be co-located or operation in conjunction with any other antenna or 

transmitter.

• 

Cet appareil et son antenne (s) ne doit pas être co-localisés ou fonctionnement en association avec une autre 

antenne ou transmetteur.

Canadian Department of Communications Radio Interference Regulations

This digital apparatus (NETGEAR DOCSIS 3.0 N450 Wi-Fi Data Gateway) does not exceed the Class B limits for 
radio-noise emissions from digital apparatus as set out in the Radio Interference Regulations of the Canadian 
Department of Communications.

This Class [B] digital apparatus complies with Canadian ICES-003.

Cet appareil numérique de la classe [B] est conforme à la norme NMB-003 du Canada

Industry Canada

This device complies with RSS-210 of the Industry Canada Rules. Operation is subject to the following two conditions: 
(1) This device may not cause harmful interference, and (2) this device must accept any interference received, 
including interference that may cause undesired operation.

Caution:

The device for the band 5150-5250 MHz is only for indoor usage to reduce po-tential for harmful interference to 
co-channel mobile satellite systems. 

High power radars are allocated as primary users (meaning they have priority) of 5250-5350 MHz and 5650-5850 MHz 
and these radars could cause interference and/or damage to LE-LAN devices. 

Ce dispositif est conforme à la norme CNR-210 d'Industrie Canada applicable aux appareils radio exempts de licence. 
Son fonctionnement est sujet aux deux conditions suivantes: (1) le dispositif ne doit pas produire de brouillage 
préjudiciable, et (2) ce dispositif doit accepter tout brouillage reçu, y compris un brouillage susceptible de provoquer un 
fonctionnement indésirable.

Содержание CG3000Dv2

Страница 1: ...350 East Plumeria Drive San Jose CA 95134 USA August 2013 202 11278 02 DOCSIS 3 0 N450 Wi Fi Data Gateway CG3000Dv2 User Manual...

Страница 2: ...For product updates and web support visit http support netgear com Phone US Canada only 1 888 NETGEAR Phone Other Countries Check the list of phone numbers at http support netgear com general contact...

Страница 3: ...up 15 Set Up Wi Fi Multimedia 18 Change the Password 19 Chapter 3 Filtering Content View Denial of Service DoS Attack Logs 22 Limit Internet Site Access 23 Allow Unrestricted Access 24 Disable Gateway...

Страница 4: ...ss Translation 47 Remove USB Devices 47 Chapter 6 Troubleshooting Basic Functions 49 Connect to the Gateway s Main Menu 49 Troubleshoot the ISP Connection 50 Troubleshoot a TCP IP Network Using a Ping...

Страница 5: ...Dv2 User Manual This chapter describes how to log in and monitor your gateway and includes these sections Gateway Front Panel Gateway Rear Panel Label Log In to Your Gateway View Basic Settings For in...

Страница 6: ...LED and button on the front panel of the gateway Table 1 LEDs and buttons LED Description Power Solid green Power is supplied to the cable modem Blinking The modem is performing a power on self test R...

Страница 7: ...ndicates 100 10 Mbps Solid An Ethernet device is connected and powered on Blinking Data is being transmitted or received on the Ethernet port Off No Ethernet device is detected on the Ethernet port Wi...

Страница 8: ...ectors viewed from top to bottom Four Gigabit Ethernet LAN ports To connect local computers use these ports USB port To connect a USB hard drive flash drive or printer use this port Reset To set the g...

Страница 9: ...depending on your configuration choices For best results place your gateway according to the following guidelines Near the center of the area in which your computers operate In an elevated location su...

Страница 10: ...that came with your computer If you do not click Logout when you have logged in the gateway waits for activity for 5 minutes before it automatically logs you out To log in to the gateway 1 On the comp...

Страница 11: ...or configure basic settings 1 From the main menu select Basic Settings 2 Enter the domain name If your Internet service provider requires a domain name type that name here 3 Enter the device name Thi...

Страница 12: ...add devices to your network It includes the following sections Set Up Your Wireless Network Set Up Wi Fi Multimedia Change the Password Note Before changing wireless settings connect the gateway and...

Страница 13: ...ly configure the wireless settings and security in the Wireless Settings screen To view or configure the wireless settings 1 If you are located near the gateway use an Ethernet cable to connect your c...

Страница 14: ...de to support faster equipment or legacy equipment 5 Specify the security options By default the gateway works with WPA and WPA 2 wireless security You can specify the network key which works like a p...

Страница 15: ...network first see Configure Wireless Settings Manually on page 13 After that you can still use WPS to set up the wireless connection for the computers that support WPS Note All WPS capable products s...

Страница 16: ...WPS Client screen displays 5 Either click the WPS button or press the button on the front of the gateway The WPS LED on the front of the gateway begins to blink The gateway tries to communicate with t...

Страница 17: ...elessly to the gateway is a client After a device is added as a client it can automatically connect to the gateway To add a wireless device to your gateway using a PIN 1 Make sure that you know how WP...

Страница 18: ...11 networks WMM prioritizes traffic according to four access categories voice video best effort and background It does not however provide guaranteed throughput You can use the Wi Fi Multimedia scree...

Страница 19: ...rcase and lowercase letters numbers and symbols Passwords can contain up to 30 characters To change the password 1 In the main menu under Maintenance select Set Password 2 Enter the new password twice...

Страница 20: ...Configuring Your Wireless Network 20 NETGEAR DOCSIS 3 0 N450 Wi Fi Data Gateway...

Страница 21: ...on your network When you log in to the gateway see Log In to Your Gateway on page 10 these tasks are grouped under Content Filtering This chapter includes the following sections View Denial of Servic...

Страница 22: ...menu under Content Filtering select Logs 2 Enter an email address This address is the full email address to which you want the gateway to send logs 3 Enter the SMTP server name Type the outgoing SMTP...

Страница 23: ...certain words 1 In the main menu under Content Filtering select Block Sites 2 Select the Keyword Blocking Enable check box 3 In the Keyword List enter the words you want to block 4 Click Add Keyword...

Страница 24: ...d access 1 In the main menu under Content Filtering select Block Sites 2 Select the Allow Trusted Computer to Visit Blocked Sites check box 3 Enter the MAC address of each computer 4 Click Apply Disab...

Страница 25: ...Firewall Enable The gateway performs stateful packet inspection SPI Disable The gateway does not perform SPI IPSec Pass Through Enable The gateway forwards IPS traffic Disable The gateway blocks traff...

Страница 26: ...TGEAR DOCSIS 3 0 N450 Wi Fi Data Gateway NAT ALG status features appear near the bottom of the screen To allow NAT traversal filters for certain application layer control data protocols select the cor...

Страница 27: ...your gateway When you log in to the gateway see Log In to Your Gateway on page 10 these tasks are grouped under Maintenance This chapter includes the following sections View the Gateway Status View th...

Страница 28: ...n of firmware currently running on the gateway Cable MAC Address The MAC address used by the cable modem port of the gateway This MAC address might need to be registered with your cable service provid...

Страница 29: ...way s initialization procedure In the main menu under Maintenance select Connection The gateway automatically goes through the following steps in the provisioning process Scans and locks the downstrea...

Страница 30: ...wnload location on the hard drive To restore the backup settings 1 In the main menu under Maintenance select Backup 2 Click Browse 3 Locate and select the previously saved backup file then click Resto...

Страница 31: ...Utilities From the Diagnostics screen you can run ping and traceroute utilities Ping Utility Ping is an administration utility that tests whether a computer on the network is reachable and measures t...

Страница 32: ...r the ping utility Target The IP address of the ping target computer Ping Size The size of the ping packet No of Pings The number of times to ping the target computer Ping Interval The time between pi...

Страница 33: ...enance select Diagnostics 3 In the Utility list select Traceroute 4 Specify the following parameters for the traceroute utility Target The IP address or host name of the computer you are tracing Max H...

Страница 34: ...on page 10 these tasks are grouped under Advanced This chapter includes the following sections Advanced Wireless Settings MAC Filtering IP Filtering Port Blocking Port Forwarding Port Triggering DMZ...

Страница 35: ...the settings described in the following table Advanced Wireless Settings Description Wireless Access Point Enable By default this check box is selected so that the gateway works as a wireless access...

Страница 36: ...the Trusted Devices table If the computer is still not listed complete the Device Name and MAC Address fields 3 Click Add The Enable check box for the computer in the MAC Filter List is automatically...

Страница 37: ...ecific times The selected period applies to each day that you selected 5 Click Apply 6 Repeat these steps for all computers that you want to block To stop blocking a computer 1 In the MAC Filter List...

Страница 38: ...evices table select its radio button to capture its IP address If the computer you want is not listed click Refresh to update the Trusted Devices table If the name of the computer you want to add does...

Страница 39: ...the Add Custom Service table Name A name for the service Start Port The start port for the service End Port The end port for the service Protocol The protocol for the ports TCP TCP only UDP UDP only B...

Страница 40: ...dress of the local server computer the address might change when the computer is rebooted To keep the address from changing you can assign a static IP address to your server outside the range that DHC...

Страница 41: ...riggering table 2 The gateway records this connection opens the incoming port or ports associated with this entry in the Port Triggering List and associates them with the computer 3 The remote system...

Страница 42: ...s Click Apply to save your settings and activate the port triggers To remove a port trigger select its radio button and click Delete To return all trigger and target ranges to zero click Reset DMZ Hos...

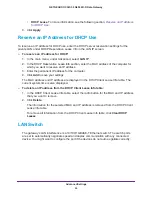
Страница 43: ...tic IP address to reconnect to the gateway and enable the DHCP server again To configure LAN IP settings 1 In the main menu under Advanced select LAN IP 2 Specify these settings LAN IP Address The fac...

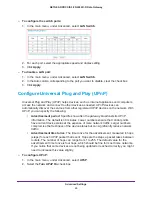
Страница 44: ...mputer 4 Click Add to save your settings The MAC address and IP address are displayed in the DHCP Client Lease Info table The current system time is also displayed To delete an IP address from the DHC...

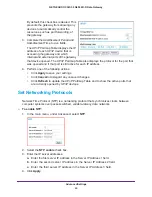
Страница 45: ...can specify the following Advertisement period Specifies how often the gateway broadcasts its UPnP information The default is 30 minutes Lower numbers ensure that control points have current device st...

Страница 46: ...e for each IP address 4 Perform one of the following actions Click Apply to save your settings Click Cancel to disregard any unsaved changes Click Refresh to update the UPnP Portmap Table and to show...

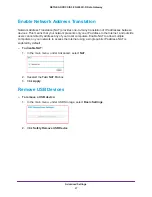
Страница 47: ...he Internet and outside users cannot directly address any of your local computers Enable NAT to allow multiple computers on your network to access the Internet using a single public IP address NAT is...

Страница 48: ...to the Gateway s Main Menu on page 49 I have configured the gateway but I cannot access the Internet See Troubleshoot the ISP Connection on page 50 My gateway is not responding See Troubleshoot a TCP...

Страница 49: ...pter supplied by NETGEAR for this product If the error persists you have a hardware problem and should contact technical support All LEDs stay on Clear the gateway s configuration to factory defaults...

Страница 50: ...again Make sure that you are using the correct login information The gateway user name is admin and the default password is password both in lower case letters Caps Lock should be off when you enter t...

Страница 51: ...Request timed out If the path is not working correctly you could have one of the following problems Wrong physical connections Make sure that the LAN port LED is lit If the LED is off see Basic Functi...

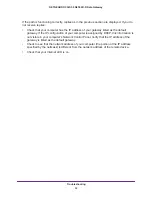
Страница 52: ...sted as the default gateway If the IP configuration of your computer is assigned by DHCP this information is not visible in your computer s Network Control Panel Verify that the IP address of the gate...

Страница 53: ...53 A A Supplemental Information This appendix includes the following sections Factory Default Settings Technical Specifications...

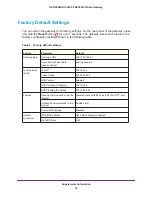
Страница 54: ...settings Feature Parameter Default Gateway login User login URL http 192 168 0 1 User name and password case sensitive admin password Local network LAN LAN IP 192 168 0 1 Subnet mask 255 255 255 0 DHC...

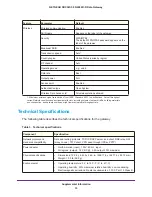
Страница 55: ...rate derived from IEEE Standard 802 11 specifications Actual throughput varies Network conditions and environmental factors including volume of network traffic building materials and construction and...

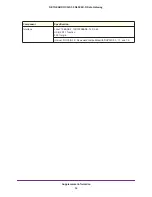
Страница 56: ...ion 56 NETGEAR DOCSIS 3 0 N450 Wi Fi Data Gateway Interface Local 10BASE T 100 1000BASE Tx RJ 45 USB 2 0 1 1 function 802 11n g b Internet DOCSIS 3 0 Downward compatible with DOCSIS 2 0 1 1 and 1 0 Co...

Страница 57: ...vice may not be used for setting up outdoor radio links in France and in some areas the RF output power may be limited to 10 mW EIRP in the frequency range of 2454 2483 5 MHz For detailed information...

Страница 58: ...election of other channels is not possible Pour les produits disponibles aux tats Unis Canada du march seul le canal 1 11 peuvent tre exploit s S lection d autres canaux n est pas possible This device...

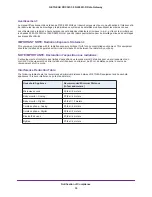
Страница 59: ...onment This equipment should be installed and operated with minimum distance 20cm between the radiator your body NOTE IMPORTANTE D claration d exposition aux radiations Cet quipement est conforme aux...

Отзывы: