POC-300 Series
61
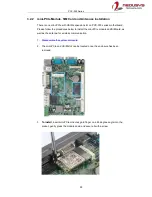
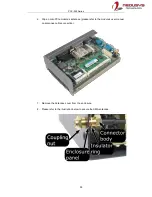
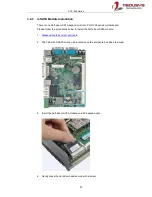
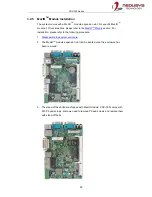
4. To install, match the three (3) screw holes (indicated by black arrows) to the
standoffs and the MezIO
TM
port, gently lower the module onto the PCBA. The
MezIO
TM
port should engage if the three (3) standoffs and screw holes meet.
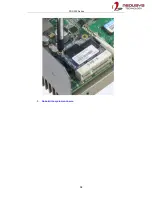
Then using the three (3) screws supplied, secure the module by fastening a
screw on each standoff.
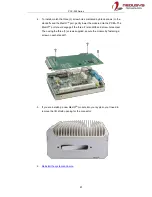
5. If you are installing a new MezIO
TM
module into your system, you’ll need to
remove the I/O shield opening for the connector.
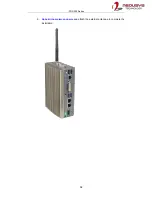
6.
Reinstall the system enclosure
.
Содержание POC-300
Страница 1: ...Neousys Technology Inc POC 300 Series User Manual Revision 1 0 ...
Страница 4: ...Table of Contents 4 StopDICOS 108 DI COS Example 108 ...
Страница 20: ...POC 300 Series 20 1 5 Dimension 1 5 1 Superior View NOTE All measurements are in millimeters mm ...
Страница 21: ...POC 300 Series 21 1 5 2 Front Panel View NOTE All measurements are in millimeters mm ...
Страница 22: ...POC 300 Series 22 1 5 3 Bottom View NOTE All measurements are in millimeters mm ...
Страница 24: ...POC 300 Series 24 1 6 2 Wall Mount Bracket WM 300V NOTE All measurements are in millimeters mm ...
Страница 25: ...POC 300 Series 25 1 6 3 Wall Mount Bracket WM 300H NOTE All measurements are in millimeters mm ...
Страница 58: ...POC 300 Series 58 5 Reinstall the system enclosure ...
Страница 110: ...POC 300 Series 110 printf StopDICOS PASSED n printf npress any key to exit n system pause nul return 0 ...

