POC-300 Series
59
3.2.4
2.5
” HDD/ SSD Installation (for MezIO-R11/ R12)
MezIO-R11/ R12 offer a SATA port for users to install a 2.5
” HDD/ SSD in their
POC-300 series systems. A MezIO-R12 will be used as an example in the following
procedure to demonstrate installation.
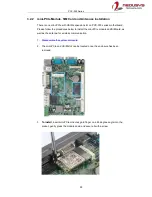
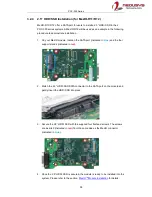
1. On your MezIO module, location the SATA port (indicated in
blue
) and the four
support stands (indicated in
red
).
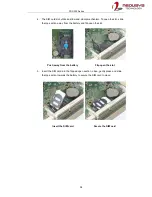
2. Match the 2.5
” HDD/ SSD SATA connector to the SATA port on the module and
gently insert the HDD/ SSD into place.
3. Secure the 2.5
” HDD/ SSD with the supplied four flathead screws. The screws
are inserted (indicated in
red
) from the same side as the MezIO connector
(indicated in
blue
).
4. Once the 2.5
” HDD/ SSD is secured, the module is ready to be installed into the
system. Please refer to the section,
MezIO
TM
Module Installation
for details.
Содержание POC-300
Страница 1: ...Neousys Technology Inc POC 300 Series User Manual Revision 1 0 ...
Страница 4: ...Table of Contents 4 StopDICOS 108 DI COS Example 108 ...
Страница 20: ...POC 300 Series 20 1 5 Dimension 1 5 1 Superior View NOTE All measurements are in millimeters mm ...
Страница 21: ...POC 300 Series 21 1 5 2 Front Panel View NOTE All measurements are in millimeters mm ...
Страница 22: ...POC 300 Series 22 1 5 3 Bottom View NOTE All measurements are in millimeters mm ...
Страница 24: ...POC 300 Series 24 1 6 2 Wall Mount Bracket WM 300V NOTE All measurements are in millimeters mm ...
Страница 25: ...POC 300 Series 25 1 6 3 Wall Mount Bracket WM 300H NOTE All measurements are in millimeters mm ...
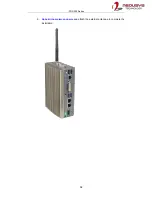
Страница 58: ...POC 300 Series 58 5 Reinstall the system enclosure ...
Страница 110: ...POC 300 Series 110 printf StopDICOS PASSED n printf npress any key to exit n system pause nul return 0 ...

