nedis SLNVR201CWT Скачать руководство пользователя страница 7

7

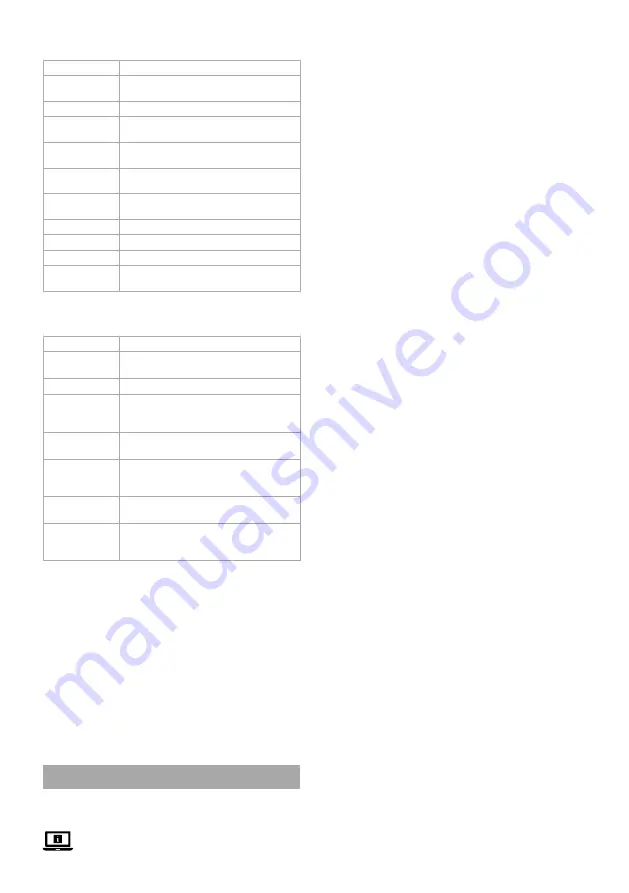
Function descriptions of the software 

(image 

B

)

Function

Description

Pair IPC

Check the status of the IPC channel and 

whether it is connected.

System

Open a new window with the system settings.

Playback

Playback video recordings stored on the 

hard disk.

Record mode

Schedule video recordings throughout the 

week.

Backup

Backup the videos of the hard disk to an 

external hard disk/USB.

PTZ Control

Control the camera from a distance (not 

available for this product).

IPC Config

Adjust the settings of the cameras.

Info

Shows information about the system

Shutdown

Switch off the system.

View 4

Switch between an overview of 1 or 4 camera 

views.

Function descriptions of the Nedis SmartLife 

app

 (image 

C

)

Function

Description

Playback 

C

2

Tap 

C

2

 to play back the video footage 

stored on the hard disk.

Message 

C

3

Tap 

C

3

 to view human detection alarms.

Albums 

C

4

Tap 

C

4

 to view recorded video footage 

and screenshots saved to an album on your 

smartphone.

Settings 

C

5

Tap 

C

5

 to open a new window with the 

system settings

Screenshot 

C

7

Tap 

C

7

 to make a screenshot of the current 

camera view. The screenshot will be saved to 

an album on your smartphone.

Security camera 

speaker 

C

8

Tap and hold 

C

8

 to speak through the 

speaker of the camera.

Record video 

C

9

Tap 

C

9

 to record the current camera view. 

The video footage will be saved to an album 

on your smartphone.

Declaration of Conformity

We, NEDIS, as manufacturer, declare that product SLNVR201CWT 
from the brand Nedis, produced in China was tested according to all 
relevant CE standards / regulations and passed all tests.

The complete Declaration of Conformity ( + safety datasheet if 
applicable ) can be found and downloaded via http://webshop.
nedis.com
For other compliant-related information, please contact customer 
service desk for support:

via website: http://www.nedis.com
via e-mail: [email protected]
NEDIS B.V., De Tweeling 28,
5215 MC ’s-Hertogenbosch, THE NETHERLANDS

c

 Kurzanleitung

Smart Wireless 

NVR-Sicherheits-Set

SLNVR201CWT

Weitere Informationen finden Sie in der erweiterten 
Anleitung online: 

ned.is/slnvr201cwt

Bestimmungsgemäße Verwendung

Dieses Produkt ist nur zur Verwendung als Smartes Wireless-
Sicherheits-Set gedacht.
Das Produkt ist nur zur Verwendung innerhalb von Gebäuden 
gedacht.
Jegliche Modifikation des Produkts kann Folgen für die Sicherheit, 
Garantie und ordnungsgemäße Funktionalität haben.

Hauptbestandteile 

(Abbildung 

A

)

1

 Antenne

2

 Basisstation

3

 Festplattenabdeckung

4

 Ethernet-Anschluss

5

 VGA-Ausgang

6

 HDMI-Ausgang

7

  USB-Anschluss (2x)

8

 DC-Stromanschluss

9

  Bohrschablone (2x)

q

  Dübel (6x)

w

  Schraube (6x)

e

  Festplattenschraube (4x)

r

 HDD-LED

t

 Betriebs-LED

y

 Power-LED

u

 Schelle

i

  Kamera (2x)

o

 Lautsprecher

p

 Mikrofon

a

 Objektiv

s

  Lichtempfindlicher Sensor

d

 Adapterstecker

f

 Kopplungs-Taste

g

 Maus

h

 Ethernet-Kabel

j

  Netzkabel (3x)

Benutzeroberfläche der Software 

(Abbildung 

B

)

1

  Neu laden/Anmelden 

Symbol

2

 QR-Code

3

 Rechtsklick-Menü

4

  Signalstärke der 

verbundenen Kamera

5

 Stummschalten/

Stummschaltung aufheben

Benutzeroberfläche der App

 (Abbildung 

C

)

1

 Menü

2

 Wiedergabe

3

 Nachricht

4

 Alben

5

 Einstellungen

6

 Stummschalten/

Stummschaltung aufheben

7

 Screenshot

8

 Sicherheitskamera-

Lautsprecher

9

  Video aufzeichnen

q

 Vollbild

Sicherheitshinweise


-

WARNUNG

• 

Vergewissern Sie sich, dass Sie die Anweisungen in diesem 
Dokument vollständig gelesen und verstanden haben, bevor Sie 
das Produkt installieren oder verwenden. Heben Sie die 
Verpackung und dieses Dokument zum späteren Nachschlagen 
auf.

• 

Verwenden Sie das Produkt nur wie in diesem Dokument 
beschrieben.

• 

Verwenden Sie das Produkt nicht, wenn ein Teil beschädigt ist 
oder es einen Mangel aufweist. Ersetzen Sie ein beschädigtes 
oder defektes Produkt unverzüglich.

• 

Lassen Sie das Produkt nicht herunterfallen und vermeiden Sie 
Kollisionen.

• 

Setzen Sie das Produkt keinem Wasser oder Feuchtigkeit aus.

• 

Dieses Produkt darf nur von einem ausgebildeten Techniker 
gewartet werden, um die Gefahr eines Stromschlags zu 
reduzieren.

• 

Verwenden Sie nur das mitgelieferte Stromkabel.

• 

Trennen Sie das Produkt von der Stromquelle und anderer 
Ausrüstung, falls Probleme auftreten.

• 

Ziehen Sie das Produkt niemals am Kabel aus der Steckdose. 
Halten Sie immer den Stecker fest und ziehen Sie daran.

Optional: Installieren der Festplatte (nicht im 

Lieferumfang enthalten) 

(Abbildung 

D

)

1.  Drehen Sie die Basisstation 

A

2

 auf einer weichen Oberfläche 

vorsichtig auf den Kopf.

2.  Lösen Sie die Schrauben, um die Festplattenabdeckung 

A

3

 von 

A

2

 zu lösen.

Содержание SLNVR201CWT

Страница 1: ...ned is slnvr201cwt Smart Wireless NVR Security Set 2 wirelessly connected cameras SLNVR201CWT...

Страница 2: ...a de inicio r pido 13 iGuia de inicia o r pida 15 eSnabbstartsguide 17 gPika aloitusopas 18 fHurtigguide 20 2Vejledning til hurtig start 21 kGyors be zemel si tmutat 22 nPrzewodnik Szybki start 24 x 2...

Страница 3: ...3 1 2 5 4 6 7 8 9 q 1 2 3 4 5 B C...

Страница 4: ...Router D E...

Страница 5: ...28 g Power input 220 230 VAC 50 60 Hz Operating temperature 20 C 50 C Operating humidity 10 90 RH Resolution 1920 px 1080 px Frame speed 15 fps Image sensor 1 2 9 Color CMOS Video compression H 265 Ph...

Страница 6: ...ws Installing the product image E 1 Connect the cables to the product as shown in image E 4It is also possible to use a VGA cable instead of an HDMI cable for use with monitors with VGA ports 4You can...

Страница 7: ...erwendung als Smartes Wireless Sicherheits Set gedacht Das Produkt ist nur zur Verwendung innerhalb von Geb uden gedacht Jegliche Modifikation des Produkts kann Folgen f r die Sicherheit Garantie und...

Страница 8: ...is SmartLife App 4 Tippen Sie auf in der oberen rechten Ecke der Nedis SmartLife App 5 Scannen Sie den auf dem TV Monitor angezeigten QR Code 6 Befolgen Sie die Anweisungen in der Nedis SmartLife App...

Страница 9: ...st pr t tre install 1 Suivez les instructions de l assistant d installation L assistant d installation est termin lorsque l cran de pr sentation du logiciel et des cam ras s affiche 2 Cliquez sur l ic...

Страница 10: ...application Nedis SmartLife 1 Mettre le produit sous tension 2 Ouvrez l application Nedis Smartlife sur votre smartphone 3 Appuyez sur dans l application Nedis SmartLife 4 Appuyez sur dans le coin en...

Страница 11: ...g gelezen en begrepen heeft voordat u het product installeert of gebruikt Bewaar de verpakking en dit document voor toekomstig gebruik Gebruik het product alleen zoals in dit document beschreven Gebru...

Страница 12: ...martLife di Nedis 1 Scaricare l app Nedis Smartlife per Android o iOS sul telefono tramite Google Play o l Apple App Store 2 Aprire l app Nedis Smartlife sul proprio smartphone 3 Creare un account con...

Страница 13: ...taladrar 2x q Enchufe 6x w Tornillo 6x e Perno para disco duro 4x 4 Immettere il codice di verifica ricevuto 5 Creare una password e toccare Fatto 6 Toccare Aggiungi Casa per creare una casa SmartLife...

Страница 14: ...ro Record mode modo de grabaci n Permite definir el calendario con el que quiere realizar las grabaciones a lo largo de la semana r LED de HDD t LED de funcionamiento y LED de energ a u Abrazadera i C...

Страница 15: ...fornecidos Ae conforme ilustrado na imagem D 4 Ligue o cabo de alimenta o e o cabo de dados do disco r gido a A2 5 Volte a fixar A3 na respetiva posi o com os parafusos Backup copia de seguridad Perm...

Страница 16: ...as USB para ligar armazenamento externo apenas para backup n o inclu do Instala o das c maras de seguran a imagem F 1 Instale as c maras utilizando a matriz de perfura o inclu da A9 as buchas Aq e os...

Страница 17: ...re h gra h rnet i appen Nedis SmartLife 5 Skanna Qr koden som visas p TV n monitorn 6 F lj anvisningarna i Nedis SmartLife appen 4S kerst ll att du ansluter produkten till ett 2 4 GHz WiFi n tverk 7 G...

Страница 18: ...a pistorasiasta johdosta vet m ll Tartu aina pistokkeeseen ja ved 4 Tryck p parningsknappen Af och h ll den intryckt i 5 sekunder 4Det tar ungef r 1 minut f r kameran att anslutas till produkten Signa...

Страница 19: ...yl salaisin pehme lle alustalle 2 Irrota ruuvit kiintolevyn kannen A3 irrottamiseksi tukiasemasta A2 3 Kiinnit kiintolevyn kansi A3 kiintolevyyn mukana toimitetuilla kiintolevyn pulteilla Ae katso kuv...

Страница 20: ...t med smarttelefonen din Tilkobling av kameraet 1 H yreklikk for pne h yreklikkmenyenB3 2 Klikk Pair IP Camera 3 Klikk Pair 4 Trykk p paringsknappen Af i fem sekunder 4Det tar ca ett minutt f r kamera...

Страница 21: ...orsigtigt A2 omvendt p et bl dt underlag 2 L sn skruerne for at fjerne harddiskd kslet A3 fra A2 3 Monter A3 p din harddisk ved brug af de medf lgende harddiskbolte Ae som vist p billedet D Funksjonel...

Страница 22: ...skruerne Tilslut produktet billedet E 1 Tilslut kablerne til produktet som vist p billedet E 4Man kan ogs anvende et VGA kabel i stedet for et HDMI kabel til sk rme med VGA porte 4Du kan bruge en af...

Страница 23: ...n a jobb gombbal a jobb gombbal kattintva megnyithat men B3 megnyit s hoz 2 Kattintson az Pair IP Camera 3 Kattintson Pair 4 Nyomja meg a p ros t si gombot Af 5 m sodpercig 4A kamera s a term k p ros...

Страница 24: ...pi problemy od cz produkt od r d a zasilania i innych urz dze A szoftver funkci le r sai B k p Funkci Le r s Az IPC p ros t sa Ellen rizze az IPC csatorna llapot t s hogy csatlakoztatva van e System...

Страница 25: ...stalowanie twardego dysku brak w zestawie Ilustracja D 1 Ostro nie po stacj bazow A2 do g ry nogami na mi kkiej powierzchni 2 Odkr ruby aby zdj pokryw twardego dysku A3 z A2 3 Zamontuj A3 na twardym d...

Страница 26: ...SmartLife Home 7 4 USB A2 4 1 2 B1 3 4 admin 4 OK Nedis SmartLife 1 2 Nedis SmartLife smartphone strona www http www nedis com e mail service nedis com NEDIS B V De Tweeling 28 5215 MC s Hertogenbosch...

Страница 27: ...5 V stup VGA 6 V stup HDMI 7 Port USB 2x 8 Port jednosmern ho nap jania 9 V tacia abl na 2x q Pr chytka 6x w Skrutka 6x e Skrutka na pevn disk 4x r LED indik tor pevn ho disku HDD t LED indik tor inn...

Страница 28: ...bumy 5 Nastavenia 6 St enie zru enie st enia 7 Z ber obrazovky 8 Reproduktor bezpe nostnej kamery 9 Z znam videa q Cel obrazovka Bezpe nostn pokyny VAROVANIE Pred in tal ciou alebo pou it m v robku si...

Страница 29: ...likaci Nedis SmartLife pro Android nebo iOS z obchodu Google Play nebo Apple App Store 2 Otev ete ve sv m telefonu aplikace Nedis SmartLife 3 Vytvo te si et pomoc sv ho telefonn ho sla nebo e mailov a...

Страница 30: ...y LED indicator alimentare u Suport i Camer video 2x o Difuzor p Microfon a Lentil 4 Zadejte p ijat ov ovac k d 5 Vytvo te heslo a klepn te na Hotovo 6 Klepnut m na P idat domov vytvo te domov SmartL...

Страница 31: ...cate pe hard disk Mod nregistrare Planifica i nregistr rile video pe parcursul s pt m nii Copie de rezerv Crea i o copie de rezerv a nregistr rilor video de pe hard disk pe un hard disk extern USB s S...

Страница 32: ...captur de ecran a imaginii curente de pe camer Captura de ecran va fi arhivat ntr un album pe smartphone ul dumneavoastr Difuzorul camerei de supraveghere C8 ine i ap sat C8 pentru a vorbi prin difuzo...

Страница 33: ......

Страница 34: ......

Страница 35: ......

Страница 36: ...Nedis BV De Tweeling 28 5215 MC s Hertogenbosch The Netherlands 01 22...

Отзывы: