57
- A d j u s t m e n t -
1 . S o u r c e R e g i s t r y
2 . A m p l i t u d e
3 . W h i t e B a l a n c e
4 . S i g n a l L e v e l
5 . U n i f o r m i t y
6 . D i s p l a y F u n c t i o n
7 . L a m p M o d e
8 . S e t O p t i o n
- S e t O p t i o n -
1 . P a s s c o d e
2 . S e t t i n g M o d e
3 . M e n u M o d e
4 . E x e c u t e M o d e
P a s s c o d e
P a s s c o d e S e t t i n g
C u r r e n t P a s s c o d e [ ]
✳ ✳ ✳ ✳
■
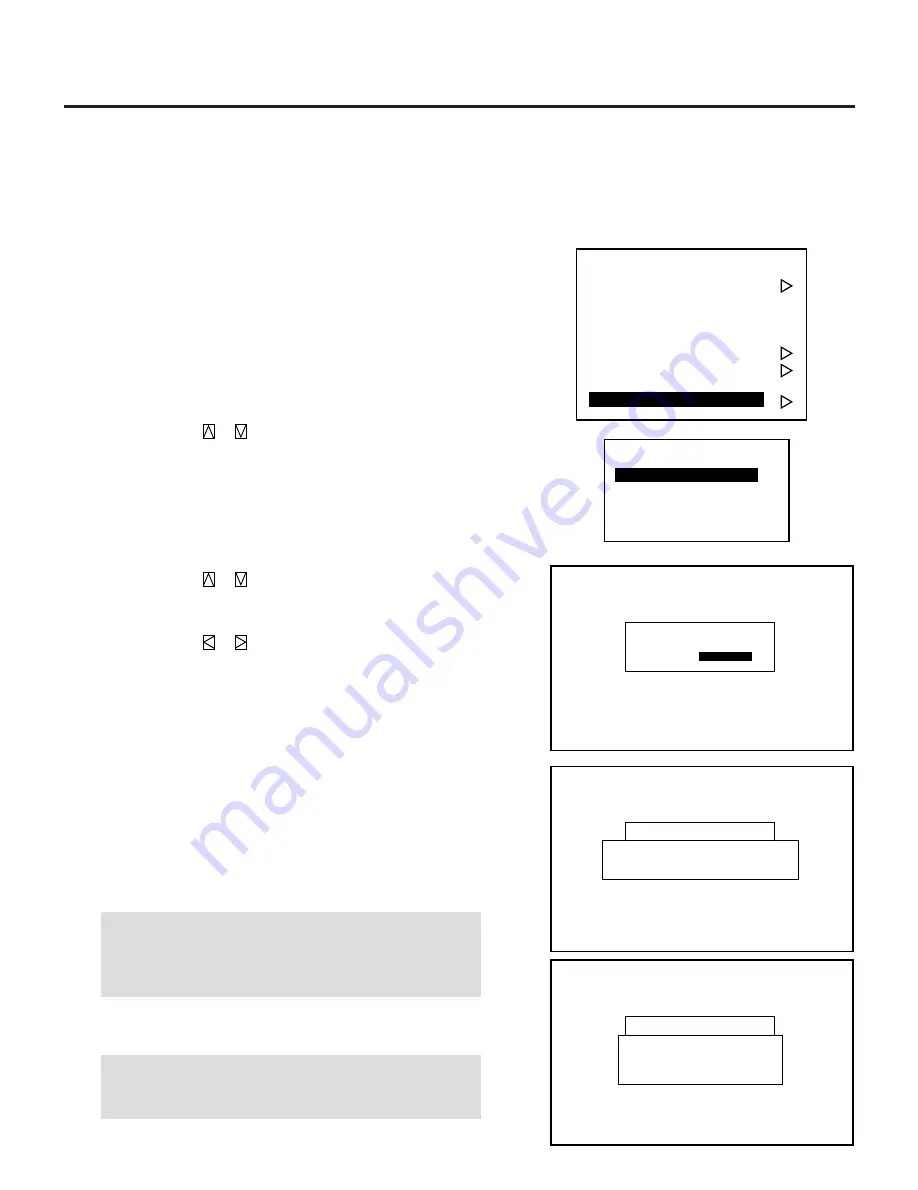
Canceling Your Passcode
To cancel the passcode, proceed as follows:
1
Press the ADJUST button and then enter your passcode.
• The “Passcode?” screen will be displayed.
2
Enter the four digit current passcode using the “1” through “10”
buttons and then press ENTER.
• The “Adjustment” menu will be displayed.
3
Use the CURSOR
or
button to highlight “8. Set Option”.
Press the ENTER button to display the “Set Option” menu.
4
Use the CURSOR
or
button to highlight “1. Passcode”
line. Press ENTER to display the “Passcode Setting” menu.
5
Use the CURSOR
or
button to select “Disable”. Press
ENTER to display the “Passcode Disable?” menu. Select “Yes”
and press ENTER.
• The “Current Passcode” screen will be displayed.
6
Enter the four digit passcode (the current passcode) using the “1”
through “10” buttons.
1) Each time you press the INPUT button, an asterisk will appear
next to the “Current Passcode?” message.
2) Once you have finished entering the four digit passcode, press
ENTER.
NOTE:
If you have made an error, press the NORMAL button
to delete the asterisk “*”. Then re-enter the correct passcode.
To delete all the entered digits, hold down the CTL button
then press the NORMAL button.
3) If the entered passcode is correct, the “Passcode Disable?”
menu will be displayed.
NOTE:
If the passcode is not correct, the “Warning Different
Passcode!!” message will be displayed. You will be required
to enter your correct passcode.
P a s s c o d e
P A S S C O D E S E T T I N G
E N A B L E D I S A B L E
P a s s c o d e S e t t i n g
P a s s c o d e D i s a b l e ?
Y e s
N o
P a s s c o d e
P a s s c o d e S e t t i n g
E n t r y
D i s a b l e
3.OPERATION
Содержание XL-6500
Страница 81: ...81...
Страница 82: ...NEC Corporation Printed in Japan 78409611...


