


2-10 Getting Started
5.
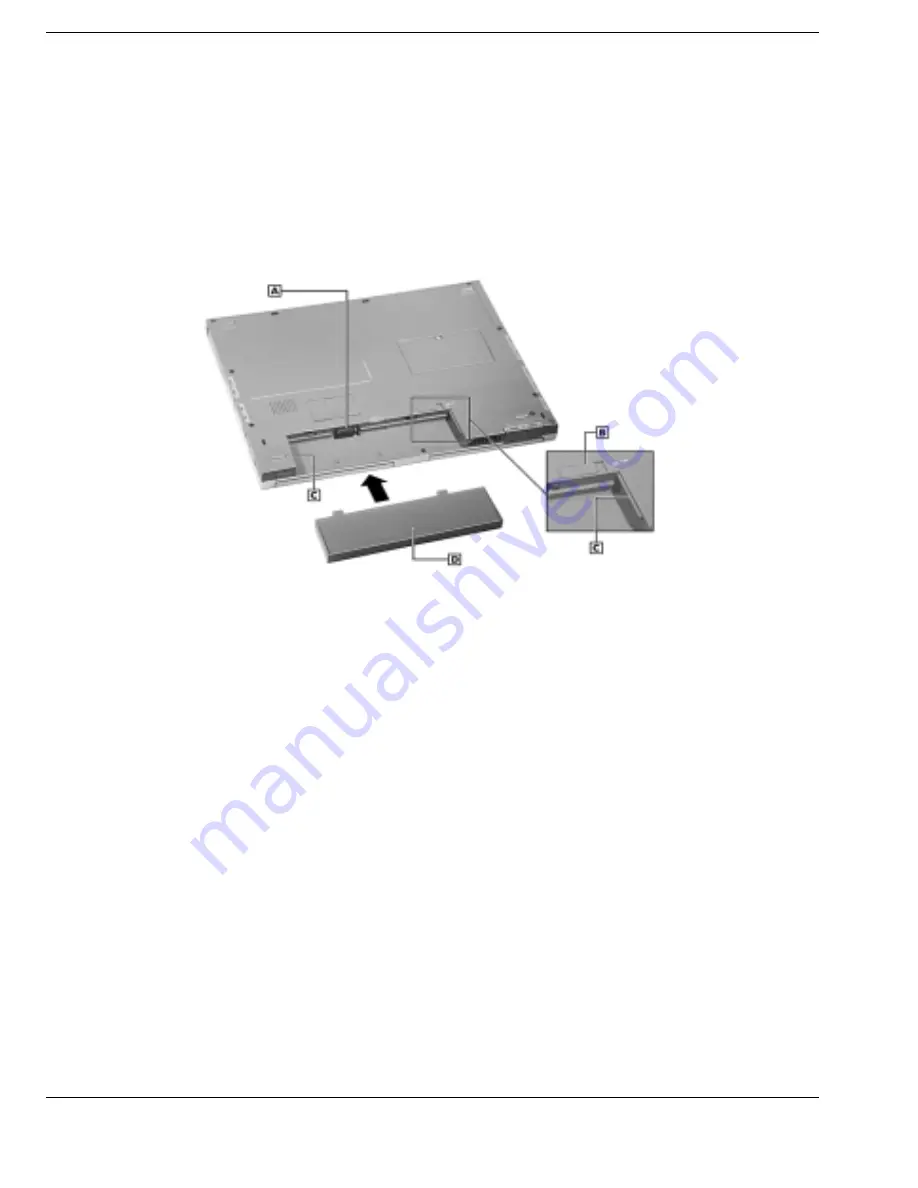
Insert the new battery as follows:
!
Locate the alignment groove on the edge of the battery.
!
Locate the alignment groove inside the battery bay.
!
Align the grooves on the battery with the grooves in the bay.
!
Slide the battery into the bay until securely locked into place.
Inserting the battery pack
A – Battery Bay Connectors
C – Alignment Grooves
B – Battery Bay Release Latch
D – Standard Lithium-Ion Battery
6.
Turn over the system.
Charging the Battery
Charge the main (primary) battery and secondary (optional) battery by simply
connecting your NEC Versa FX system to an AC power source. To monitor the
charging activity, observe the battery charging LED on the front of the system. The
battery charging LED lights as follows:
!
Lights amber when the primary battery is charging.
!
Blinks amber if the primary battery encounters an error while charging.
!
Lights green when the secondary battery is charging.
!
Blinks green if the secondary battery encounters an error while charging.
Содержание VERSA FX
Страница 1: ......
Страница 95: ...6 Communicating with Your NEC Versa PC Cards Mini PCI LAN Internal Modem Internet Connections IR Port ...
Страница 109: ...8 Using Peripheral Devices External Monitor Parallel Devices External Audio Options USB Devices ...
Страница 114: ...9 Using Multimedia Audio Video Multimedia Applications ...
Страница 119: ...10 Solving System Problems Problem Checklist Start Up Problems If You Need Assistance ...
Страница 137: ...B Specifications System Components Memory Map Interrupt Controllers ...
Страница 145: ...C Frequently Asked Questions External Mouse Display PC Cards Diskette Drive Booting Power Management Miscellaneous ...
Страница 171: ...Index 6 Windows introduction 4 2 keys 1 10 power management 3 15 Windows 98 4 2 desktop icons 4 2 taskbar icons 4 3 ...


