


Setting Up 2–33
7.
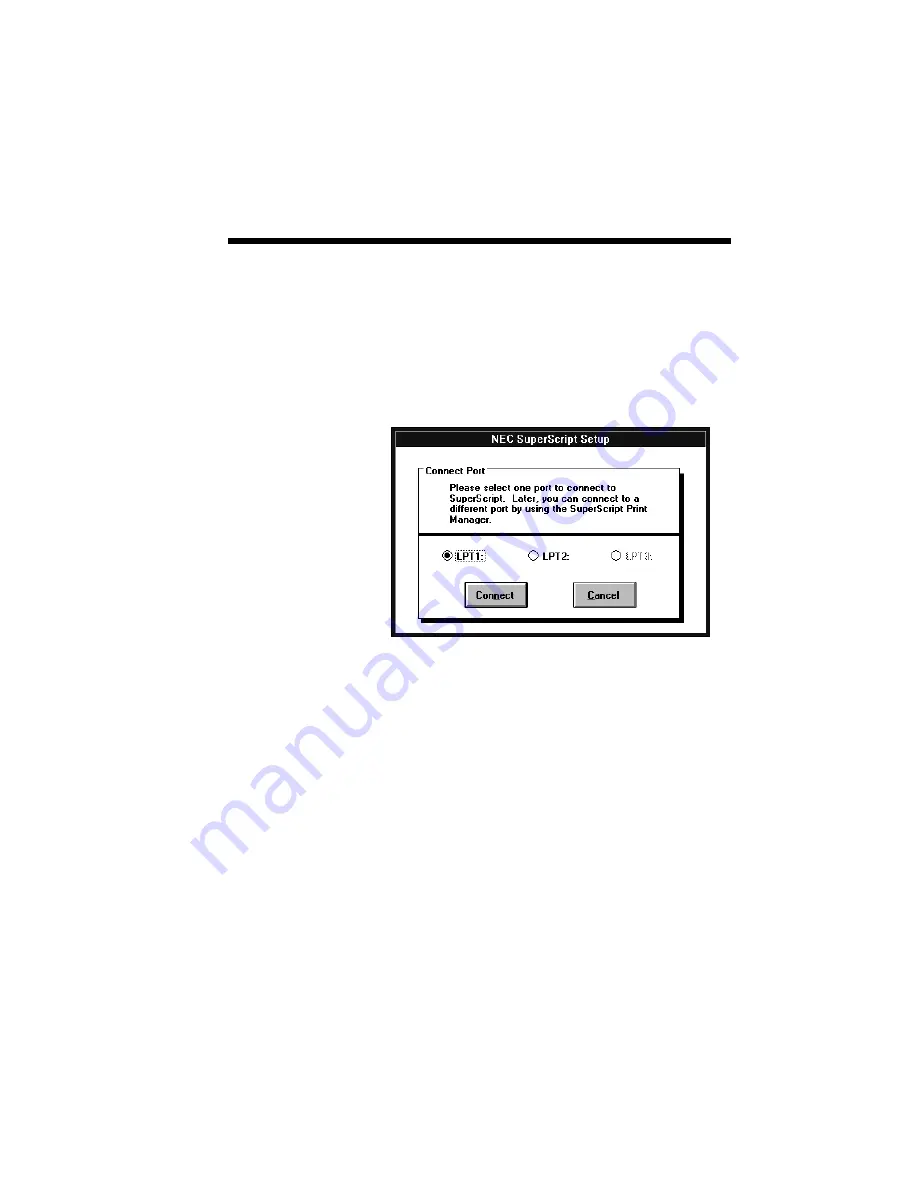
Tell the setup program which parallel port you
wish to use: LPT1, LPT2, or LPT3. The setup
program only shows you the port names avail-
able on your system. The default is LPT1.
Later, after the installation, you can select a
different port by using the
NEC SuperScript
Print Status Window
(see Chapter 5).
8.
Tell the setup program which drive and directory
you want to install the NEC SuperScript soft-
ware. You can accept the default supplied by the
setup program, or give it the name of another
drive on your PC on which to install the soft-
ware. You should select a drive with at least the
amount of free disk space (7.1 megabytes)
required for the NEC SuperScript installation.
As shown in the next figure, “Setup Directory
Selection”, the setup program will create and set
up the directory “C:\SSCRIPT” as the default
installation directory. You can change the
default directory at this time by specifying a
different directory.
Содержание SILENTWRITER SUPERSCRIPT 660
Страница 1: ...Silentwriter SuperScript 660 User s Guide ...
Страница 8: ...vi Contents ...
Страница 10: ...viii ...
Страница 11: ...Introduction 1 1 1 1 Introduction ...
Страница 20: ...1 10 Introduction ...
Страница 21: ...Setting Up 2 1 2 2 Setting Up ...
Страница 26: ...2 6 Setting Up ...
Страница 64: ...2 44 Setting Up ...
Страница 65: ...Printing with Your SuperScript 660 3 1 3 3 Printing with Your SuperScript 660 ...
Страница 95: ...NEC SuperScript Print Manager 4 1 4 4 NEC SuperScript Print Manager ...
Страница 104: ...4 10 NEC SuperScript Print Manager ...
Страница 105: ...Print Status Window 5 1 5 5 Print Status Window ...
Страница 117: ...Selecting Paper and Media 6 1 6 6 Selecting Paper and Media ...
Страница 133: ...Using Fonts 7 1 7 7 Using Fonts ...
Страница 137: ...Using Fonts 7 5 31 Additional TrueType Fonts ...
Страница 138: ...7 6 Using Fonts ...
Страница 139: ...Choosing Print Options 8 1 8 8 Choosing Print Options ...
Страница 155: ...Maintaining Your Printer 9 1 9 9 Maintaining Your Printer ...
Страница 168: ...9 14 Maintaining Your Printer 4 Remove the Toner Cartridge gently by holding the two green handles ...
Страница 181: ...Troubleshooting 10 1 1 10 0 Troubleshooting ...
Страница 190: ...10 10 Troubleshooting ...
Страница 201: ...Troubleshooting 10 21 Your printer has run out of paper Add more paper to the printer and then click RESUME ...
Страница 220: ...10 40 Troubleshooting ...
Страница 221: ...Getting Service and Support 11 1 1 11 1 Getting Service and Support For U S only ...
Страница 230: ...11 10 Getting Service and Support ...
Страница 233: ...Character Sets and Code Sequence Commands for HP LaserJet 4P A 3 ...
Страница 234: ...A 4 Character Sets and Code Sequence Commands for HP LaserJet 4P ...
Страница 235: ...Character Sets and Code Sequence Commands for HP LaserJet 4P A 5 ...
Страница 236: ...A 6 Character Sets and Code Sequence Commands for HP LaserJet 4P ...
Страница 237: ...Character Sets and Code Sequence Commands for HP LaserJet 4P A 7 ...
Страница 238: ...A 8 Character Sets and Code Sequence Commands for HP LaserJet 4P ...
Страница 239: ...Character Sets and Code Sequence Commands for HP LaserJet 4P A 9 ...
Страница 240: ...A 10 Character Sets and Code Sequence Commands for HP LaserJet 4P ...
Страница 241: ...Character Sets and Code Sequence Commands for HP LaserJet 4P A 11 ...
Страница 242: ...A 12 Character Sets and Code Sequence Commands for HP LaserJet 4P ...
Страница 243: ...Character Sets and Code Sequence Commands for HP LaserJet 4P A 13 ...
Страница 244: ...A 14 Character Sets and Code Sequence Commands for HP LaserJet 4P ...
Страница 245: ...Character Sets and Code Sequence Commands for HP LaserJet 4P A 15 ...
Страница 247: ...Character Sets and Code Sequence Commands for HP LaserJet 4P A 17 Roman 8 Character Conversion ...
Страница 248: ...A 18 Character Sets and Code Sequence Commands for HP LaserJet 4P Roman 8 Character Conversion cont d ...
Страница 249: ...Character Sets and Code Sequence Commands for HP LaserJet 4P A 19 Roman 8 Character Conversion cont d ...
Страница 250: ...A 20 Character Sets and Code Sequence Commands for HP LaserJet 4P Roman 8 Character Conversion cont d ...
Страница 251: ...Character Sets and Code Sequence Commands for HP LaserJet 4P A 21 Roman 8 Character Conversion cont d ...
Страница 252: ...A 22 Character Sets and Code Sequence Commands for HP LaserJet 4P Roman 8 Character Conversion cont d ...
Страница 270: ...A 40 Character Sets and Code Sequence Commands for HP LaserJet 4P ...
Страница 271: ...Optimizing Printer Performance B 1 B B Optimizing Printer Per formance ...
Страница 275: ...Specifications C 1 C C Specifications ...
Страница 278: ...C 4 Specifications Administrative UL 1950 D3 Compliance CSA 22 2 No 950 D3 FCC Class B CDRH Class I ...
Страница 279: ...Interface Cable Specifications D 1 D D Interface Cable Specifications ...
Страница 284: ...D 6 Interface Cable Specifications ...
Страница 285: ...Removing SuperScript Files from Your System E 1 E E Removing SuperScript Files from Your System ...
Страница 287: ...Installing the Memory Expansion Module F 1 F F Installing the Memory Expansion Module ...
Страница 302: ...Glossary 10 ...


