5-38 Installing Options
Removing the Front Panel
Remove the front panel before installing a device in the
5 1/4-inch accessible device slot. The front panel does not
need to be removed if you are installing an internal
3 1/2-inch hard drive. If you are going to install an external
5 1/4-inch device, you may also need to remove the blank
panel that covers the slot on the front panel.
1.
Remove the system unit cover (see “Removing the
Cover”).
2.
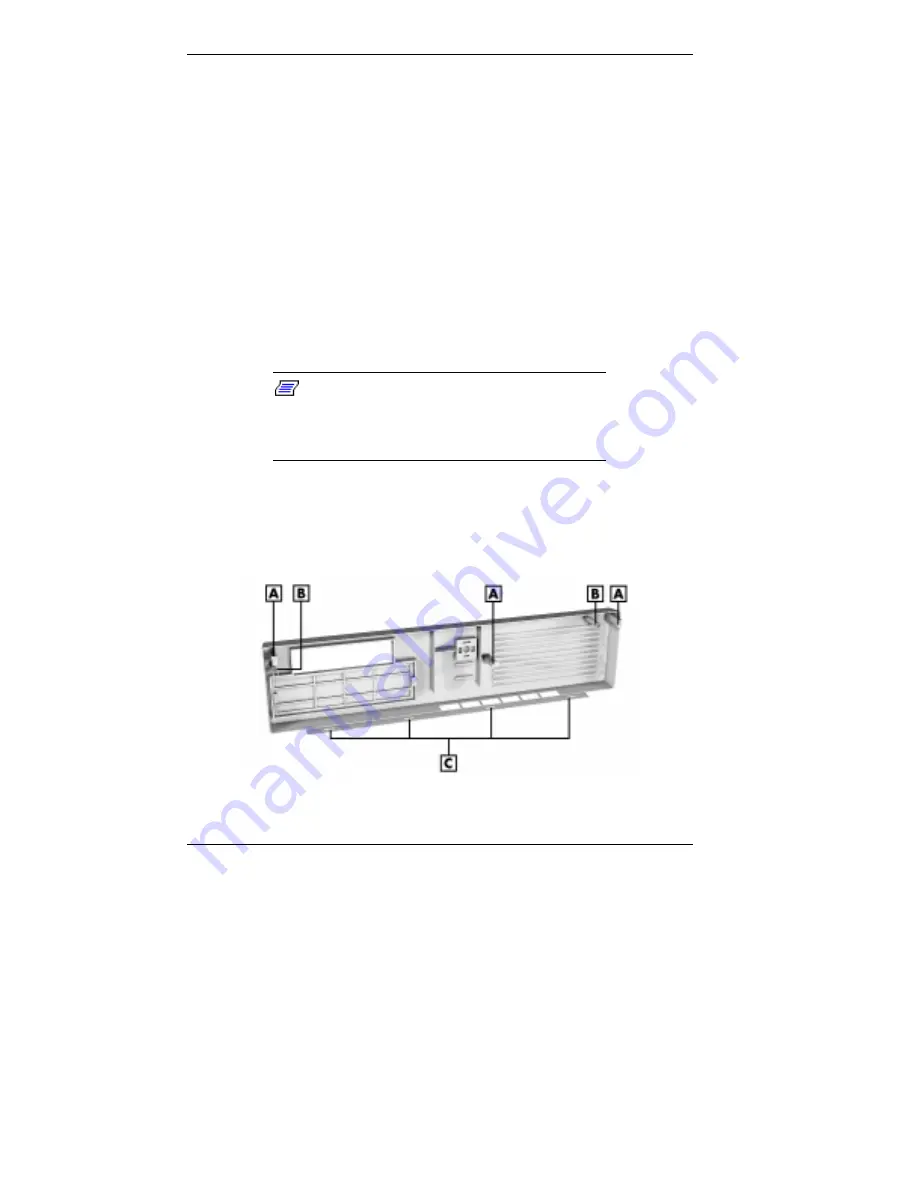
Press in on the left and right locking tabs and press down
on the middle tab (see the following figure).
Note:
The inside of the front panel has three
locking tabs, two on the left and right sides and
one in the middle. The panel also has two pop-in
tabs on each side and four slots on the bottom.
3.
Remove the front panel slots from the metal tabs on the
bottom of the chassis.
Front panel tab and slot locations
A – Locking Tabs B – Pop-In Tabs C – Front Panel Slots
Содержание POWERMATE 5100 - SERVICE
Страница 14: ...1 Reviewing System Features Front Features Rear Features Inside Features Speakers System Features ...
Страница 36: ...2 Setting Up the System Cable Connections Startup Shutdown Power Saving Features System Care More Information ...
Страница 185: ...6 Solving System Problems Solutions to Common Problems How to Clean the Mouse Battery Replacement How to Get Help ...


