manualshive.com logo in svg
background image

Replacing the Hard Drive in the NVM-2000 


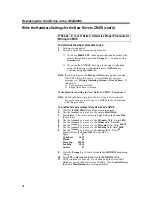
Write the Hardware Settings for the New Drive to CMOS (cont’d) 


Write Hardware Setting for New Drive to CMOS - Procedure A 

 
Note: 

 You should have completed the two steps in Determine the  

Proper Procedure for Writing to CMOS before you continue  
with this procedure.


To write the hardware settings for the New Drive to CMOS: 
1. 

Wait for the MR BIOS main menu screen to appear. 

2. 

Use the Arrow key to move to the option Fixed Disk

3. 

Press Enter.  The cursor moves to Type field in the Fixed Disk 
(C:)
 column. 

4. 

Press Shift + ? key to enter the correct values in all the Fixed Disk 
fields.  At the bottom of the screen, look for the message, 
Completed - Press Any Key to Continue

5. 

Press the Escape key twice to return to the MR BIOS main menu 
screen. 

6. 

Press F10 to Record and Exit from the MR BIOS utility. 

7. 

NVM continues to boot up.  If you backed up the Voice Mail 
Database, you should now restore this data.  (See Locally Restore 
the Voice Mail Database 
in this supplement.) 


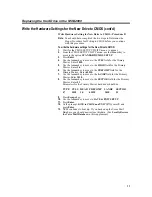
Write Hardware Setting for New Drive to CMOS - Procedure B 


Note: 

 You should have completed the two steps in Determine the  

Proper Procedure for Writing to CMOS


before you continue  

with this procedure.


To write the hardware settings for the New Drive to CMOS: 
1. 

Wait for the CMOS SETUP UTILITY menu  to appear. 

2. 

From the CMOS SETUP UILITY menu, use the Arrow key to 
move to the option IDE HDD AUTO.  You will see Auto 
Configure HDD:  Sector, Cylinder, Head
 at the bottom of the 
screen. 

3. 

Press Enter.  You will see: 
Select Primary Master  Option (N=Skip) : N 

4. 

At the flashing N, enter Y.  Press Enter. You will see: 
Select Primary Slave  Option (N=Skip) : N 

5. 

At the flashing N, press Enter. You will see: 
Select Secondary Master Option (N=Skip) : N 

6. 

At the flashing N, enter N.  Press Enter. You will see: 
Select Secondary Slave  Option (N=Skip) : N 

7. 

Press Enter.  You will return to the CMOS SETUP UTILITY 
menu. 

8. 

Press F10 to Save and Exit from the CMOS SETUP UTILITY 
menu. 

9. 

At the prompt, SAVE to CMOS and EXIT (Y/N), enter Y and 
press Enter

10. 

NVM continues to boot up.  If you backed up the Voice Mail 
Database, you should now restore this data.  (See Locally Restore 
the Voice Mail Database 
in this supplement.) 


Содержание NVM-2000

Страница 1: ...NVM 2000 Hard Drive Replacement Instructions Part No 17569HDINS02 Issue 1 0 May 2001...

Страница 2: ...ubject to change without notice and NEC America has no obligation to provide any updates or corrections to this manual Further NEC America also reserves the right without prior notice to make changes...

Страница 3: ...Important Notes 1 Tools and Materials Needed 1 Locally Back Up the Voice Mail Database 1 Remove the Old Hard Drive 3 Install the Replacement Hard Drive 6 Write the Hardware Settings for the New Drive...

Страница 4: ......

Страница 5: ...ed Phillips head Screwdriver ESD Wrist Strap to be worn on wrist and attached to a grounded metal object at all times 3 inch floppy disk s Required for backing up the Voice Mail database Four or more...

Страница 6: ...ides you with information about the Backup Utility 9 When you see the prompt Do you wish to continue Y N enter Y The Voice Mail System will shut down and exit to the SYSTEM SAVE FILE CREATION utility...

Страница 7: ...urn off the NVM without first shutting it down If you do not shut down first you may corrupt the NVM database when you turn it off To remove the old hard drive Note Instructions assume you are in Full...

Страница 8: ...alled Hard Drive cont d 6 Remove the cabinet cover by sliding it towards you and lifting it up See Figure 2 Figure 2 7 Remove and retain the four screws that secure cage assembly from the chassis The...

Страница 9: ...mounting bracket 9 Disconnect the ribbon cable and power supply connector from the hard drive See Figure 4 10 Remove and retain the four screws securing the hard drive to the cage assembly See Figure...

Страница 10: ...holes on the hard drive with the screw slots on the cage assembly See Figure 5 2 Secure the hard drive in place with the four screws removed and retained in step 10 of Remove the Old Hard Drive See Fi...

Страница 11: ...he cage assembly in place with the four screws removed and retained in step 7 of Remove the Recalled Hard Drive See Figure 6 6 Replace the cabinet cover 7 Replace the 5 screws removed and retained in...

Страница 12: ...17569 24 is a 24 hour drive regardless of the actual physical size of the drive Go to 17569 24 E G or H Series Determine Proper Procedure for Writing to CMOS see page 10 17569 65 J or K Series Determi...

Страница 13: ...is supplement Write Hardware Setting for New Drive to CMOS Procedure B Note You should have completed the two steps in Determine the Proper Procedure for Writing to CMOS before you continue with this...

Страница 14: ...have completed the two steps in Determine the Proper Procedure for Writing to CMOS before you continue with this procedure To write the hardware settings for the New Drive to CMOS 1 Wait for the MR B...

Страница 15: ...ry Master Enter 1010 5 Use the Arrow key to move to the HEAD field for the Primary Master Enter 16 6 Use the Arrow key to move to the PRECOMP field for the Primary Master Enter 65535 7 Use the Arrow k...

Страница 16: ...he system requests it 8 Select Local Restore The system prompts you through the restore procedure Select the files to be processed System Database D Mailbox Messages M File Type enter Q to Quit D 9 De...

Страница 17: ...ec com Other Important Telephone Numbers Sales 203 926 5450 Customer Service 203 926 5444 Customer Service FAX 203 926 5454 Technical Service 203 925 8801 Discontinued Product Service 900 990 2541 Tec...

Отзывы: