Installing the Voice Mail Hardware
Increasing the Number of Voice Mail Ports
12
◆
VANGARD Mail/i-Series Quick Setup Guide
Chapter 2: Installing the Voice Mail
8.
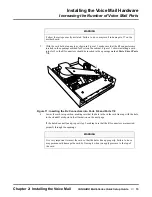
Push down on the port card’s hole to seat the card firmly in the cabinet, as shown in the fol-
lowing illustration.
Figure 6: Seating the Card Firmly in the Cabinet
9.
Secure the card with two screws. Do not over-tighten these screws.
10.
Repeat steps 4 through 9 for each card that you are installing.
11.
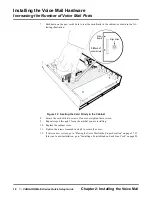
Replace the cabinet cover.
12.
Tighten the screws loosened in step 2 to secure the cover.
13.
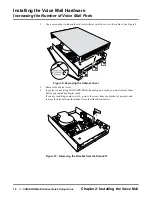
If this is a new system, go to “Placing the Voice Mail in the Proper Location” on page 17. If
this is not a new installation, go to “Installing a Ferrite Bead on Each Line Cord” on page 22.
Installing Digital Port Cards
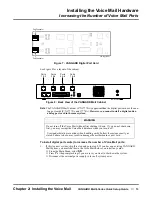
Each digital port card (P/N 17774ADIG) has 2 connectors and provides 4 ports. Each connector on
a port card provides 2 Voice Mail ports. See Figure 7.
Your digital VANGARD Mail System supports up to 8 ports.
If you have a 4-Port digital VANGARD Mail System, you can expand it with 4 additional ports.
Availability:
VANGARD Mail with software version 10.06 or higher. Also requires
VANGARD Mail Cabinet P/N 17770A.
VAN-V
Bexp4
Align holes
Voice
Board
For cabinet 17770,
J11 and J1
should mate.
For cabinet 17770A,
J7 and J1
should mate.


