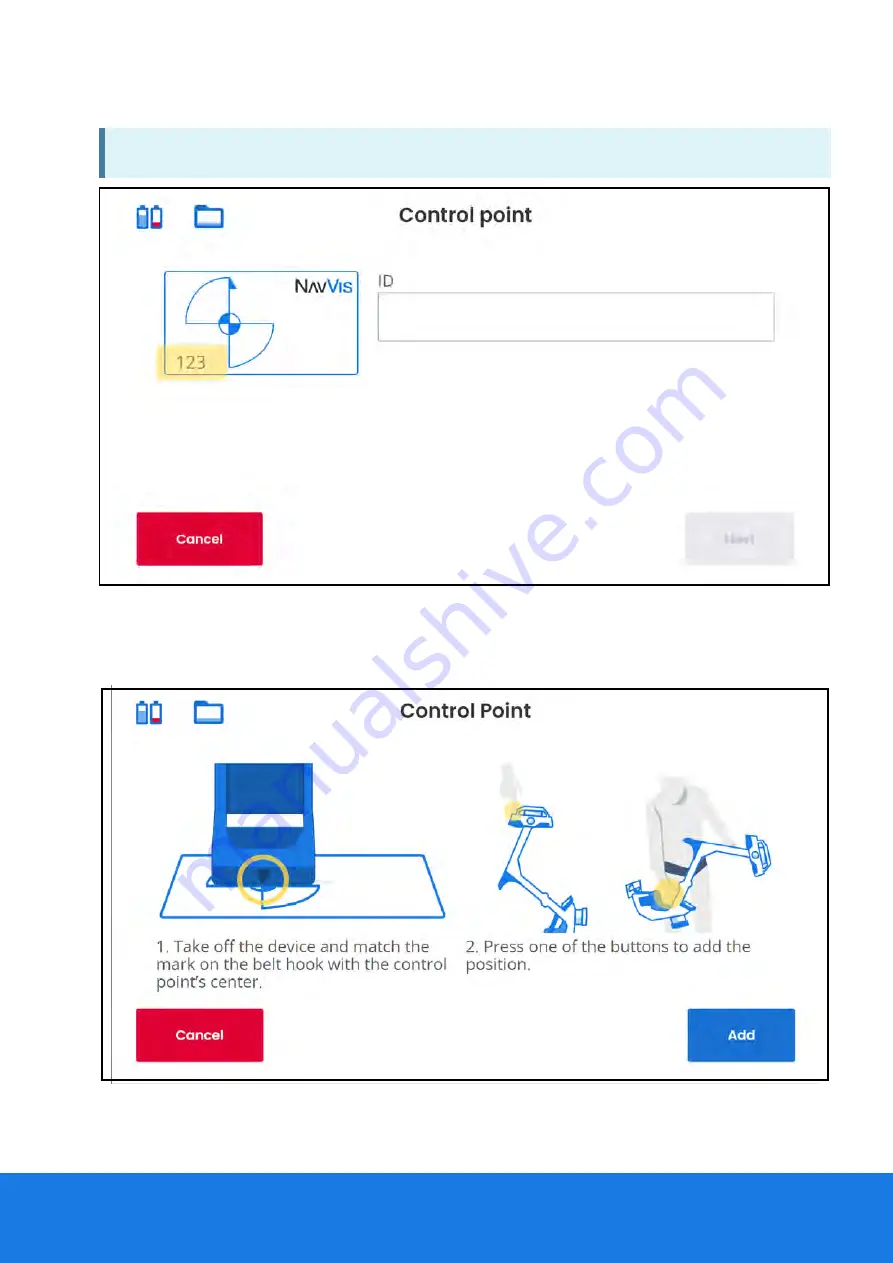
3. From the Contr
Control P
ol Point
oint screen, enter a unique control point ID in the field. Tap Next
Next.
NOTE:
The ID entered must match the ID on the control point marker.
4. Remove the NavVis VLX from the belt hook while holding the frame and handle. Make sure
the area above your head is clear. Avoid fast or jerky movements while moving the device.
5. Position the NavVis VLX into the correct position (refer to next section) and tap Add
Add.
6. The screen displays that the control point has been successfully added and that you need
to add two more control points. Tap Continue
Continue.
Na
NavVis VLX
vVis VLX
User Guide
User Guide
126
126
Содержание VLX
Страница 1: ...NAVVIS I NavVis VLX User Guide...
Страница 2: ...Na NavVis VLX 3 vVis VLX 3 User Guide User Guide...
Страница 8: ...Na NavVis VLX vVis VLX User Guide User Guide 6 6...
Страница 13: ...Na NavVis VLX vVis VLX User Guide User Guide 11 11...
Страница 23: ...Contents of the box Na NavVis VLX vVis VLX User Guide User Guide 21 21...
Страница 55: ...Na NavVis VLX vVis VLX User Guide User Guide 53 53...
Страница 73: ...Period Apostrophe Round brackets Comma Na NavVis VLX vVis VLX User Guide User Guide 71 71...
Страница 79: ...Na NavVis VLX vVis VLX User Guide User Guide 77 77...
Страница 88: ...Na NavVis VLX vVis VLX User Guide User Guide 86 86...
Страница 99: ...F FoV F oV Fr ront and back camer ont and back cameras as Na NavVis VLX vVis VLX User Guide User Guide 97 97...
Страница 100: ...F FoV Side camer oV Side cameras as Na NavVis VLX vVis VLX User Guide User Guide 98 98...
Страница 110: ...Loop closur Loop closures in corridors es in corridors Na NavVis VLX vVis VLX User Guide User Guide 108 108...
Страница 124: ...Na NavVis VLX vVis VLX User Guide User Guide 122 122...
Страница 142: ...Na NavVis VLX vVis VLX User Guide User Guide 140 140...
Страница 176: ...Na NavVis VLX vVis VLX User Guide User Guide 174 174...


