14
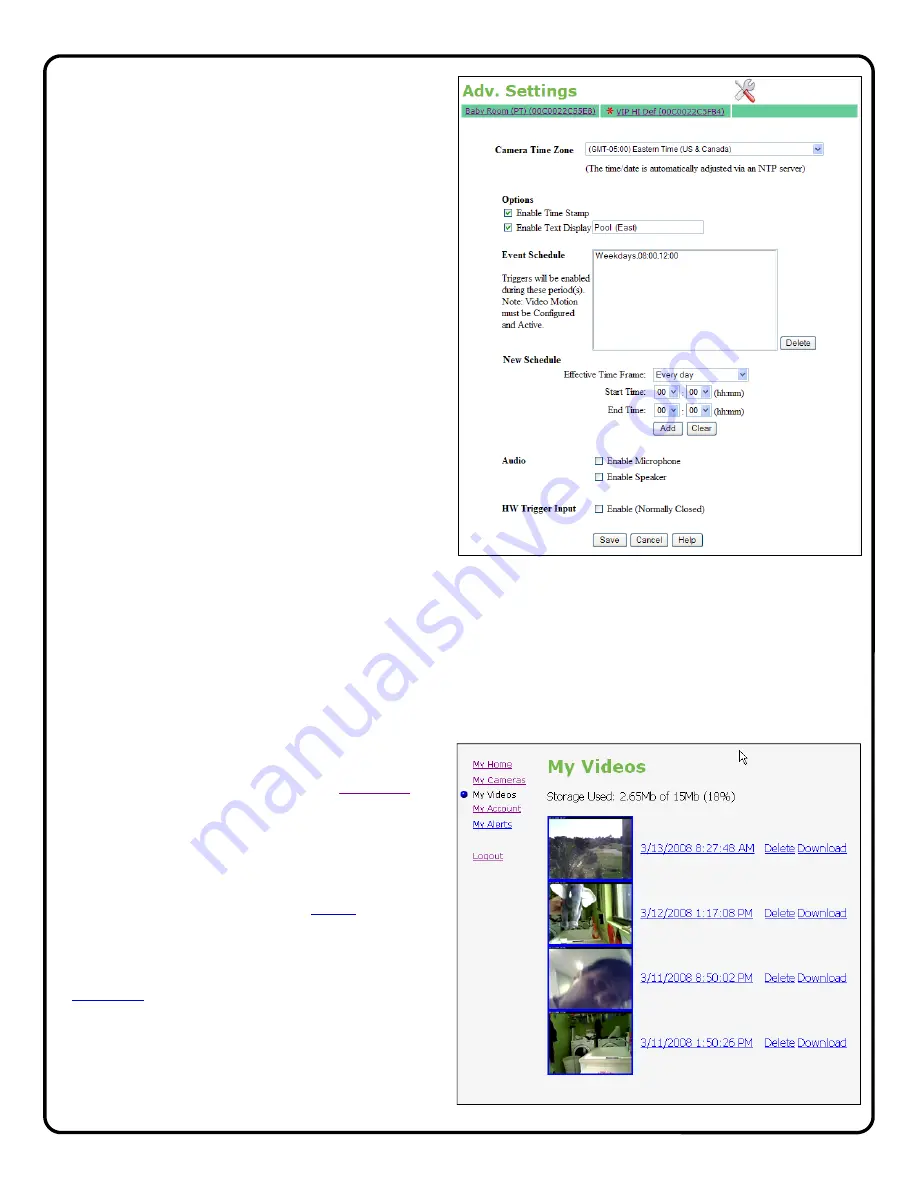
Camera Time & Date
Use drop down menu to set the time zone of the gate-
way. The time and date is automatically set by the NTP
server.
Enable Time Stamp
To enable a time and date stamp on the live and saved
images, click the check box next to
Enable Time
Stamp
.
Enable Text Display
To display a Camera Name, click the check box next to
Enable Text Display
and enter in the name you would
like to see on the screen.
Event Schedule
To enable a time schedule for motion detection trigger-
ing, select the desired day(s) in the Effective Time
Frame window. Click
Start Time
and
End Time
to
select the start and end time of the motion detection
schedule.
As schedules are programmed, they will appear in the
Event Schedule
window.
Audio Enable Microphone
Enable
Speaker
To enable audio operation, click the appropriate box.
Note:
Microphone and speaker optional.
Note:
Prior to using the audio feature, it is recom-
mended that the viewer/listener obtain any required
advance consent of the occupants of the premises.
HW Trigger Input
Select to enable the normally closed trigger input to trig-
ger video clip transmission to the VideoAlert.net server,
when momentarily opened. For wiring instructions, see
TRIGGER INPUT TERMINALS
on page 5.
When done, click
Save
to save changes.
Viewing of Stored Video
To view stored video clips, click on the
My Videos
link
and the My Videos page will appear.
For each video, a thumbnail image will appear, along
with a time and date stamp indicating the time and
date of the creation of the file.
The file can be deleted by clicking
Delete
adjacent to
the file.
The file can also be saved on the hard drive of the
computer being used to view the file by clicking
Download
adjacent to the file.
Once the number of video clips stored in the account
reaches the maximum allotted size for the account,
each new file stored will result in the automatic dele-
tion of the oldest file.
Содержание iSeeVideo ISEE-SCHGW
Страница 19: ...19 NOTES...


