6
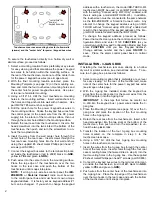
(2) Configure Wireless Camera:
When wireless cam-
eras are first powered, they (by default) automatical-
ly attempt to connect with the first ISEE-WAP that
answers using the default
SSID
of "PUBLIC". This
feature requests all cameras within range to attempt
to connect with an ISEE-WAP using the custom
SSID
and secret
Key
previously created in the
menu item named "
(1) Change/Create CUSTOM
IBRIDGE ISEE-WAP SSID and KEY
" described
above.
Note:
All wireless cameras in the system
must be unlocked before using this feature (will read
"
Camera is unlocked
" in popup).
(3.a) Lock Down IBRIDGE ISEE-WAP:
Tap to protect
the ISEE-WAP / touchscreen connection by a "lock
down" process, ensuring a fixed connection be-
tween the ISEE-WAP / touchscreen device pairs.
This selection disables the automatic connection
process that attempts to connect the touchscreen
with the first ISEE-WAP that answers using the de-
fault
SSID
of "PUBLIC".
(3.b) Unlock IBRIDGE ISEE-WAP:
To reverse the
"Lock Down" process described in the previous
menu selection.
(4) Restart Wi-Fi:
Tap to perform a "warm boot" re-
start operation of the Wi-Fi, where the power is not
turned off and back on, and with the app running.
Minutes to check connection integrity:
Tap to set
the number of minutes the touchscreen will automat-
ically attempt a restoration of the wireless connec-
tion between the touchscreen and the ISEE-WAP
should this connection be interrupted. Selectable
durations are: 1, 3, 5, 7, 10, 15 and 20 (minutes).
BSSID used to LOCKDOWN IBRIDGE:
Tap to enter
a new "broadcast" SSID (named "BSSID" in this
menu) to be stored in the touchscreen's memory, to
be used by default when the touchscreen is reboot-
ed, powered off/on or emerges from Screen lock.
Factory Default:
Tap to remove all user data and restore the IBR-
TOUCH / IBR-TOUCH-WL back to its original out-of-box
factory condition.
iBridge Updater
Update Server Address:
Displays the IP Address
and Port number used by the network server when
the menu selection
Check For Updates
(described
below) is tapped.
Check for Updates:
Tap to automatically check to
see if a newer version of the touchscreen firmware
is available from the location specified in the
"
Source
" menu item (described above). If a new-
er version is available, follow the on-screen prompts
to load the firmware update files, as necessary.
Current Version:
Displays the current version num-
ber of the IBR-TOUCH / IBR-TOUCH-WL firmware.
Update iBridge Application from USB:
Select if the
new firmware update is located on USB memory
(such as a thumb drive, portable hard drive, memory
stick, etc.), and you wish to use the USB socket lo-
cated on the side of the IBR-TOUCH / IBR-TOUCH-
WL to re-install the firmware.
Note:
The update file
must be placed in a folder named "napco" (case
sensitive) located in the top root directory.
Update Logo:
Insert a USB thumb drive to add your
logo image to the Home Screen and "Keypad Skin".
The logo must be named "logo.png" (case sensitive)
and must be located in a folder named
"dealerLogo" (case sensitive) located at the top root
directory of the thumb drive. When this logo is add-
ed successfully and later the logo is tapped, the
touchscreen opens its default browser to the
webpage specified in the
Update Infopage
menu
selection, detailed below.
Note:
Although the
touchscreen searches for the specific file name
"logo.png", the image file itself may be a .png, .bmp
or .jpeg format. However, the file must be re-named
"logo.png".
Update Infopage:
Insert a USB thumb drive to add
an image that will display website or other corporate
information. The file must be named
"dealer.png" (case sensitive) and must be located in
a folder named "dealerLogo" (case sensitive) locat-
ed at the top root directory of the thumb drive.
When a logo is added to the Home Screen and
"Keypad Skin" using the
Update Logo
menu selec-
tion (see above) and this logo is later tapped, the
"dealer.png" image file will appear enlarged on the
touchscreen.
Update Android OS via USB:
Select to update the
Android operating system. Be sure the update .zip
file (WinZip) is located in the top root directory of the
USB drive (such as a thumb drive, portable hard
drive, memory stick, etc.). Use the USB socket lo-
cated on the side of the IBR-TOUCH / IBR-TOUCH-
WL to install the OS. Once inserted into the USB
socket, tap this selection (if already inserted, remove
and re-insert). Allow up to 15 seconds for the up-
date process to begin; once started, DO NOT re-
move the USB drive!.
Password Configuration:
Allows you to change the
password used to access the
Dealer Settings
menu. In
the
Change Settings password
popup that appears,
press the empty field with the flashing cursor to open an
onscreen keyboard, allowing you to type the new pass-
word. Check the optional "
Show password
" checkbox to
view the populated characters. Press "
Change Pass-
word
" to enter or "
Cancel
" to exit without changing.
Video
Allows changes to the video data settings received by
the IBR-TOUCH / IBR-TOUCH-WL.
Note:
This
Video
menu selection appears (and all of the selections below)
only if "
ISEE Series Cameras
" is selected in the Setup
Wizard (see WI2297 for more information about the Set-
up Wizard).
Camera List
Camera Auto Discovery:
Check to allow the
touchscreen to automatically attempt to capture and
(
continued from previous page
)
Dealer Settings Menu


