5
DEALER & USER SETTINGS MENUS
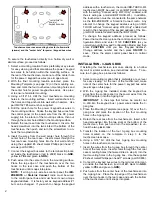
This "System Settings" button can display either a list of "user-
only" selections (adapted for home/business owners), or a list of
"dealer-only" selections (customized for installers), depending on
the
how
this button is tapped and pressed:
Dealer Settings
: To display the list of "dealer-only" selec-
tions,
press and hold
this
button (password required)
User Settings
: To display the list of "user-only" selec-
tions, simply tap this button once
When accessing the
Dealer Settings
, (again, by pressing and
holding this
button), a popup appears requesting a password.
This password request signifies that the
Dealer Settings
menu will
be displayed. Type the dealer password (default is "
admin
") and
tap
OK
. Tap
Yes
to the warning popup that appears, and the
Dealer Settings
menu opens.
For Z-Wave menu selections, see the
Using your iBridge
®
IBR-
TOUCH Series Z-Wave
®
Home Automation System
(OI394).
DEALER SETTINGS
Setup Wizard
Tap to re-start the Setup Wizard to configure how the IBR-
TOUCH / IBR-TOUCH-WL will be used, its Wi-Fi connection
settings to the customer's Wi-Fi network and iBridge radio,
and optionally the NAPCO StarLink account(s). See the
NAPCO iBridge IBR-TOUCH & IBR-TOUCH-WL Quick
Start Guide
(WI2297) for step-by-step instructions to help
guide you through the Wizard.
Run Diagnostics
Tap to run a system diagnostics test for components selected
the last time the
Setup Wizard
was run (typically when the
touchscreen was first powered). Functional components are
marked with a check; items not configured or not enabled are
marked with an "x". Selections are blank when the Wizard is
run for the first time. If you wish to continue through the
Set-
up Wizard
(described below), tap
Configure
; otherwise
tap
Continue to App
to return to the Home Screen (or
Test
Again
to repeat the test). See the
NAPCO iBridge IBR-
TOUCH & IBR-TOUCH-WL Quick Start Guide
(WI2297)
for step-by-step instructions to help guide you through the
Wizard.
Security
EZ-ARM:
Check to enable Easy Arming (ability to arm
the alarm system quickly by simply tapping
ENTER
or
ON/OFF
,
Night
,
Away
or
Stay
). Each touchscreen
may be individually programmed for Easy Arming.
Disarming still requires entry of a valid user code.
Note:
Do not program Easy Arming in UL installa-
tions. The alarm control panel must be programmed
to support this feature.
EASY EXIT:
Check to enable Easy Exit. While armed in
the Interior Bypass/Stay Mode, Easy Exit can be initi-
ated by pressing and holding the
Disarm
"pie wedge"
button. Easy Exit restarts the Exit delay (the top ban-
ner on the touchscreen changes to read "
ARMING
STAY
...") allowing a User to exit an armed premises
without disarming and rearming the system.
Note:
Do not program Easy Exit in UL installations. The
alarm control panel must be programmed to support
this feature.
Number of Zone Areas:
Some systems may be divid-
ed, or partitioned, into smaller independent subsys-
tems, which are referred to as Areas. Tap to select the
number of Areas in the alarm system.
Note:
Each Area
may be controlled by its own touchscreen or by a
touchscreen of a different Area through Managers
Mode (a low-security operating mode that allows arm-
ing by Area).
Connection Settings:
Displays the network communica-
tion and automatic identification settings used between
the IBR-TOUCH / IBR-TOUCH-WL and the customer's
router (and/or IBR-ZREMOTE / StarLink radio).
Serial Interface:
Indicates "Enabled" if IBR-TOUCH
("hardwire" model) is used.
IP Address:
Displays the private TCP/IP protocol ad-
dress used for communications between the IBR-
TOUCH / IBR-TOUCH-WL and the customer's router
(and/or IBR-ZREMOTE / StarLink radio).
Port No.:
Displays the port number used for network
activities as set by the IBR-ZREMOTE or StarLink radio.
Autodiscovery Options:
"Enabled" allows for the on-
going automatic recognition of and connection between
the IBR-TOUCH / IBR-TOUCH-WL and the IBR-
ZREMOTE or StarLink radio. Includes discovery and
ports established during the initial handshake process.
Time interval to request status:
Displays the duration
between autodiscovery process activations.
Connect using Wi-Fi Only
When checked, a model IBR-TOUCH "hardwired"
touchscreen is converted to a model IBR-TOUCH-WL
"wireless" touchscreen; i.e. signals received into the 4-wire
bus terminals (inside the IBR-TOUCH) are ignored, with the
exception of the two power terminals (thus the touchscreen
can be powered by the control panel 4-wire bus or by wiring
power directly to the power terminals).
Tablet
Connection:
(1) Change/Create CUSTOM IBRIDGE ISEE-WAP Wi-
Fi Name and KEY
: Select this feature to modify
the factory default network settings of the ISEE-
WAP and touchscreen. The
Preferred Network
dia-
log appears, allowing a new
Wi-Fi Name
(SSID)
and a new secret
Key
to be entered. Note that this
information can be changed at any time by re-
running this feature.
Note:
The ISEE-WAP and all
wireless cameras in the system must be unlocked
before using this feature.
IBR-TOUCH App
"System Settings" Button


