background image

6-1132 

Rev. 040212

This insTrucTion Manual conTains 

iMporTanT safeTy inforMaTion. 
   

read This  


insTrucTion Manual 


carefully and  


undersTand all  


inforMaTion Before  


operaTing This Tool.

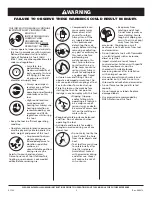
• Always operate, inspect and maintain  

  this tool in accordance with American  

  National Standards Institute Safety  

  Code of Portable Air Tools (ANSI  

  B186.1) and any other applicable safety  

  codes and regulations.
   

• For safety, top  


  performance and  


  maximum durability of  


  parts, operate this tool  


  at 90 psig; 6.2 bar max  


  air pressure with 3/8"  

  diameter air supply hose.
   

• Always wear impact- 


  resistant eye and face  


 protection when  


  operating or performing  


  maintenance on this  


  tool. 


• High sound levels can  


  cause permanent  


  hearing loss. Always use  


  hearing protection as  


  recommended by your  


  employer and OSHA  


  regulations while using  


  this tool.

• Keep the tool in efficient operating  

  condition.
• Operators and maintenance personnel  

  must be physically able to handle the  

  bulk, weight and power of this tool.
   

• Air powered tools can 


  vibrate during use.  


  Extended exposure to  


  vibration, repetitive  


  motions, or  


  uncomfortable positions  


  during use may be  

harmful to your hands and arms. 

Discontinue use of tool if discomfort, 

tingling, or pain occurs. Seek medical 

advice before resuming use.


• Compressed air can 


  cause severe injury.  


  Never direct air at  


  yourself or others.  


  Always turn off the  


  air supply, drain hose  


  of air pressure and  


  detach tool from air  


  supply before installing,  


  removing or adjusting  


  any part or accessory on  


  this tool, or before  


  performing any    


  maintenance on this  


  tool. Failure to do so  


  could result in injury.  


  Whip hoses can cause  


  serious injury. Always  


  check for and replace  


  any damaged, frayed  

  or loose hoses and fittings. Do not  

  operate a damaged or worn tool. Do  

  not use quick-detach couplings at tool.  

  See instructions for correct set-up.
• Place the tool on the work before  

  starting the tool. Do not point or  

  indulge in any horseplay with this tool.
   

• Slipping, tripping  


  and/or falling while  


  operating air tools can  


  be a major cause of  


  serious injury or death.  


  Be aware of excess hose  


  left on the walking or  


  work surface.

• Keep body working stance balanced  

  and firm. Do not overreach when  

  operating the tool.
• Anticipate and be alert for sudden  

  changes in motion during use of any  

  power tool.
   

• Do not carry tool by the  


  hose. Protect the hose  


  from sharp objects and  


  heat.


• Tool shaft may continue  


  to rotate briefly after  


  throttle is released.  


  Avoid direct contact  


  with accessories during  


  and after use. Gloves  


  will reduce the risk of  


  cuts or burns.


• Keep away from  


  rotating end of tool.  


  Do not wear jewelry or  


  loose clothing. Secure  


  long hair. Scalping can  


  occur if hair is not kept  


  away from tool and  

  accessories. Choking can occur if  

  neckwear is not kept away from tool  

  and accessories.
• Do not lubricate tools with flammable  

  or volatile liquids such as kerosene,  

  diesel or jet fuel.
• Impact wrenches are not torque  

  control devices. Fasteners with specific  

  torque requirements must be    

  checked with suitable torque    

  measuring devices after installation  

  with an impact wrench.  
• Use only impact wrench sockets and  

  accessories on this tool. Do not use  

  chromed hand sockets and accessories.
• Do not force tool beyond its rated  

  capacity.
• Do not remove any labels. Replace  

  damaged labels.
• Use accessories recommended by 

  NAPA Professional Air Tools. 

FAILURE TO OBSERVE THESE WARNINGS COULD RE SULT IN IN JU RY.

please revieW all Warning insTrucTions prior To operaTion. save This Man u al for fuTure ref er ence.

WARNING

Содержание 6-1132

Страница 1: ...Les travaux de construction effectu s l aide d un outil lectrique comme le sablage le sciage le meulage et le per age produisent de la poussi re qui contient des produits chimiques De tels produits s...

Страница 2: ...nd replace any damaged frayed or loose hoses and fittings Do not operate a damaged or worn tool Do not use quick detach couplings at tool See instructions for correct set up Place the tool on the work...

Страница 3: ...NING INSTRUCTIONS PRIOR TO OPERATION Save this man u al for future ref er ence OPERATION This im pact ratchet wrench is rated at 3 8 USS bolt size Rat ing must be down grad ed for spring U bolts tie b...

Страница 4: ...3222 FRONT END PLATE Includes 17 1 23 RS30524 BALL BEARING 1 24 RS113224 WASHER 1 25 RS113225 HAMMER CAGE 1 26 RS113226 STEEL BALL 1 27 RS113227 MECHANISM ANVIL 1 28 RS113228 HAMMER PIN 2 29 RS113229...

Страница 5: ...ery hard drive hole when used with impact tools Chrome sockets will wear wrench anvils quickly and present a danger of splitting or breakage which can lead to injury or death TOOL SLOWLY LOSES POWER B...

Страница 6: ...supply and repeat above steps If the tool is still seized insert a 6 piece of 1 8 diameter rod in the nozzle and lightly tap to loosen the piston in the rear direction Reconnect air supply and repeat...

Страница 7: ...los acoplamientos de separaci n r pida con la herramienta Vea las instrucciones para la instalaci n correcta Sea alerto y anticipe cambios repentinos de movimiento durante el uso de cualquier herramie...

Страница 8: ...m s simple que sea posible Cada una de las conexiones absorbe energ a y reduce la potencia Las herramientas de esta categor a operan bajo una amplia gama de presiones de aire Nosotros recomendamos qu...

Страница 9: ...tas de impacto o por unos casquillos desgastados USTED DEBE Dejar de usar los casquillos al cromo Los casquillos al cromo tienen una superficie exterior dura y un centro blando el cual se conlleva a u...

Страница 10: ...a herramientas neum ticas en la entrada de admisi n de aire Opere el gatillo en arranques cortos con el cincel en su lugar y contra una superficie s lida Desconecte el suministro de aire Pegue ligeram...

Страница 11: ...un outil endommag ou us vitez d utiliser des raccords rapides avec cet outil Pour installer correctement l outil consulter les directives Positionnez bien l outil avant de le mettre en marche Ne poin...

Страница 12: ...rette conduite d air injectez 1 2 oz d huile dans l outil Vous pouvez injecter l huile dans l entr e d air de l outil ou dans le boyau par l entremise du raccord le plus pr s de la source d alimentati...

Страница 13: ...cl chocs ou de porte douilles us s CONSEIL Cessez d utiliser des douilles en chrome car celles ci ont une surface externe rigide et une structure interne souple L action d un outil chocs muni d une t...

Страница 14: ...jectez une g n reuse dose d huile outil pneumatique dans l entr e d air Faites fonctionner l outil par saccades avec le burin en place et contre une surface solide D branchez la source d alimentation...

Отзывы: