


EN
4.4 Utilizing the ModuWand for the installation of hard disks
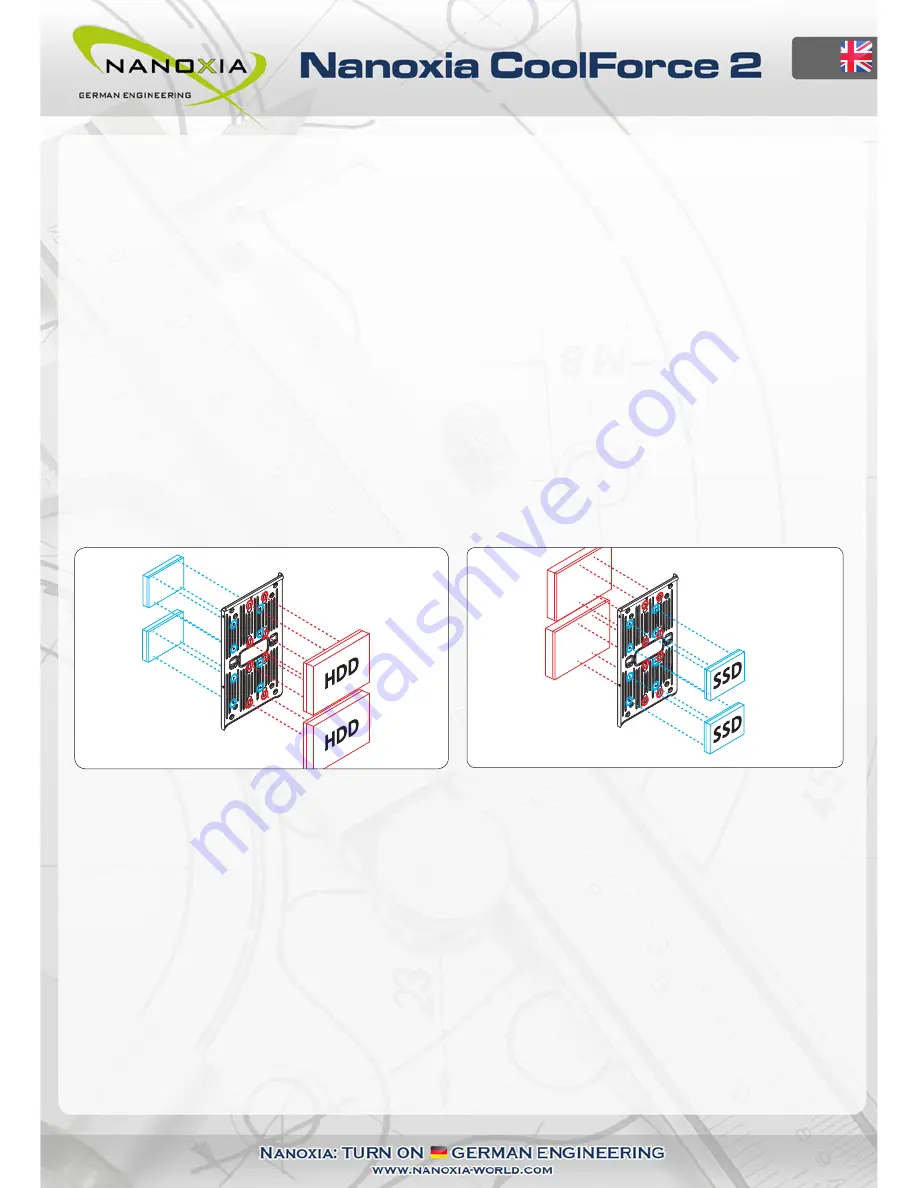
The versatile Nanoxia ModuWand allows the installation of up to four hard disk drives – two each
of 2.5 and 3.5 inch drives per side (removal of the 2-bay HDD-cage may be necessary).
Please remove the Nanoxia ModuWand for the installation of hard disks first (
see chapter 3
).
If you plan to install both 2.5 and 3.5 inch drives, you have to install the 2.5 inch drives first and
only then the 3.5 inch HDD, as you wouldn’t be able to reach the 2.5 inch mounting holes
otherwise.
For the installation of a 3.5 inch hard disk on the outer side of the ModuWand, it is necessary to
use the included SATA combo-cable with the angled connector. Connect the cable to the drive
before the installation. You cannot connect the cable after the drive has been mounted. Additio-
nal cables can be purchased in stores.
Please note that installing hard disks on the outer side of the ModuWand will limit the availab-
le space for the installation of long VGA cards.
5. Removing the front panel and the Nanoxia Air-Cover
5.1 Removing the front panel
To remove the front panel, simply hold the cutout at the bottom of the front panel and pull it
towards you with a firm tug. Please be careful not to damage the cables of the Nanoxia Rigid
LED bar behind the front.
5.2 Removing the Nanoxia Air-Cover
To remove the lid of the case, for example to install fans or radiators under the top of the case,
please first loosen the catch at the rear side of the cover. Pull it gently backward and upward
away.
08
Содержание CoolForce 2
Страница 1: ......
Страница 17: ...Nanoxia...