


EN
4. Installation of hard drives
You can mount up to six 2.5 inch SSD as well as up to four 3.5 inch HDD in the CoolForce 2.
4.1 Mounting of hard disk drives in the 2-bay HDD-cage
Install the hard drives in the illustrated mounting frames. In order to extract the frame, squeeze
the protruding brackets and pull the slide out gently. Please be advised that the HHD-cage is
only accessible from the right side, as seen from the front.
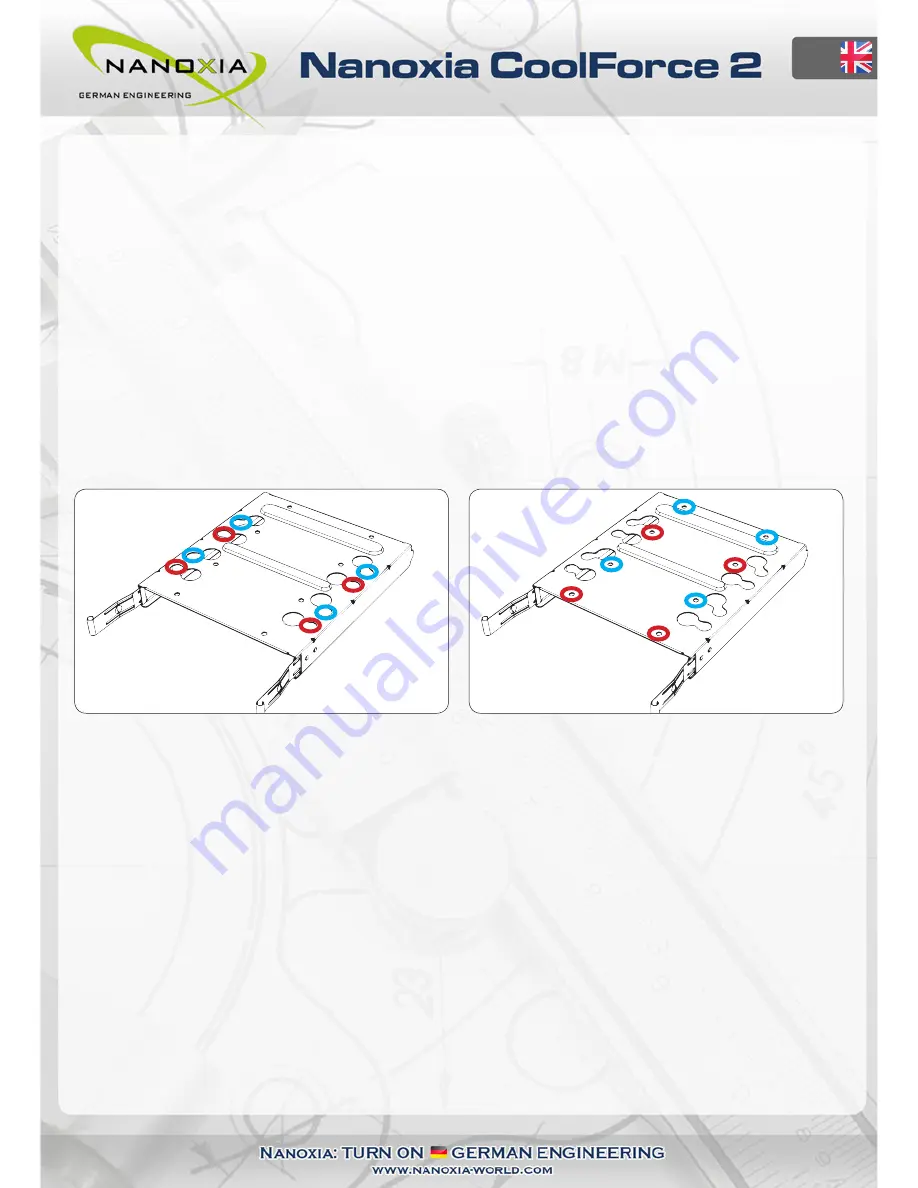
To install a hard drive into a bracket insert the disk so that the connectors point to the back and
attach the hard drive using the screws provided.
For the installation of 3.5 inch drives, use the
holes in Figure 3A
For the installation of 2.5 inch drives, use the
holes in Figure 3B
To lock the drive, push the bracket with the drive back installed back into the slot until the
bracket is re-engaged.
4.2 Removal of the HDD-cage
The 2-bay HDD-cage of your new case is modular and can easily be removed. You can also
purchase additional HDD cages and increase the number of hard disk drives in your case.
Due to this unique variability, you can:
- Adjust the number of available HDD mounts
- Optimize the air flow within the case
- Mount a water cooling system behind the front fans
Figure 3A
Figure 3B
06
Содержание CoolForce 2
Страница 1: ......
Страница 17: ...Nanoxia...